Bathroom Remodeling Cost in Seattle: What You Need to Know
So, you have a bathroom in Seattle that’s seen better days and you’re wondering how much it’ll cost to fix it up? You’re not alone. Bathroom remodeling costs here can range widely – from a few thousand dollars for a minor refresh to tens of thousands for a full high-end overhaul. Seattle is known for its higher cost of living, and that reflects in renovation prices too. While a small cosmetic update might start around $5,000–$10,000 (some contractors in town start basic remodels near $8,000), a complete bathroom remodel in Seattle often runs much higher once you factor in all the details. In this guide, we’ll break down the costs and what influences them, especially for a small bathroom, so you can plan your budget with fewer surprises.
Even a modest small bathroom in Seattle can rack up costs if it needs a full remodel. Older fixtures, outdated tiles, and water damage all add to the scope of work, which means added expense. However, with smart planning, you can transform a run-down bathroom without breaking the bank.
Why Are Seattle Bathroom Remodel Costs High?
If you’ve done any research, you’ve probably noticed Seattle bathroom remodel prices run a little high. There are a few key reasons for this:
- Labor Costs: Seattle has a hot construction market, and skilled workers are in high demand. Contractors here often charge more than the national average. In many projects, labor can eat up about 40–60% of your total bathroom remodel budget. Hourly rates typically range from $75 to $150 for licensed pros in the Seattle area. The busy season (spring and summer) can also mean scheduling delays and sometimes higher bids.
- Permits and Regulations: Don’t forget about city rules. In Seattle, many bathroom remodels (even some small ones) require permits and inspections from the Seattle Department of Construction & Inspections (SDCI). Permit fees add to your cost, often anywhere from around $500 up to $1,500 just for the permits. It’s an extra expense and can slow things down a bit, but it’s necessary to make sure the work is safe and up to code.
- Older Homes Needing Upgrades: Seattle has a lot of older homes (think charming craftsman houses and mid-century builds). Remodeling an older bathroom can uncover issues like outdated plumbing or ancient electrical wiring that must be brought up to code. Updating old pipes or knob-and-tube wiring can add thousands to the project. For example, if your Wallingford bungalow’s bathroom still has 1940s galvanized pipes, you might need to replace them during the remodel – an extra cost, but important for safety and longevity.
- Material Choices & Style: Seattle folks love high-quality, clean finishes – wood tones, matte black fixtures, durable porcelain and quartz, eco-minded options. Premium materials raise your budget. Marble or imported tile, custom glass shower enclosures, or smart mirrors all look amazing, but they cost more. Even something like in-floor radiant heating (nice on cold mornings) adds expense. Standard ceramic tile and off-the-shelf fixtures keep costs more manageable.
- Bathroom Size & Layout: Size plays a big role. A small bathroom will generally cost less than a sprawling master bath because you need fewer materials and less labor overall. In Seattle, remodel costs are commonly quoted anywhere from $70 to $250 per square foot depending on complexity and finishes. If you keep the layout the same (not moving the toilet or shower), you’ll save money. Moving plumbing lines or opening structural walls increases cost.
- Permit & Inspection Hurdles (Time = Money): Seattle’s permit process can add time to your remodel, and delays can nudge labor costs up. The peace of mind is worth it though – no one wants to tear open a finished wall because something wasn’t done to code.
In short, Seattle’s higher labor rates, older home stock, and taste for quality all contribute to remodels here being a bit more expensive than in many other places. Understanding these factors helps you budget realistically.
Breakdown of Bathroom Remodel Costs in Seattle
It helps to see how your budget is usually divided. Whether you have a small bathroom or a large one, most remodels include the same basic components. Below are typical categories with Seattle-area ranges for a small-to-average bath:
- Demolition & Removal – Approx. $500 – $2,000: Tearing out old tile, vanities, fixtures, and hauling debris. Surprises like hidden water damage or mold can add time and cost, since pros need to remove it safely. (Please don’t tile over a soft, rotten subfloor – happens more than you’d think.)
- Plumbing & Electrical – Approx. $1,500 – $6,000+: Updating pipes, drains, valves, and electrical circuits to current code. Moving the toilet, shower, or sink increases cost fast. Replacing 1920s wiring or galvanized supply lines adds real money but pays back in reliability and safety.
- Flooring & Tile – Approx. $1,200 – $5,000: Ceramic/porcelain tile for floors and shower walls is popular here. Basic subway tile stays affordable; hand-made tile or stone costs more. Intricate patterns or mosaics add labor hours. Heated floors are a common Seattle upgrade and will push costs higher.
- Vanity & Countertops – Approx. $800 – $4,500: From off-the-shelf single vanities with integrated tops to custom cabinets with quartz or marble. Damp climate favors better cabinet boxes over flimsy particleboard. Don’t forget faucet, sink, trap, shut-offs, and hardware.
- Shower or Bathtub – Approx. $1,500 – $7,000+: Often the centerpiece and biggest single line item. A simple tub/shower surround is cheaper; a custom tiled walk-in with frameless glass, niches, and premium fixtures costs much more. Curb-less showers and linear drains look great but add complexity and dollars.
- Lighting & Fixtures – Approx. $500 – $2,500: Faucets, shower valves, head(s), vanity lights, exhaust fan, accessories (towel bars, paper holder). Black and brushed gold finishes trend higher in price than chrome. Adding new circuits or can lights increases electrical labor.
- Paint & Finishing – Approx. $300 – $1,500: Walls/ceilings, trim, caulking, mirrors, shelves. Smaller percentage of the budget, but still real work to wrap the project cleanly.
Every element from demolition to the final paint coat has a price. In Seattle, those prices lean high for the reasons above. The shower often consumes the biggest share, while painting is the smallest (but necessary) slice.
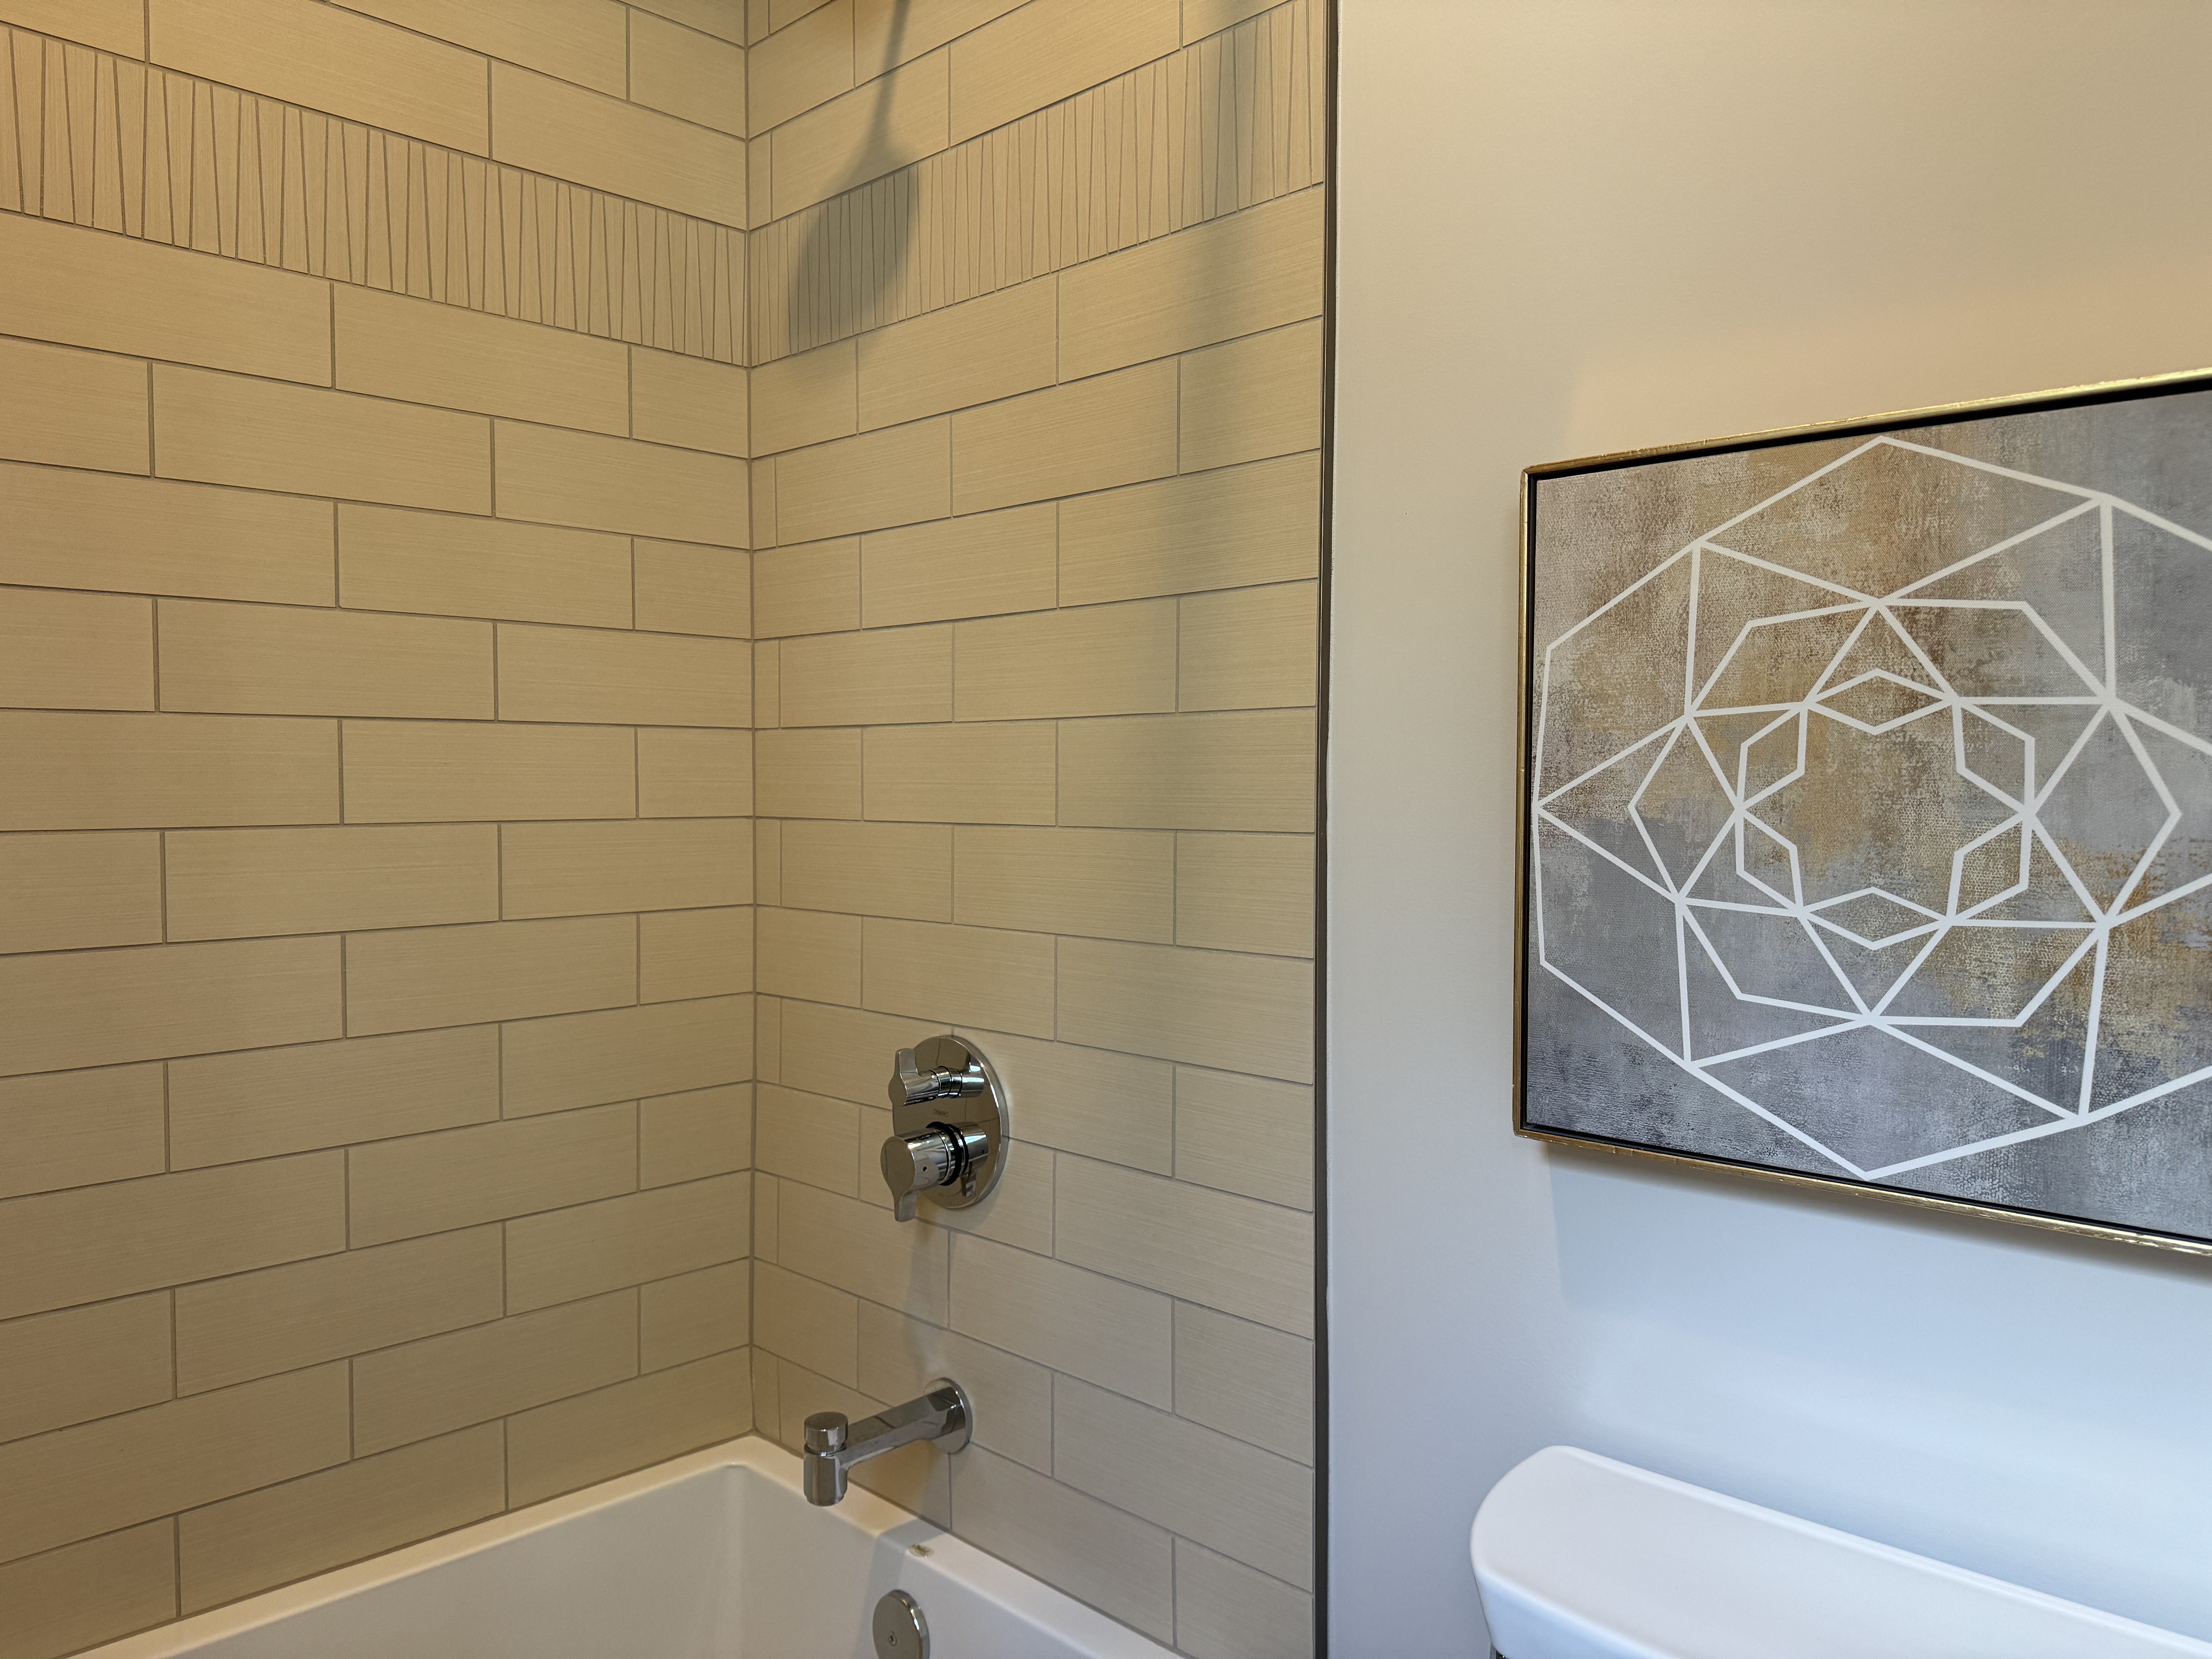
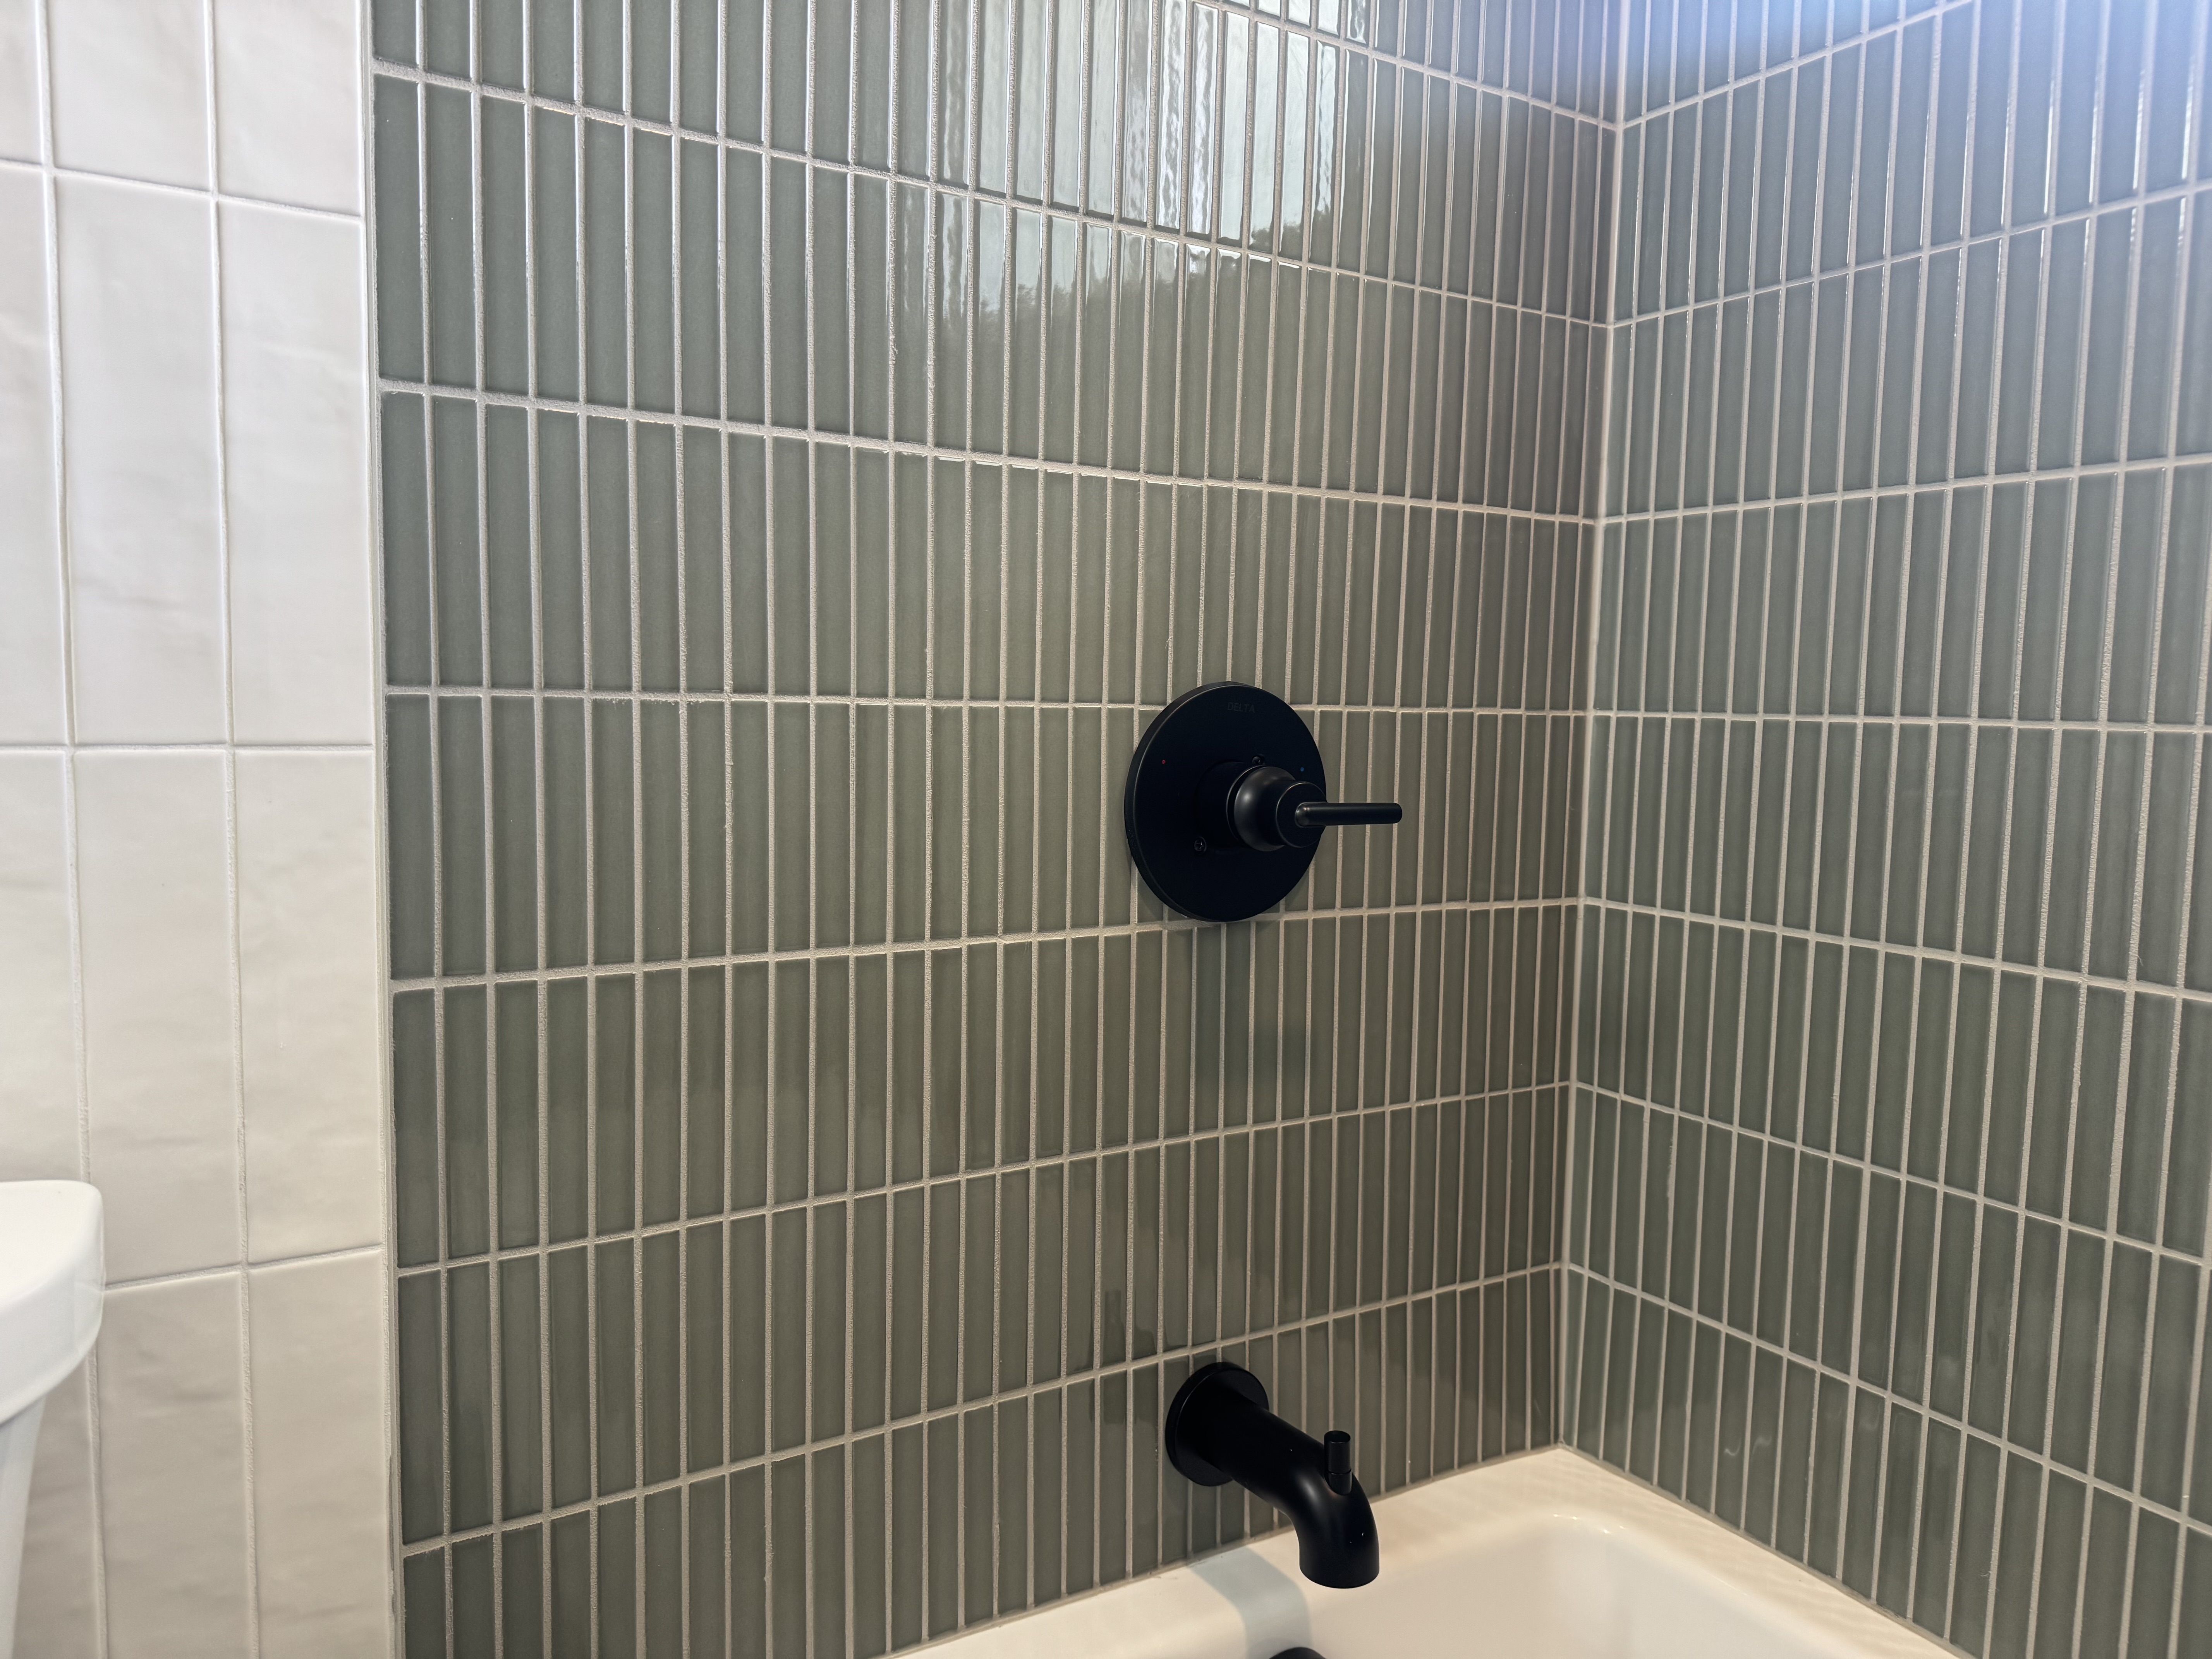
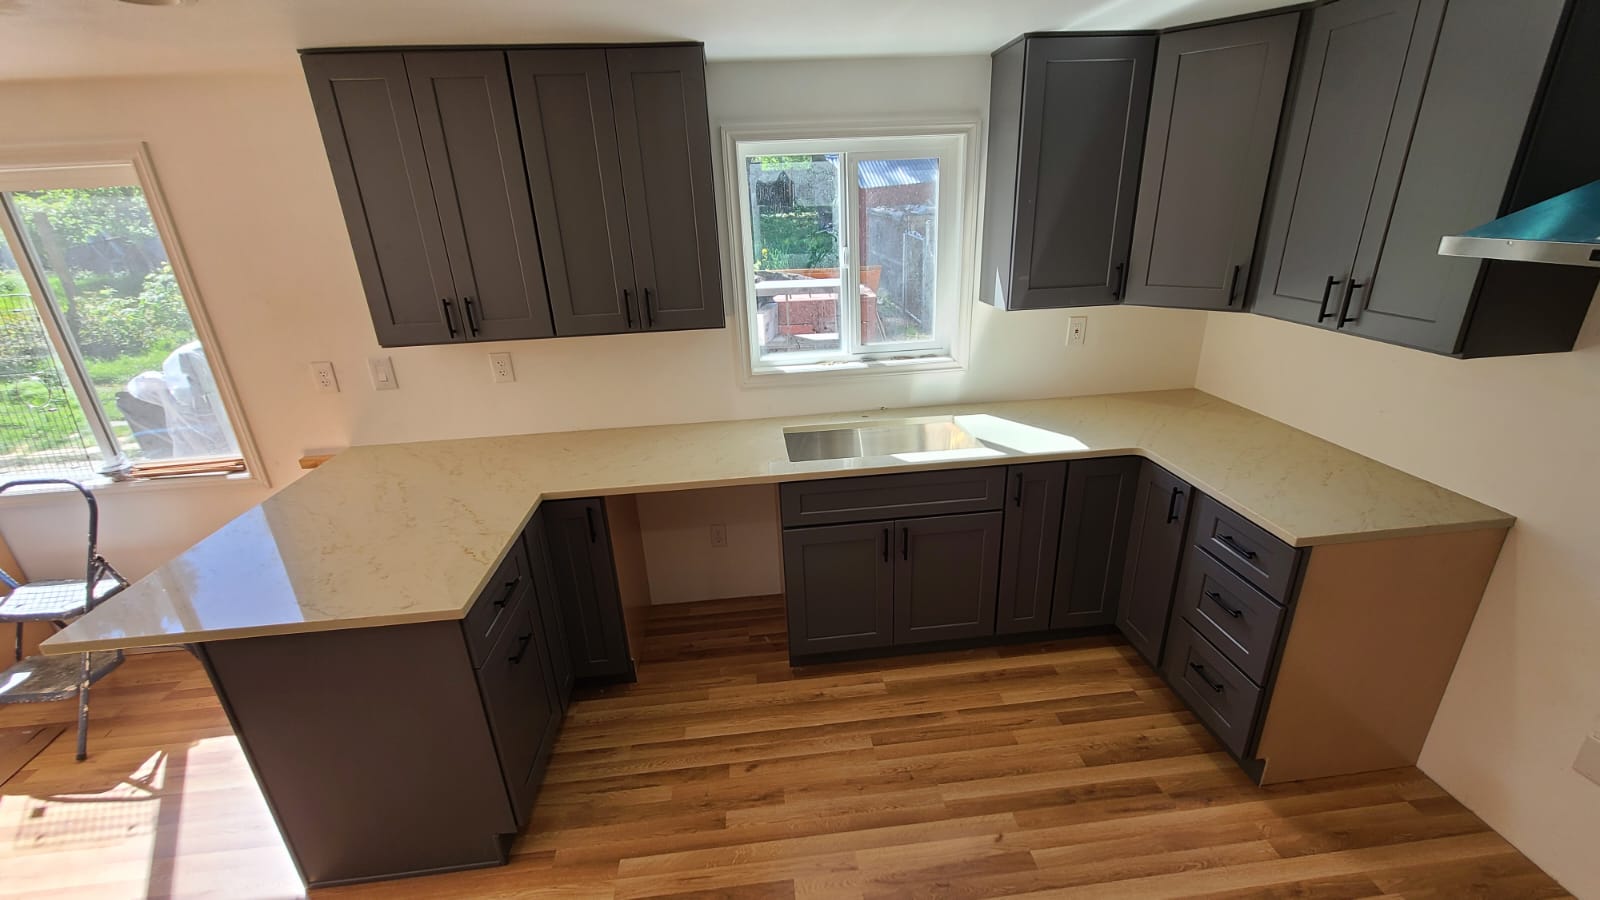
A beautifully remodeled small bathroom in Seattle featuring modern tilework and updated fixtures. Small bathrooms still involve many of the same cost components (tile, plumbing, permits, etc.) as larger baths.
Cost of Remodeling a Small Bathroom in Seattle
Remodeling a small bathroom (hall bath, powder, compact 3/4) can be more affordable than a large master, but it isn’t cheap. Even with less square footage you still have most of the same tasks: plumbing, waterproofing, tilework, lighting, ventilation, permitting. In Seattle, many homeowners spend roughly $10,000–$18,000 for a small bath update. That would typically include new floor and shower tile, a new vanity, updated lighting and fan, a new toilet, and paint.
What pushes a small bathroom higher? Usually moving fixtures or choosing luxury finishes. Relocating a toilet or converting a tub to a custom tiled walk-in shower will add cost quickly. Using high-end stone tile, a frameless glass door, or specialty fixtures raises the budget too.
On the flip side, since the room is small, you can sometimes splurge on nicer materials without blowing the budget – you just don’t need much of it. Paying a bit more per square foot on tile might be doable when you only need 50 sq ft instead of 200.
Design tips that make a small Seattle bathroom feel bigger, without crazy costs:
- Floating vanity: Shows more floor, makes the room feel lighter and easier to clean under.
- Clear glass shower door: Ditches the visual barrier of a curtain; your eye sees the back wall, which feels roomier.
- Big mirror + bright lighting: Reflects light and visually doubles the space. Light, neutral colors help too.
- Clever storage: Recessed shower niches, mirrored medicine cabinets, shelves above the toilet. Keeps clutter off tiny counters.
A compact bath still takes time. A complete small remodel often runs 2–4 weeks end to end if everything is lined up and inspections land on schedule. If it’s your only bathroom, plan for temporary arrangements.
Tips to Save Money on Your Seattle Bathroom Remodel
A bathroom remodel is a significant investment, but there are ways to save money and still get a result you’re happy with:
- Plan and prioritize: Decide what matters most. Splurge where you’ll feel it daily (e.g., shower system, good fan, waterproofing), save on secondary items (hardware, decorative lights). Avoid mid-project changes – change orders cost time and money.
- Keep the layout: Moving drains and vents costs. Working with existing locations for toilet, sink, and shower/tub can save thousands.
- DIY carefully: Homeowners often handle demolition and painting to trim labor. But leave permitted plumbing/electrical to licensed pros – Seattle code is strict, and failed inspections are expensive.
- Shop smart: Mix sources. Clearance tile from a big-box store + a mid-range vanity + a contractor’s trade-discounted fixtures can balance looks and budget. Seattle’s reuse stores sometimes have great finds (mirrors, lights, even vanities).
- Choose durable mid-range materials: Porcelain tile over marble, quartz over exotic stone, quality LVP for powder rooms. Water-saving fixtures can reduce utility bills. Cheap-now-expensive-later choices (like flimsy vanities) often regret.
- Get multiple quotes: Compare scope and line items, not just totals. Very low bids can hide missing scope. Look for clear inclusions (demo, waterproofing method, tile allowance, permit handling, cleanup) and proof of insurance/licensing.
- Think long-term: Good waterproofing, ventilation, and valves prevent future repairs. Spending a bit more on the invisible stuff (like membranes and proper pans) saves headaches later.
- Design-build option: A single team handling design and construction can reduce miscommunication and delays. Not always cheaper on paper, but often more efficient overall.
Final Thoughts: Is a Seattle Bathroom Remodel Worth It?
Remodeling a bathroom in Seattle (even a small one) isn’t the cheapest thing, but most homeowners find it’s worth it for both comfort and resale. A well-designed bathroom adds real value to your home, and you feel the upgrade every day. Pick the right team, plan carefully, and put money where it counts (waterproofing, ventilation, the shower).
If you want a local pro who knows the permit process, Seattle pricing, and common quirks in older homes, check out RENOVA Contractors’ bathroom remodeling services. They can walk you through options, give a clear estimate, and help you avoid the pitfalls that make projects drag.
Bottom line: Know where your money is going, be realistic about Seattle-specific factors, and don’t be shy about asking questions. Do it right the first time and you’ll enjoy a fresh, functional bathroom for years – with that little “wow” moment every time you flip on the light.
Seattle Kitchen Remodel Cost Guide – Real Prices, No Fluff
You want straight answers on Seattle kitchen costs, not fuzzy averages. Fair. Here’s a contractor style breakdown that talks real numbers, what actually drives them up or down, and how to keep the project on budget without wrecking the design. The tone here is normal human – a bit rough around the edges – because that’s how we talk on jobs. There will be a few typos and run-on thoughts. That’s life.
Seattle kitchens vary a lot: craftsman bungalows with tricky walls, mid-century homes with low soffits, new townhomes with compact footprints. Pricing swings with those details. The point is to plan honestly and avoid surprises. If you just want a quick number and to move on, here’s the short version:
- Light pull-and-replace (keep layout, stock cabinets, standard finishes): typically $28k–$55k.
- Mid-range update (semi-custom cabinets, quartz tops, tile splash, electrical upgrades, a couple layout tweaks): $55k–$95k.
- Major gut & reconfigure (move plumbing and walls, high-end cabinets and tops, pro appliances, new lighting plan): $95k–$180k+.
If that shocks you, you’re not alone. But once you see where each dollar goes, it starts making sense. Seattle labor is expensive, and older houses fight you a little.
What drives cost in Seattle
- Labor market – Skilled trades in Seattle are busy. Licensed electricians and plumbers are not cheap, and we dont want them to be cheap either because mistakes cost more later. Figure labor is often 45–60% of the whole budget.
- Permits and inspections – Many kitchen projects need permits. SDCI has different tracks; small like-for-like electrical or plumbing might be simple; layout changes or structural work need more. Permit fees aren’t wild individually, but the process adds time. Time = money.
- Sales tax – Seattle’s combined sales tax is around 10.25%. It hits most remodel invoices, so don’t forget to include it when you’re penciling numbers.
- Age of the house – Knob-and-tube, galvanized pipes, odd framing, sloped floors, mystery soffits hiding ductwork – these show up in Seattle a lot. Fixing old problems is the unglamorous part of the budget.
- Layout moves – Keeping sink, range, and fridge near where they are saves a chunk. Moving the range to the opposite wall? Now we’re adding circuits, possibly venting through roof or sidewall, patching, more tile, etc.
- Finish level – Stock shaker plus quartz vs. custom rift oak with porcelain slab splash – you get it. Looks great either way, but numbers change a lot.
Suggested ranges by scope
These are not promises, just honest ranges we actually see.
1) Light pull-and-replace – $28k–$55k
- Keep the same footprint.
- Stock or value semi-custom cabinets.
- Quartz or good laminate tops.
- LVP or tile floor.
- Basic tile backsplash.
- Minor electrical updates and new lighting trims.
- Existing appliances reused or replaced with mid-grade units.
This is the quickest path if the bones are fine and you just need fresh finishes.
2) Mid-range update – $55k–$95k
- Semi-custom cabinetry with better boxes and hardware, more drawers than doors.
- Quartz or porcelain tops, full tile splash.
- Dedicated circuits for appliances, new lighting plan, new outlets, undercabinet lighting.
- Some layout tweaks like shifting the fridge or widening an opening.
- New mid-grade appliance package.
This is where most Seattle homeowners land – looks great, functions better, still sane.
3) Major gut & reconfigure – $95k–$180k+
- Remove soffits, move walls or add beams, relocate plumbing and gas.
- Custom or high-end semi-custom cabinets, integrated panels, inserts galore.
- Large-format porcelain or natural stone, slab splash features.
- High-end appliance set (pro range, built-in fridge, panel dishwasher, maybe a steam oven because why not).
- New window or door, serious lighting design, floor leveling.
Big jump in cost because structure and systems work stack up. Gorgeous outcome though.
Line-item breakdown – where the money actually goes
Numbers reflect typical small-to-average Seattle kitchens. Bigger rooms or ultra-premium picks trend higher. You can shave or add depending on scope.
-
Design & planning – $1,500–$8,000
- Measured drawings, layout options, cabinet plan, appliance spec, lighting schedule, permit drawings if needed. A couple revision cycles. Money well spent. Doing layout right once saves a lot of change orders later.
-
Permits, engineering – $600–$3,500
- Over-the-counter trades permits are one thing; structural calcs or significant floor-plan changes are another. Add a bit if you need an engineer for a dropped beam or to open a wall.
-
Demo & protection – $1,200–$5,000
- Site protection, temp walls or zip walls, careful removal, legal disposal. Asbestos/lead testing on older homes when necessary. You dont want dust all over the house – we spend time on clean containment.
-
Framing & drywall – $1,000–$6,000
- Fix studs, straighten walls, remove soffits, fur out for plumb cabinets, patch drywall. Seattle’s older walls are rarely square – making them square is half the battle.
-
Electrical – $2,500–$10,500
- Dedicated circuits for microwave, dishwasher, disposal; GFCI where required; undercabinet lighting; cans or surface fixtures; maybe a subpanel upgrade in some houses. Copper isn’t cheap. But flicker-free lights and enough outlets – it matters everyday.
-
Plumbing & gas – $1,800–$9,500
- Sink moves, new shutoffs, dishwasher drain air gap, icemaker line, gas stub for a range, venting corrections. If we find corroded galvanized, we fix it while walls are open. Future you will be thankful.
-
HVAC & venting – $400–$2,500
- Range hood duct to exterior, adjust heat run or add a toe-kick register so the floor isn’t freezing. Venting to outside is not optional here – grease and moisture need to get out.
-
Cabinetry
- Stock: $3,500–$10,000 installed.
- Semi-custom: $8,500–$22,000 installed.
- Custom: $22,000–$45,000+ installed.
- Boxes, fronts, soft-close hardware, fillers, crown, panels, trims. Seattle humidity likes plywood boxes. Particleboard can work, but we spec better boxes where budget allows.
-
Countertops
- Laminate: $1,500–$3,500.
- Butcher block: $1,800–$4,500 finished and sealed.
- Quartz: $3,200–$8,500 depending on brand, thickness, edges.
- Granite/Natural stone: $3,500–$9,500+.
- Porcelain slab: $4,500–$11,000+.
- Splash can be tile or slab – slab looks slick but bumps cost.
-
Flooring – $1,800–$6,500
- LVP with decent underlayment is the budget hero and handles spills. Tile is classic and durable but adds labor for prep and setting. Site-finished hardwood looks great in older homes but needs careful protection during the rest of the work.
-
Tile & backsplash – $900–$4,500
- Subway is affordable. Handmade tile or herringbone patterns add labor. Niches, ledges, and special trims add time too. Small kitchen? You can splurge on a nicer tile because quantity is low.
-
Appliances
- Mid-range set (range, DW, fridge, hood): $3,500–$9,500.
- Pro-style set: $12,000–$30,000+.
- Panel-ready items add for panels plus install time. And yes, a 36 in range changes the cabinet plan.
-
Fixtures & hardware – $500–$2,000
- Faucet, soap dispenser, air switch, pulls/knobs. Matte black and brushed brass run pricier, no surprise.
-
Painting, trims, punch – $600–$2,200
- Prime, paint, caulk, base and casing. Then the tiny stuff: door stops, felt pads, cabinet adjustments. Punch lists always exist – they’re normal.
-
Contingency – 10–15%
- Old houses hide things. A decent buffer keeps the project calm when we open a wall and find a surprise.
Seattle-specific notes you actually need
- Permitting rhythm – Minor like-for-like updates can be quick. Structural changes, new openings, or big layout moves need more paperwork. Inspections need to be scheduled; that can add days even if work is ready.
- Sales tax – Plan for the 10.25% on the invoice. It’s not a rounding error at these budgets – it is thousands.
- Moisture and ventilation – Range hoods should vent outside, not into the attic. We see attic staining and greasy sheathing from old hacks. Fixing that later is twice the cost.
- Salvage and reuse – Seattle homeowners love reuse. If you want to keep a special piece (like a vintage hutch or a fir door), tell us early so we can design around it instead of scrambling late.
- Lead and asbestos – Pre-1980 homes need testing when we disturb certain materials. It adds a few days and some cost, but the safety piece matters.
Timeline – what to expect
Every job is a little different, but here’s the usual cadence when the scope isn’t wild:
- Design & selections – 2–4 weeks. Faster if decisions are quick.
- Permitting – 1–4 weeks depending on scope.
- Ordering lead times – cabinets can be 3–8 weeks depending on line; appliances vary; counters are measured after cabinets are in.
- Active construction – 4–8 weeks for typical mid-range scope. Major structural adds time. Countertops add a pause between template and install. Then backsplash, plumbing trim, electrical trim, paint, punch.
If you only have one kitchen (everyone does), plan a temp cooking setup – hot plate, toaster oven, outdoor grill. We try to keep the fridge live and path clean. But it’s a construction zone for a bit, can’t sugar coat it.
Ways to save without wrecking the result
- Keep the layout – It’s not exciting advice, but it’s the biggest saver. Moving the sink and range means new rough-ins and more patching.
- Cabinet strategy – Use semi-custom boxes with smart inserts instead of full custom when budget is tight. Refacing is sometimes fine if boxes are solid and layout is good.
- Quartz over stone – Looks great, low maintenance, wide range. Porcelain slab is beautiful but jumps the budget quick.
- Appliance realism – Unless you cook daily on a 20k range, a solid mid-range set works great. Spend that money on lighting and drawers.
- Backsplash limits – Full-height slab is stunning but expensive. Tile to the uppers with a simple trim looks clean and costs less.
- Flooring picks – LVP isn’t fake-looking anymore. Good lines look sharp and survive kids, pets, tenants.
- Do small DIY – Paint a wall, install hardware, assemble stools. But leave electrical, gas, and plumbing to licensed pros. Failed inspections cost more than any DIY save.
- Bundle and schedule – Ordering everything before demo avoids dead days. Gaps kill budget morale.
Common surprises and how we handle them
- Out-of-level floors – Old joists sag. We might need self-leveler or sistering before tile or hardwood. Adds some labor and material.
- Hidden vents or stacks in walls – That soffit you hate might be hiding a duct or a plumbing stack. We reroute if possible or redesign if not worth it. Early discovery stops chaos.
- Undersized circuits – Kitchens need multiple small appliance circuits. Old panels cry uncle. Sometimes a service upgrade is the right call.
- Window swaps – A bigger window is great for light but triggers exterior work and sometimes energy code details. Worth it, just budget for it.
- Countertop lead times – Counters can’t be measured until cabinets are set. Plan that one-to-two week gap. People forget and think we’re stalling – we’re not.
Materials talk – quick notes you’ll care about later
- Cabinet boxes – Plywood sides handle moisture changes better. Soft-close hinges and full-extension drawers are worth every penny in daily use.
- Drawer count – More drawers, fewer doors. You’ll thank us forever for not having to crawl in a base cabinet to find a pan lid.
- Lighting – Good lighting is a game changer: cans or surface fixtures for general light, undercabinet task lights, a simple pendant or two where it makes sense. Don’t go dim – kitchens need lumens.
- Plumbing fixtures – Pull-down faucet with a decent cartridge. Skip gimmicks that are annoying after 3 months. Air switch for the disposal is clean.
- Backsplash grout – If you cook a lot, darker grout hides life. White looks great but, ya, it shows spaghetti night.

Sample budgets – how they stack
40k–55k pull-and-replace
- Semi-custom cabinets in a standard L or galley, no island move.
- Basic quartz, 2 cm eased edge, tile splash to uppers.
- LVP floor, painting, trim.
- Electrical tidy-up, new trims, a couple cans.
- Reuse fridge, new range and DW at mid-grade.
70k–95k mid-range upgrade
- Semi-custom with more drawers, tall pantry pullouts, trash pullouts.
- 3 cm quartz, waterfall on island if small, full splash tile.
- Tile floor or nice LVP, new lighting plan with undercab lights.
- Move fridge or widen opening to dining, minor framing.
- Full appliance package, hood ducted to exterior.
120k–160k major rework
- Remove wall with structural beam, island with seating, new window.
- Custom or high-end semi-custom boxes and panels.
- Porcelain slab tops and splash, or premium stone.
- Dedicated circuits throughout, panel work, layered lighting.
- Pro appliances, panel dishwasher, built-in fridge.
These stacks include typical labor, materials, finishes, and the boring must-do items like protection and clean-up. They do not include wild add-ons like steel stair rebuilds or new hardwood across the whole main floor.
Should you phase the work?
Sometimes. If the budget is tight and the layout is fine, we can do the classic floor-cabs-tops-splash-lighting path now and leave luxury appliances or a built-in pantry for later. Just plan those future items in the drawings so we leave power and spacing. Phasing saves cash today but can cost more in total. It’s a trade.
How we keep projects sane (our playbook)
- Plan the layout and cabinet list before pricing finishes. Cabinets drive the bus.
- Lock appliances early; they control rough-ins.
- Order long-lead items first.
- Protect the house like it’s ours – plastic, mats, negative air if needed.
- Communicate in plain language and write everything down.
- Don’t rush inspections. Passing the first time keeps the schedule.
If you want a local crew that speaks this language daily, check RENOVA Contractors kitchen remodeling in Seattle – the page is here: renova.contractors/kitchen-remodel-seattle. We design, fabricate, and build. We also actually pick up the phone.
Quick FAQ style wrap-up
Is 40k enough?
- Yes for a modest pull-and-replace in a smaller kitchen with stock or semi-custom boxes and simple tops. Not if you’re moving walls or chasing high-end appliances.
How long will I be without a kitchen?
- Typical mid-range jobs run 6–8 weeks of active work after permits and orders are set. Fastest is still a month plus. Counters add a measured pause.
What about ROI?
- Nice kitchens help resale in Seattle. Buyers notice. ROI depends on neighborhood and how smart you spend, but kitchens are rarely a bad move if the house needed it.
Can I reuse my existing cabinets and just change doors?
- Sometimes. If boxes are plumb and layout is good, refacing is fine. But bad boxes and weird spacing are not worth dressing up.
What do people regret?
- Low lighting, too few drawers, cheap hinges, and skipping real ventilation. Also: forgetting trash/recycle pullouts.
What takes the longest?
- Cabinets and counters. And waiting on decisions. Decision paralysis is a real schedule killer.
Final word
A Seattle kitchen remodel isn’t cheap. But done right, it’s the most satisfying upgrade you can make to a house. Cook better, host easier, feel good every day walking in there. If you want help scoping the right level for your home and budget, RENOVA Contractors LLC can lay it out clean, price it straight, and build it the way we said we would. No weird surprises – just the normal small ones that old houses always hand us, managed like adults.
Basement Remodel Cost in Seattle: Real Numbers, Permits, and Waterproofing
If your Seattle basement is half storage, half spider hotel, you’re probably asking the same thing many homeowners ask us: how much to turn this into livable space? Short answer – it isn’t cheap here. But it can add serious comfort and property value when it’s done right. Below I’ll lay out realistic local pricing, what pushes cost up or down, and the important Seattle-specific rules (permits, egress, moisture). I’ll keep the tone human – a few rough edges on grammar – so it reads like a contractor actually wrote it, not a robot :)
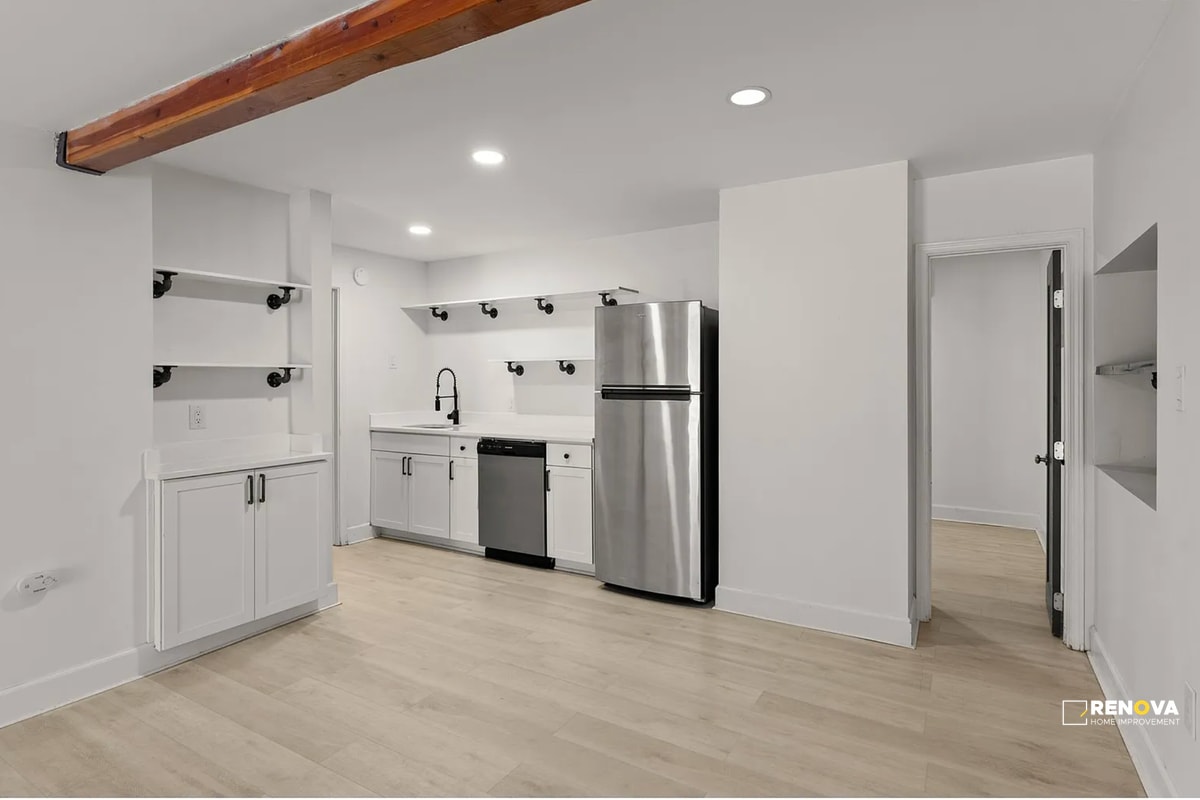
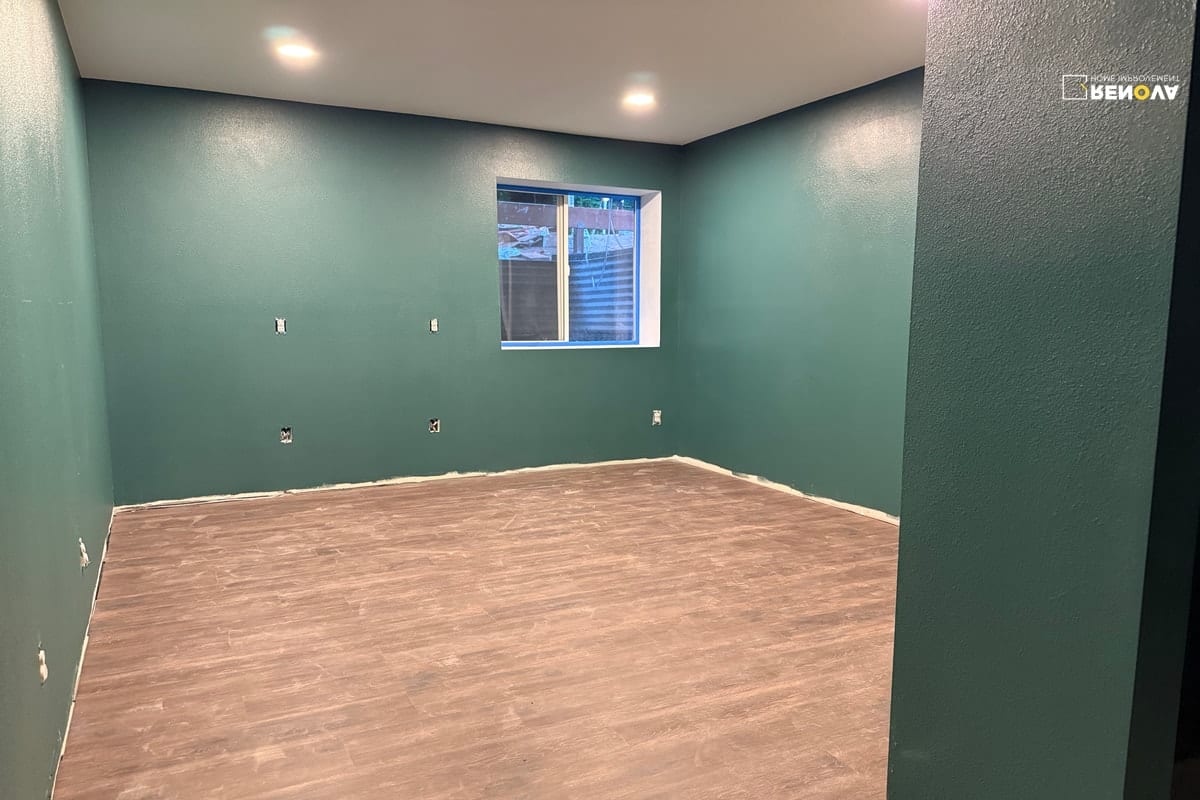
Older basements often start like this – low ceilings, moisture stains, awkward utilities. Good planning fixes most of it, not magic.
Quick Cost Snapshot (Seattle)
- Typical finished basement range: $60,000 – $180,000+ depending on size, waterproofing, bathroom/laundry, and structural work.
- Per-square-foot ballpark: $150 – $300/sf in Seattle for a complete conversion with proper moisture control, insulation, drywall, flooring, lighting, and trim. Basic refreshes fall lower; ADU-level buildouts and luxury finishes go higher.
- Timeline: 6–14 weeks for most non-structural conversions. Add time for structural changes, egress concrete cutting, or major waterproofing.
Yes – it’s expensive. Seattle labor and materials run high, older houses need extra prep, and code requirements aren’t optional. The flip side: a well-done basement often returns ~50–75% of cost in resale value, sometimes more when the plan adds a legal bedroom + bath. Daily quality-of-life is the real win though.
What Drives Cost Up (or Down) Here
- Waterproofing & Moisture Control. Most Seattle basements need it – full stop. Even “dry” basements usually want a vapor barrier, sealed slab, proper insulation strategy, and a real dehumidification plan. If there’s seepage, interior drain tile + sump or exterior corrections can be required.
- Ceiling Height. Code wants habitable spaces around 7'-0" clear. Beams/ducts can project lower in limited areas, but too many low spots and it’s not compliant or just feels cramped. Duct re-routes, beam flush framing, or slab recessing can add real dollars.
- Bedrooms & Egress. Adding a legal bedroom requires an emergency escape and rescue opening. In practice: an egress window with a big enough opening, sill height typically \u2264 44", and a code-sized well. Concrete cutting + well + window is a meaningful cost line.
- Bathrooms & Laundry. A basement bath or laundry room is super useful but needs drains, vents, fan, waterproofing, often a sewage ejector if gravity doesn’t cooperate. That’s real scope.
- Existing Conditions. Old knob-and-tube, galvanized pipe, wonky stairs, low headroom at beams, damp walls – each adds some scope. Seattle has lots of lovely older homes, but they come with surprises sometimes.
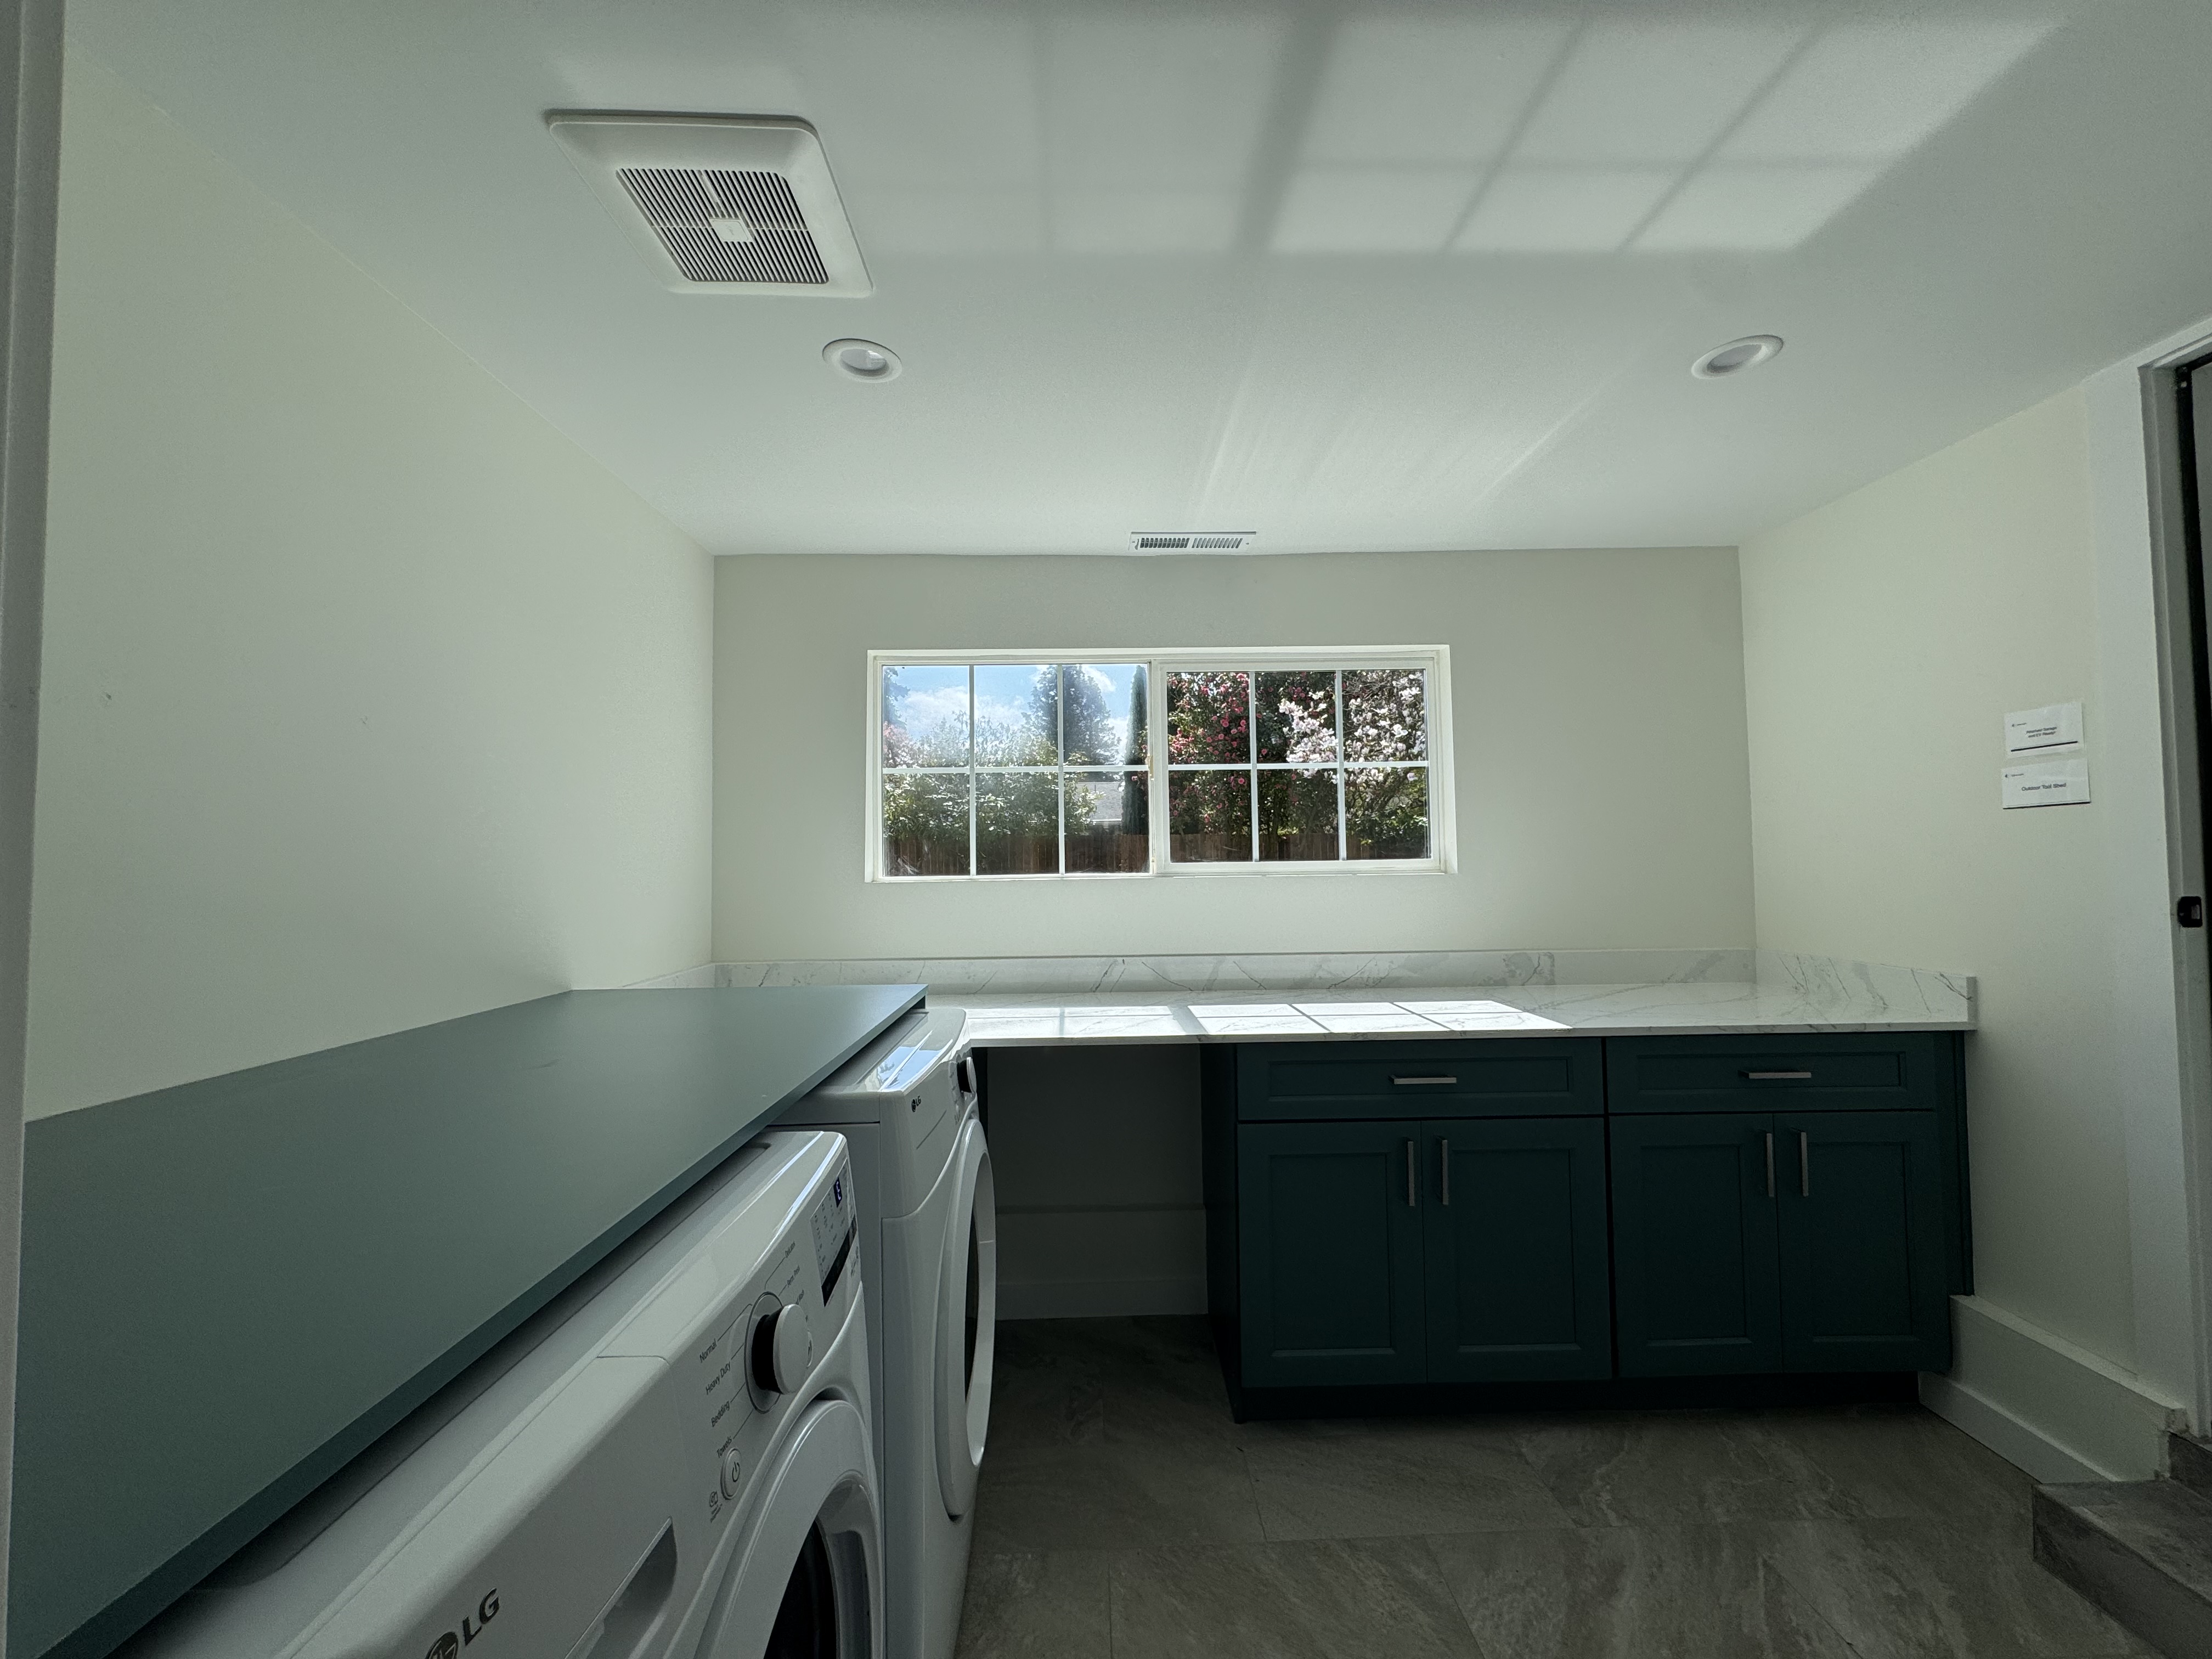
Simple laundry setups make the space useful on day one. Dryer vented right, pan under the washer, floor drain where possible.
Detailed Cost Breakdown (Seattle-Optimized)
Note: these are typical local ranges for planning. Scope, selections, and hidden issues change the math fast.
-
Waterproofing & Moisture Control – $3,000 – $25,000+
Options range from crack injection and interior sealers to perimeter drain + sump, new downspout routing, exterior grading fixes, slab moisture mitigation, vapor barriers, and dedicated dehumidification. Most homes at least need vapor barrier + insulation strategy + bath fan + sealed penetrations.
-
Framing, Insulation, Sound, Drywall – $12,000 – $35,000+
Includes new walls, soffits around ducts, safe access panels, insulation (rigid foam at walls or spray foam in tricky areas – fiberglass in interior partitions), resilient channels where needed, and Level 4/5 drywall finishes.
-
Electrical & Lighting – $6,000 – $18,000
New circuits, plenty of outlets, recessed LEDs, dedicated circuits for laundry/bath, low-voltage runs for media rooms. Older panels sometimes need capacity upgrades.
-
HVAC / Ventilation – $2,500 – $12,000
Extra supplies/returns, bath fan ducted outside, possible mini-split for big rec rooms, duct re-work to improve headroom.
-
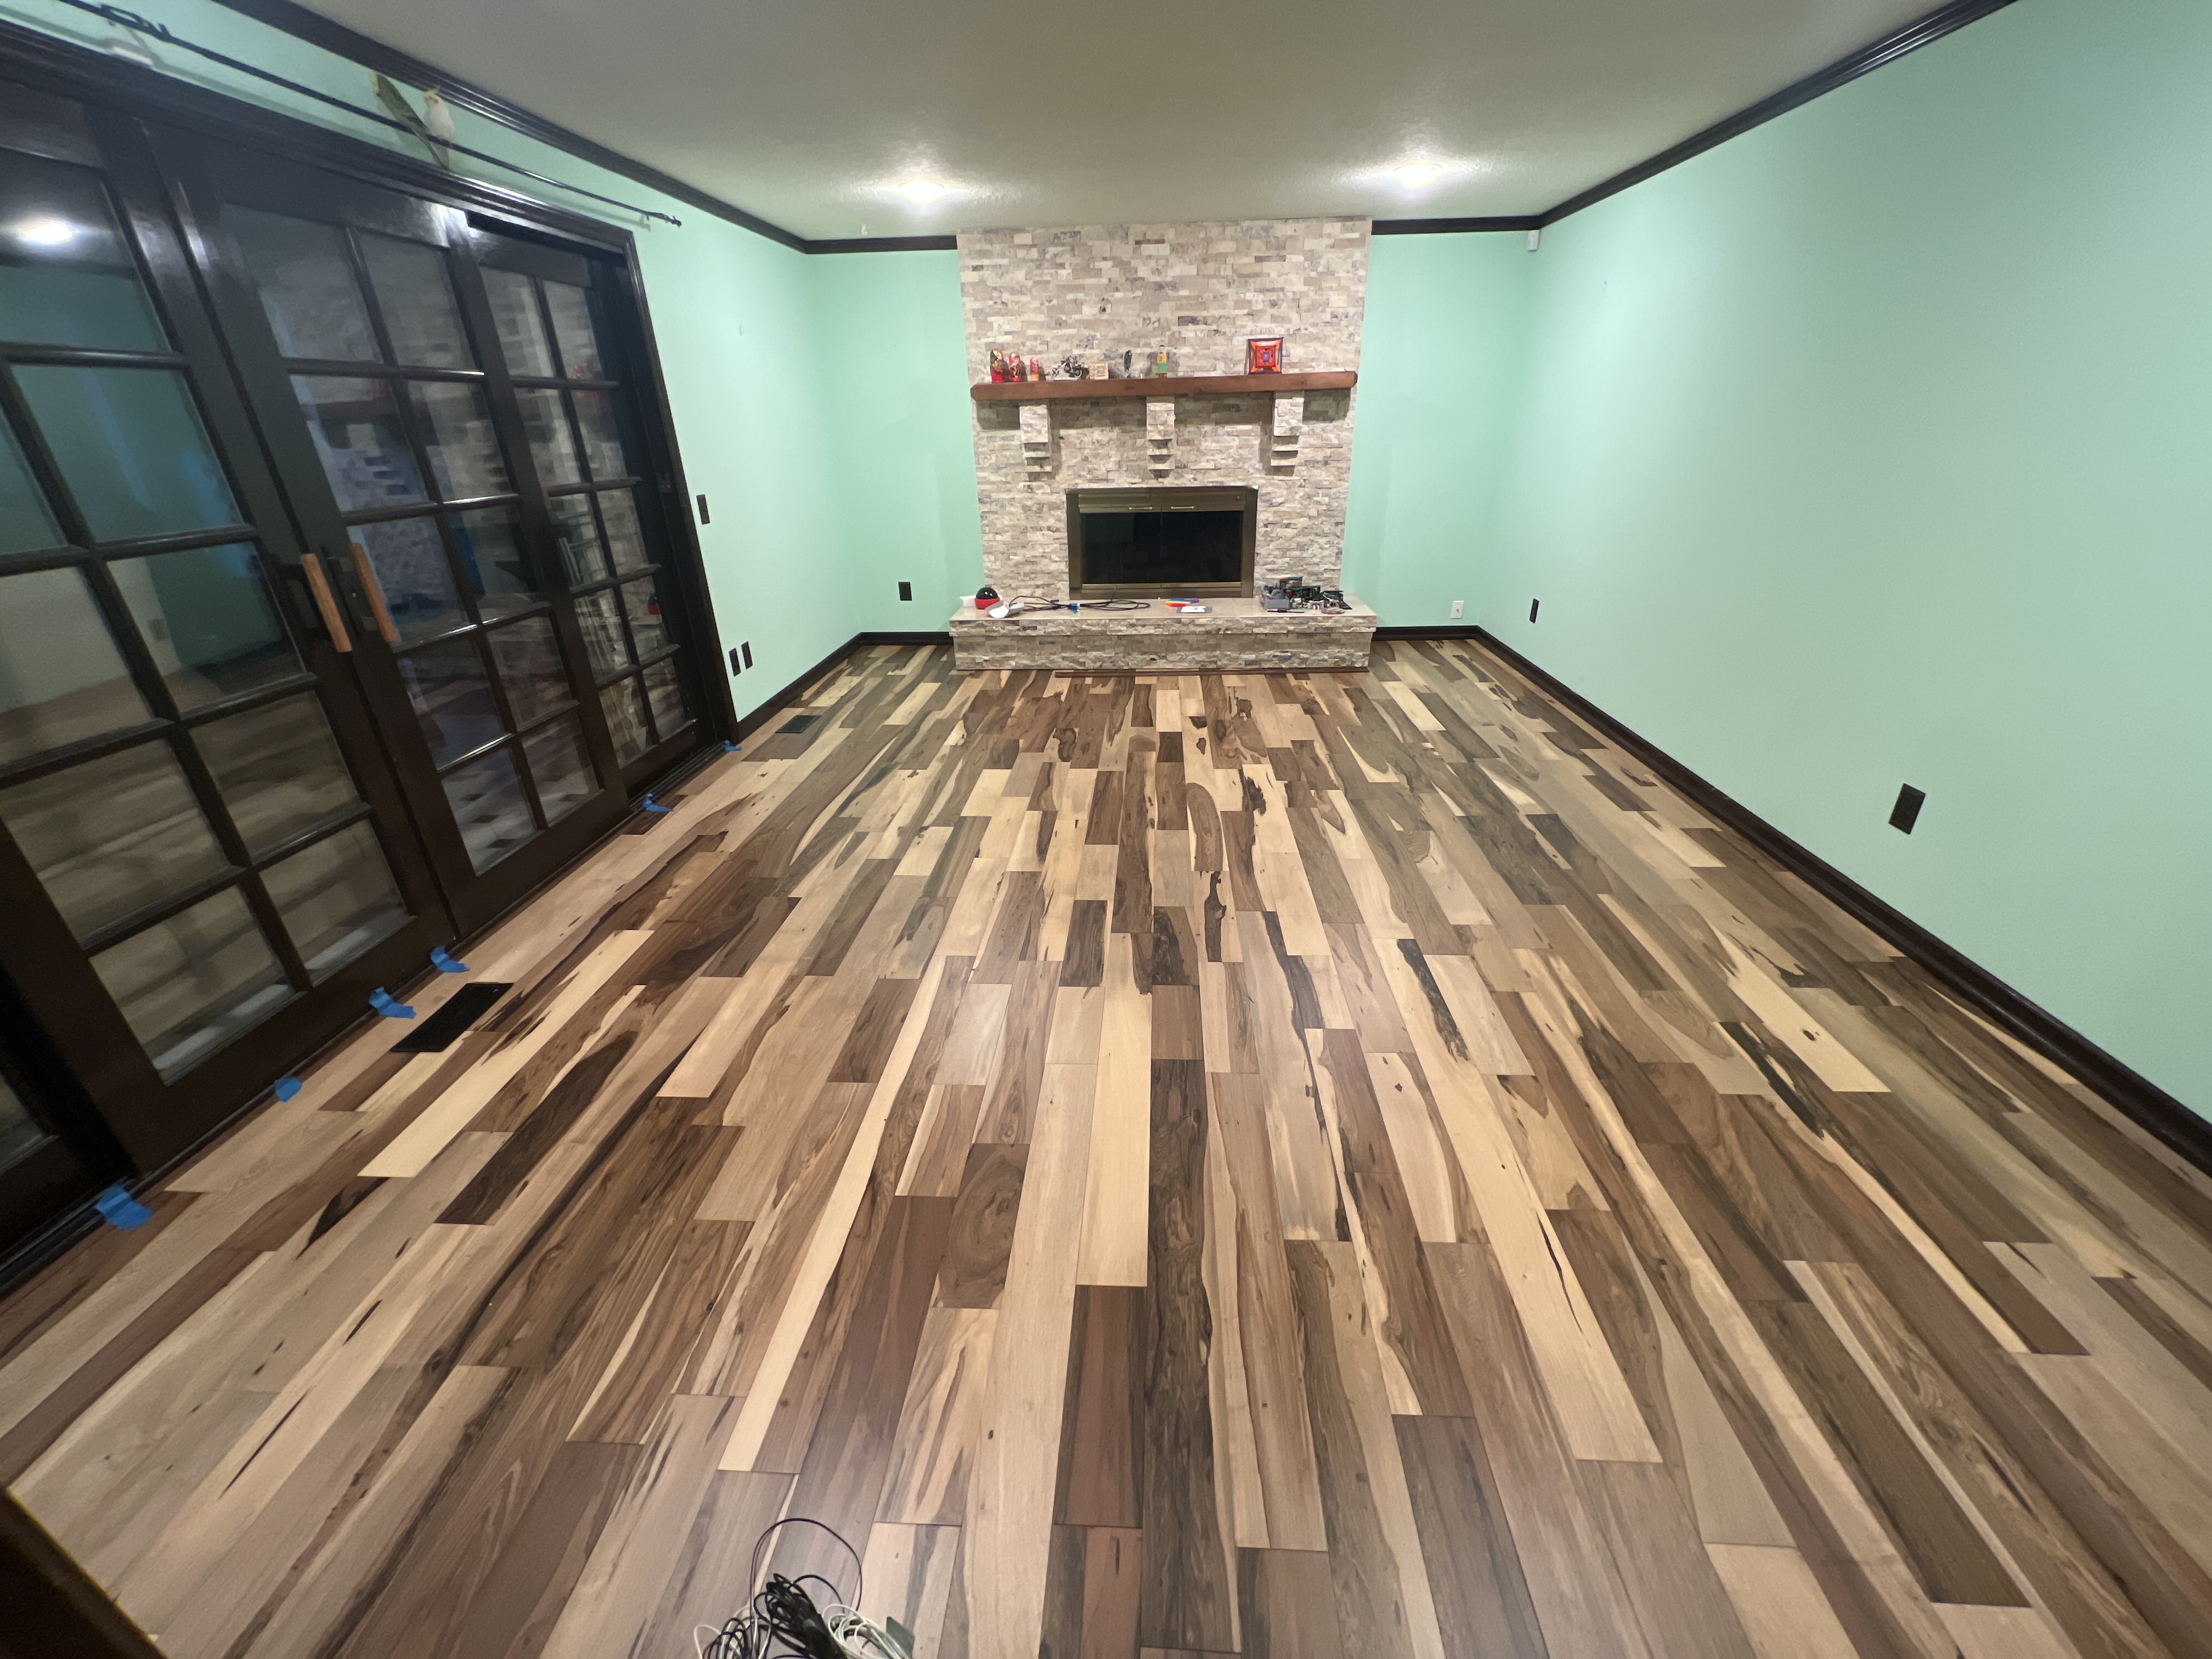
Flooring – $3,000 – $14,000
Basements like water-tolerant finishes: LVP, tile, sealed concrete with area rugs. Engineered wood if moisture is truly controlled. Carpet tiles in bedrooms are common.
-
Interior Doors, Trim, Paint – $4,000 – $12,000
Solid core doors help with sound. Careful casing/base heights when floors aren’t perfectly flat.
-
Bathroom Add-On – $14,000 – $35,000+
Shower with proper pan and waterproofing, tile, vanity, toilet, fan, GFCI, sometimes a sewage ejector. If rough plumbing is far away, allow more.
-
Laundry Add-On – $3,500 – $9,500
Box, pan, floor drain (where feasible), venting, 240V, shutoffs, and a bit of cabinet/counter for folding.
-
Egress Window (per opening) – $4,500 – $9,500
Concrete cut, lintel, well, drain, ladder/steps per code, window install, trim. Walk-out lots can be easier.
-
Basement Bar / Entertainment Room – $5,000 – $25,000+
Wet bar adds plumbing + GFCI, mini-fridge, counter. Media walls often include blocking, power/HDMI/data, sound control.
-
Stairs & Headroom Corrections – $2,500 – $18,000
Code wants stair headroom around 6'-8" and proper tread/riser proportions. Sometimes we adjust framing or rework treads.
-
Permits, Drawings, Engineering – $1,200 – $6,500+
Depends on scope. More on this right below.
Basements want water-tolerant flooring. LVP + area rugs is a balanced combo – warm, durable, easy to replace if anything leaks one day.
Permits in Seattle: STFI vs Full Permit, Drawings, and Inspections
Seattle uses a Subject-to-Field-Inspection (STFI) permit for many interior, non-structural projects. It’s faster and simpler. If your conversion doesn’t change structural elements, keeps within prescriptive code, and you’re not creating an ADU, STFI is often feasible. We handle the paperwork.
When we add bedrooms (egress), alter structural members, dig for headroom, or build an ADU/extra kitchen – plan for a full permit. That needs a drawing set (plans, details), sometimes engineering, and multiple inspections. Timelines vary a bit by season.
Drawings: We produce permit-ready drawings. Clear plans save time with SDCI and reduce field confusion.
Free interior design: We include interior design support so finishes, lighting, and layout look cohesive. Not a 30-page magazine spec… just the right level to make good choices without headaches.
Materials with contractor discount: We can source finishes and fixtures through our vendors. That discount often pays for part of our design time – nice little loop.
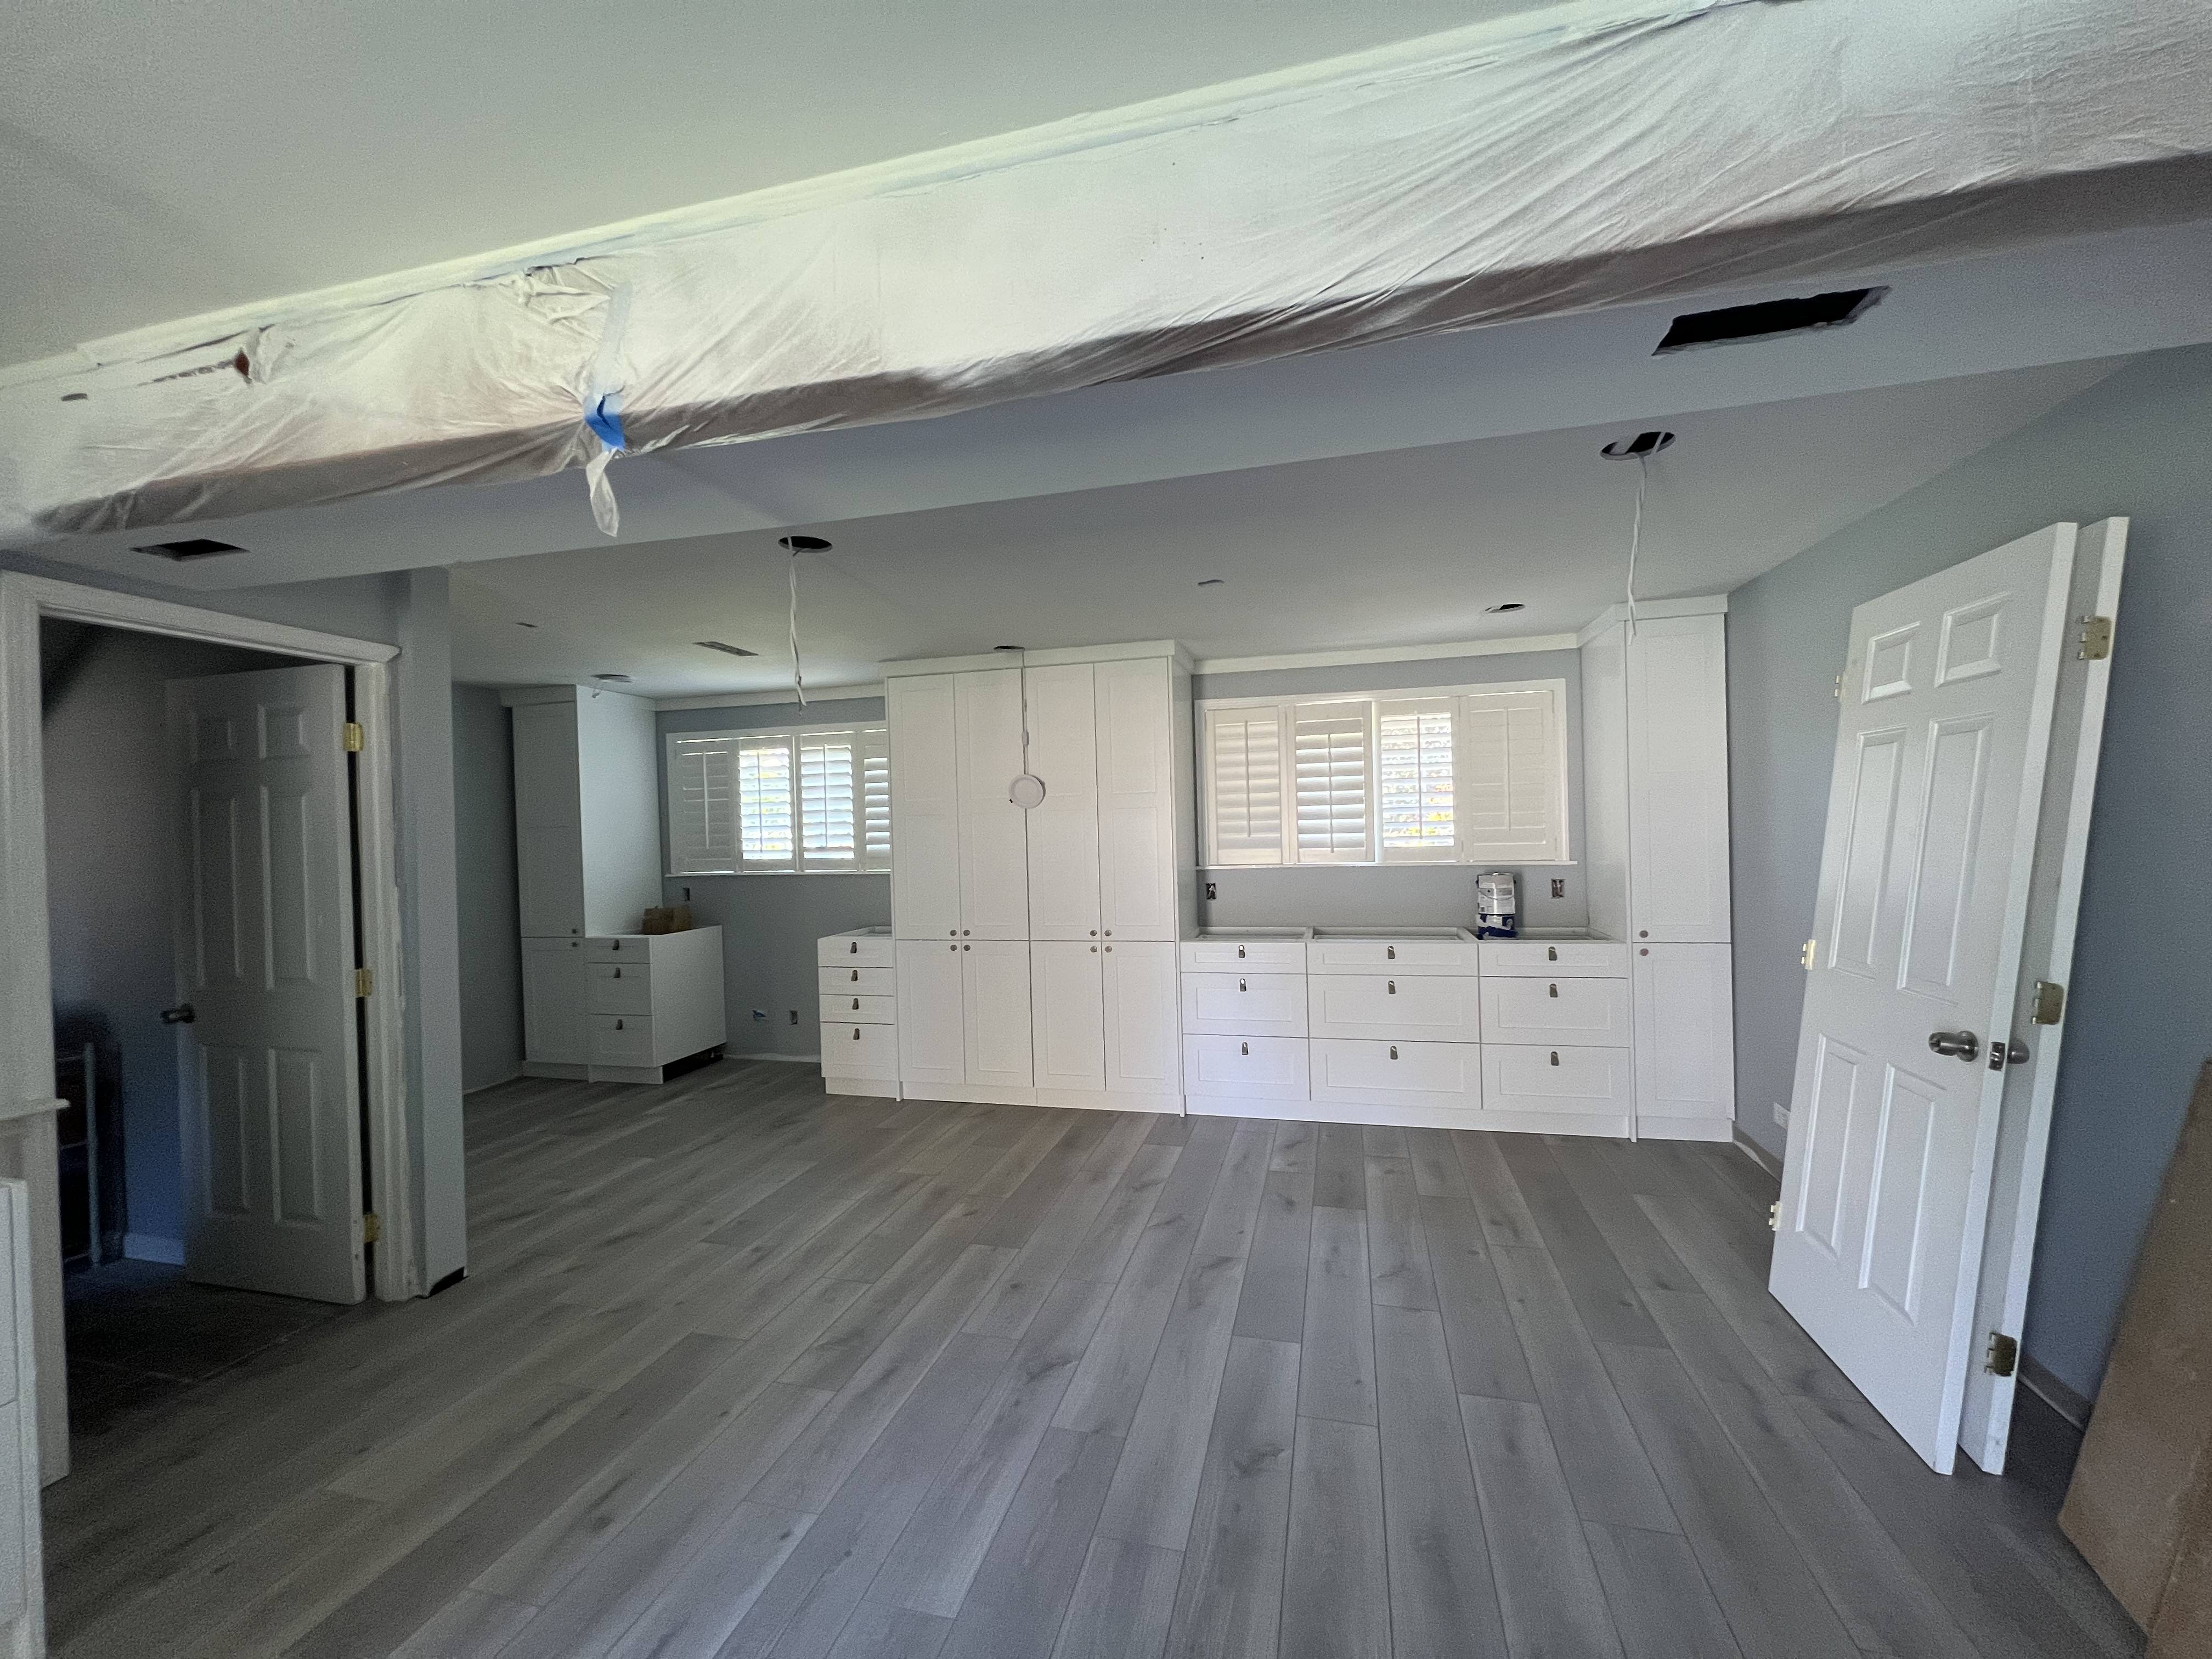
Framing around ducts and beams while keeping headroom legal is the not-so-glam part – but it’s what makes the room feel right.
Code Highlights You Should Know (plain-English)
- Ceiling height: Aim for 7'-0" in habitable rooms. Beams/ducts can dip lower in small areas; too much low stuff is a fail. Bathrooms and hallways can be a bit less, but we design to feel comfortable.
- Egress for bedrooms: One emergency escape/rescue opening – most often a large window. Sill \u2264 44" from finished floor, clear opening big enough for exit. Window well needs proper clearances and drain.
- Ventilation: Bath fans vented outdoors, not into the attic or joist bays. Good mechanical ventilation matters in our climate.
- Stairs: Headroom commonly 6'-8", consistent treads/risers, graspable handrail.
- Smoke/CO: Interconnected smoke alarms and CO detectors where required, especially with new bedrooms.
Codes update, and there are exceptions/alternates. We make sure your specific house passes – and more important – lives well.
Waterproofing & Moisture Strategy (Seattle Reality)
Seattle basements see damp soil and seasonal vapor drive. Most projects need a layered approach:
- Bulk water first: Fix gutters/downspouts, slope grade away, add extensions, route to daylight where possible.
- Interior control: Perimeter drain + sump if active seepage; seal cracks; apply slab vapor mitigation where readings are high; 10–15 mil poly or specific membranes as needed.
- Walls & insulation: Rigid foam against concrete or closed-cell spray foam in tricky spots, then framed wall with batt insulation where appropriate – keeps the dew point out of the drywall.
- Air changes: Real ventilation and a good bath fan. A smart dehumidifier helps shoulder seasons.
Do this right and your drywall isn’t a sponge and floors don’t cup. Do it wrong and… yeah, you’ll smell it later.
Moisture mitigation is boring on Instagram, but it’s what protects your finishes. We’d rather be boring than tearing out a moldy wall in 2 years.
Common Spaces People Add Down There
- Bathroom: Adds function fast; budget $14k–$35k+ depending on tile, glass, and plumbing runs. Heated floors are popular but optional.
- Laundry: Tidy alcove with pan, drain, proper venting. $3.5k–$9.5k typical.
- Bedroom: Legal egress makes the square footage count. Good ROI driver.
- Entertainment/TV room: Low-glare lighting, sound control, built-ins. Hide cables properly.
- Basement bar: Wet bar ups the vibe. Think GFCI, splash protection, and a quiet fridge.
- Storage wall: Not sexy, totally worth it. Tall cabinets soak up clutter.
Financing – What Folks Mostly Opt For in Seattle
Remodels are pricey, so financing is common. Around here most homeowners opt out for a HELOC or home-equity loan – rates and terms vary, but it’s usually the best blend of flexibility and cost. Others use a cash-out refi when timing is right. Unsecured personal loans work for smaller scopes; some split finishes onto a 0% promo credit card for 12–18 months to float cash flow. We can coordinate payment schedules so you’re not stressing timing.
Is a Basement Remodel Worth It?
For most clients, yes – as long as moisture and code are handled before the pretty stuff. You get day-to-day utility now and a value bump later. If you’re targeting an ADU, the math can pencil even stronger. Just be honest about the budget: Seattle basements aren’t the $25k internet special. We’d rather set the right number than disappoint you mid-project.
What We Include (so the process feels normal)
- STFI permit when the scope qualifies – faster path. Full permit + engineering when needed, we handle it.
- Permit-ready drawings and coordination with inspections.
- Free interior design to pull colors, tile, and lighting together without over-thinking (or up-selling you to death).
- Materials with our contractor discount through local suppliers – tile, LVP, vanities, plumbing fixtures, doors, trim.
- A clean sequence: moisture fixes \u2192 framing/MEP \u2192 insulation/drywall \u2192 paint/doors/trim \u2192 flooring \u2192 finishes/punch.
Ready to price your space? Read more and reach out here: RENOVA Contractors – Basement Finishing Seattle. We’ll walk the house, check headroom, look for moisture clues, and give you straight numbers.
Do I need a permit to remodel my basement in Seattle?
Short answer – most likely. Seattle requires permits for almost any basement finishing or remodeling that adds habitable space or changes structure, plumbing, electrical, or HVAC. Purely cosmetic work (paint, like-for-like flooring) usually doesn’t. If it touches life safety, structure, or the building envelope – assume permit.
Finishing vs. remodeling – what’s the difference?
- Finishing a basement – converting unfinished space into habitable rooms (bedroom, office, media room, bath). This does require a building permit. Straightforward, non-structural interior scopes may qualify for STFI (Subject-to-Field-Inspection). Structural or complex scopes go through full plan review.
- Remodeling an already finished basement – cosmetic only, often no permit. Move walls, add a bathroom or laundry, cut an egress window, re-wire, re-duct, or change exits – you’ll need permits (plus related trade permits).
Quick gut-check – if it changes life safety, structure, or the envelope, it’s a permit job.
Permit paths in Seattle
- STFI – small, interior, non-structural residential work that meets criteria. Fewer submittals, still inspected.
- Full building permit (plan review) – required for structural changes, new openings in foundation for windows/doors, lowering slabs to gain headroom, ADU-level conversions, or complex MEP.
The big code items you’ll hit in a basement
1) Minimum ceiling height
For habitable rooms and hallways in basements: 7 ft minimum. For bathrooms, toilet rooms, laundry rooms: 6 ft 8 in. Designers often push ducts/soffits to perimeter walls to keep clear paths near 7 ft – comfort matters. (Code ref: SRC R305.)
2) Bedrooms need an egress window (or door)
Adding a bedroom in the basement requires a compliant Emergency Escape and Rescue Opening. Typical rules used locally:
- Net clear opening: 5.7 sq ft minimum (5.0 sq ft at grade-floor openings)
- Clear opening: at least 20 in wide and 24 in high (still must reach the area)
- Sill height: ≤ 44 in above finished floor
- Window well: ≥ 9 sq ft with ≥ 36 in projection/width; wells deeper than 44 in need a ladder/steps
- Openable from inside – no keys, tools, or special knowledge
(Code refs: SRC R310, SDCI Tip 303A.)
3) Separate entrance or new exterior stairs
Cutting in a new exterior door for a daylight feel – or planning an ADU later? Follow Means of Egress provisions: readily openable egress door, compliant stair width/treads/risers, and typical stair headroom about 6 ft 8 in. (Code ref: SBC Chapter 10.)
Work that almost always triggers permits
- Finishing an unfinished basement into habitable space
- Adding bedrooms (egress required), bathrooms, or laundry
- Cutting an egress window through concrete/foundation walls
- Lowering the slab, altering beams/bearing walls for headroom
- New plumbing, electrical circuits, or HVAC runs
- Insulation/vapor control that changes the envelope
Inspections – plan for them
Even with STFI, inspectors check framing, insulation/air-barrier, rough-in plumbing/electrical/mechanical, egress, and final. Bath fans must exhaust outside – not into cavities. Build your schedule around inspection holds.
Quick decision guide
- Just paint and carpet? Probably no permit.
- Finishing an unfinished basement? Permit required – STFI if simple; full review if structural/egress.
- Adding a bedroom? You’ll need a code-sized egress opening.
- Ceilings under 7 ft? Discuss compliance and options before you buy finishes (SRC R305).
- New exterior door/stairs? Follow Means of Egress (SBC Chapter 10).
Need help pricing the conversion?
See local pricing and scope here – RENOVA Contractors – Basement Finishing Seattle.
How Much Does It Cost to Hire an Architect in Seattle — and How to Hire the Right One (Without Burning Time or Cash)
You’re planning a residential project. Maybe a basement remodel, maybe you’re opening a kitchen wall, or you’ve got dreams of a sleepable attic that isn’t a sauna in July. Somewhere in your research the word architect shows up — and now you’re wondering: Do I actually need one? How much should it cost? What’s the smartest way to hire so I don’t pay twice? Let’s unpack it — with real numbers, Seattle-specific rules, and a simple hiring playbook.
Quick context: in Washington State, many small residential projects don’t legally require a licensed architect to prepare the drawings. State exemptions cover certain residential work (up to four dwelling units). In other words, a good residential drafter / designer can legally produce permit drawings for lots of home projects. Still — some scopes will need professional stamps, and you should follow the Seattle process regardless.
What does an architect actually cost in Seattle?
There are three common pricing models you’ll see locally:
- Percentage of construction (often 7–15% for full services).
- Hourly (from drafting techs in the $75–$125/hr band to licensed architects at $150–$250/hr+).
- Per-square-foot for permit drawings (varies widely, $2–$8+/sf depending on scope, survey/engineering needs, and level of service).
Our stance (because transparency helps): we charge about ~$3 per square foot for a full residential permit set on typical interior remodels. That’s measured, code-compliant drawings — coordinated with trades — aimed at getting you permit-ready without fluff. If your scope needs heavy structural, that number changes (more on engineers below).
Why the range? Two variables blow up design time: unknown existing conditions and structural changes. If you don’t have decent as-builts, someone has to field-measure and draft the entire house to keep the permit set consistent. That time is real — and worth it — because it prevents plan review corrections later.
Do I need a licensed architect — or will a drafter do?
Washington’s rules give homeowners wiggle room on small-scale residential. That’s the legal side. Practically, use this rule of thumb:
-
No major structure. No exterior changes. No egress cut.
A skilled residential drafter/designer can usually prepare code-compliant drawings that Seattle accepts for permit review. You still submit plans and pass inspections, but you don’t necessarily need the architect stamp.
-
Altering structure or the building shell?
Bring an architect (or at least an architect-led team), and expect to add a licensed engineer where structural calculations are required. When structural design is in play, you want the right stamp on the right sheets.
-
Tricky projects, ADU conversions, additions, new openings in foundation, or slab-lowering.
Architect + engineer + permit coordinator is the responsible stack. Seattle does not love guesswork.
Bottom line: we use and need an architect mostly when alterations are required — structure, egress, envelope changes — and when a coordinated submittal will save you rounds of corrections.
The Seattle permit landscape (in 90 seconds)
Seattle has two main residential building-permit paths:
-
STFI — Subject-to-Field-Inspection
Designed for simple, interior, non-structural residential work that meets Seattle’s criteria. Lighter submittal. Still inspected. If your scope fits, it’s the fastest lane. (Know the submittal checklist and what qualifies.)
-
Full Plan Review — Construction Permit (Addition or Alteration)
Required when you alter structure, cut new openings in foundation or exterior walls, create new habitable area that triggers egress, or do complex MEP work. Expect plan sets, review cycles, and multiple inspections.
Seattle also publishes a plain-language “Do You Need a Permit?” guide — a handy page that spells out when a permit isn’t needed (minor work), and when it is. If your project touches structure, egress, or the building envelope… it’s a permit. Period.
Code triggers that change your design (and budget)
A few Seattle Residential Code items drive whether you can keep it simple — or must upgrade:
- Ceiling height. Habitable space (and hallways) needs 7 ft minimum. Bathrooms/laundry: 6 ft 8 in. Low beams and ducts? You’ll be designing soffits and clear paths. (SRC R305).
- Bedrooms need egress. If you add a bedroom — especially in a basement or attic — you’ll need an Emergency Escape and Rescue Opening with specific clear opening sizes, sill height, and window-well rules. (SRC R310; SDCI Tip 303A).
- New exterior door or stair for a “daylight basement.” Follow Means of Egress rules (door operability, stair width/treads/risers, headroom). (SBC Chapter 10).
An experienced architect should proactively flag these — and help minimize total cost by designing to the right threshold (e.g., keeping a project STFI-eligible when it’s smart to do so). If nobody on your team is thinking about “permit strategy,” you pay for it in time.
Real-world examples — when you likely need an architect (and engineer)
Likely architect + engineer
- Basement remodels adding bedrooms, bathrooms, or cutting an egress window in the foundation. (Egress + structure + waterproofing details.)
- Kitchen openings where you remove or expand a wall that turns out to be load-bearing. (Beam sizing, lateral, connections.)
- Layout changes that move or alter bearing lines, add big window/door openings, or lower the slab for headroom (basements). (Yes, people do this — carefully.)
Usually fine with a drafter/designer (STFI-type scope)
- Non-structural layout tweaks: shifting a non-bearing stud wall to improve a bathroom plan.
- Finish-level upgrades: cabinets, tile, fixtures, lighting re-use on existing circuits. (Confirm electrical/plumbing thresholds — small changes can still require trade permits.)
The one thing that nukes schedules: As-builts
“Do you have existing drawings?” If the answer is ummm, no, expect your designer/architect to measure and draft the whole house — not just the room. That sounds excessive until you hit plan review and the reviewer asks how your new loads transfer, or why the stair geometry doesn’t match reality. Accurate as-builts keep you from playing correction ping-pong. Seattle’s reviewers do read the drawings. (It’s literally their job.)
Hiring smart: a playbook you can copy
1) Decide what you’re actually buying.
- Permit set only vs permit set + design support + permit management. If you buy “just drawings,” you own coordination — and risk resubmittals if the set misses code triggers.
2) Ask about permit strategy on day one.
- “Could this be STFI?” “What draws us into full plan review?” A good team answers with the city’s criteria for STFI and the Addition/Alteration rules. If they look puzzled… not a good sign.
3) Require a scope that includes:
- Field measure + as-builts (if you don’t have them)
- Code analysis (ceiling heights, egress, smoke/CO, ventilation)
- Structural coordination with a licensed engineer when required (beam calcs, headers, lateral)
- Permit application and submittals (forms, responses, corrections)
- Two rounds of corrections included (typical for full review)
4) Payment terms that protect you.
- Pay a retainer to start; only pay the final after the permit is issued. Why? Because drawings that don’t clear plan review are just… very expensive paper.
5) Portfolio + references — recent and local.
- Same house vintage. Same neighborhood code quirks. Seattle is Seattle; context matters.
Why we bundle design + permits (and what we charge)
We’ve seen homeowners hire “just a drafter,” get a gorgeous 2D plan, then discover they can’t pull the permit — wrong details, missing egress, no structural path, or not aligned to STFI rules. Now you’re paying twice. Worse, you’ve lost weeks.
Our approach:
- Measured as-builts and code-checked drawings
- Ergonomic layout + interior finish help (included for free) — the small moves that make kitchens, basements, and attics actually pleasant
- Permit management — we file, we respond, we coordinate inspections, we push for STFI when eligible
- Engineer on call for major structural interference — beams, headers, shear, hold-downs (stamped where required)
- Pricing: about $3/sf for a typical full permit set (interior remodel scopes). Structural design and surveys are add-ons when the project needs them.
Also — and this is not a subtle dig — most companies overcharge for this work in Seattle. We’ve seen quotes 3× our fee for the same scope, and in a few cases the homeowner still couldn’t get a permit issued. No thanks.
Architect vs. engineer vs. drafter — who does what?
- Architect — codes, life safety, spatial design, coordination, and drawings suitable for permit review. On altered structures, an architect should pull in an engineer early.
- Engineer — structural analysis and stamped calculations where required. Structural engineering is a specialized practice — when structure is in play, use the right license.
- Drafter/Designer — prepares drawings (often great at measured as-builts and permit sets for non-structural scopes) under the residential exemptions.
For Seattle homeowners, the best value is usually a hybrid team: designer/drafter for as-builts and documentation, architect to set strategy and coordinate, and engineer only when structure demands it.
Seattle specifics that affect cost (and sanity)
- Permit type matters. STFI moves faster with lighter submittals; full plan review takes longer and adds corrections.
- Inspections are real. Even for STFI, you’ll see framing, insulation/air-barrier, rough-in MEP, and final. Build your schedule around them.
- Scope creep kills budgets. If you add a bedroom in the basement — surprise — you just triggered egress (window sizing, well, sill height). That’s design, structural, and cost.
Red flags when hiring (learned the hard way)
- “I only do drawings. You submit.” → Nope. If they won’t handle submittals and corrections, you’re taking the risk.
- No as-builts in the proposal → expect surprises and resubmittals.
- No mention of STFI or permit type → they don’t work in Seattle much.
- No engineer relationship → fine for non-structural; risky the minute beams enter the chat.
When drawings might not be needed (or can be simpler)
Some non-structural scopes — say, moving a short non-bearing partition to improve a bathroom layout, or replacing finishes like-for-like — can be documented with simple plans or even fall under minor-work thresholds, depending on cost and context. When in doubt, we’ll tell you if drawings are even needed — because paying for paperwork you don’t need is… not our vibe.
Can an architect legalize space that was finished without a permit?
Sometimes — if the space can be brought up to current code (egress, ceiling heights, smoke/CO, ventilation, energy). We review the as-built conditions, design the upgrades, and file the permit to legalize the area. Not every space can be saved. A straight answer early saves you months.
How to hire (step-by-step)
- Define scope in plain English. “Finish basement with one bedroom + bath; keep stairs; add egress window.”
- Ask for a fixed fee for: as-builts, code analysis, permit drawings, permit submittal, and two correction cycles.
- Confirm who applies — and who answers corrections. (Spoiler: it should be your designer/architect.)
- Get structural priced as an option unless you know walls are bearing.
- Set payment terms — retainer now, progress after submittal, final after permit issuance.
- Request a schedule tied to submission dates and review timelines.
Ready to plan — and price — your project?
We’re here for the practical stuff: as-builts, code-clean drawings, permit strategy, and budget-savvy design that doesn’t blow up construction costs. If you’re exploring a basement conversion, start here: RENOVA Contractors – Basement Finishing Seattle. Kicking around broader remodel ideas? Our main page has service overviews and contact: RENOVA Contractors. Thinking attic instead of basement? Here’s the page: Attic Finishing – Seattle.
We’ll tell you when an architect is essential, when a drafter is perfectly fine, and when an engineer must stamp the math — then we’ll coordinate all three so your permit actually gets issued. Novel concept, we know.
Seattle references (no outbound links)
- STFI (Subject-to-Field-Inspection) criteria — SDCI Tip 316.
- Do You Need a Permit? — SDCI guidance.
- Construction Permit — Addition or Alteration (Full Plan Review).
- Seattle Residential Code — Chapter 3 (R305) ceiling heights.
- SDCI Tip 303A — basement/bedroom egress (SRC R310).
- Washington exemptions for small residential projects — RCW 18.08.410.
- Professional engineers and structural engineering — RCW 18.43.
Not legal advice; always confirm your specific scope with SDCI and current code editions before you demo a single wall.
Ballard Bathroom Remodel — real before → after
This is a small hall bath in Ballard, Seattle. Nothing fancy in the brief: keep the footprint, fix anything suspect behind the tile, and upgrade every surface so the room is easier to clean and nicer to use. Below are the real conditions — before, demo, and after — with plain notes on what changed and why.
If you want the same approach (simple plan, solid execution), here’s our process and scheduling info: Bathroom remodels in Seattle.
What we walked into
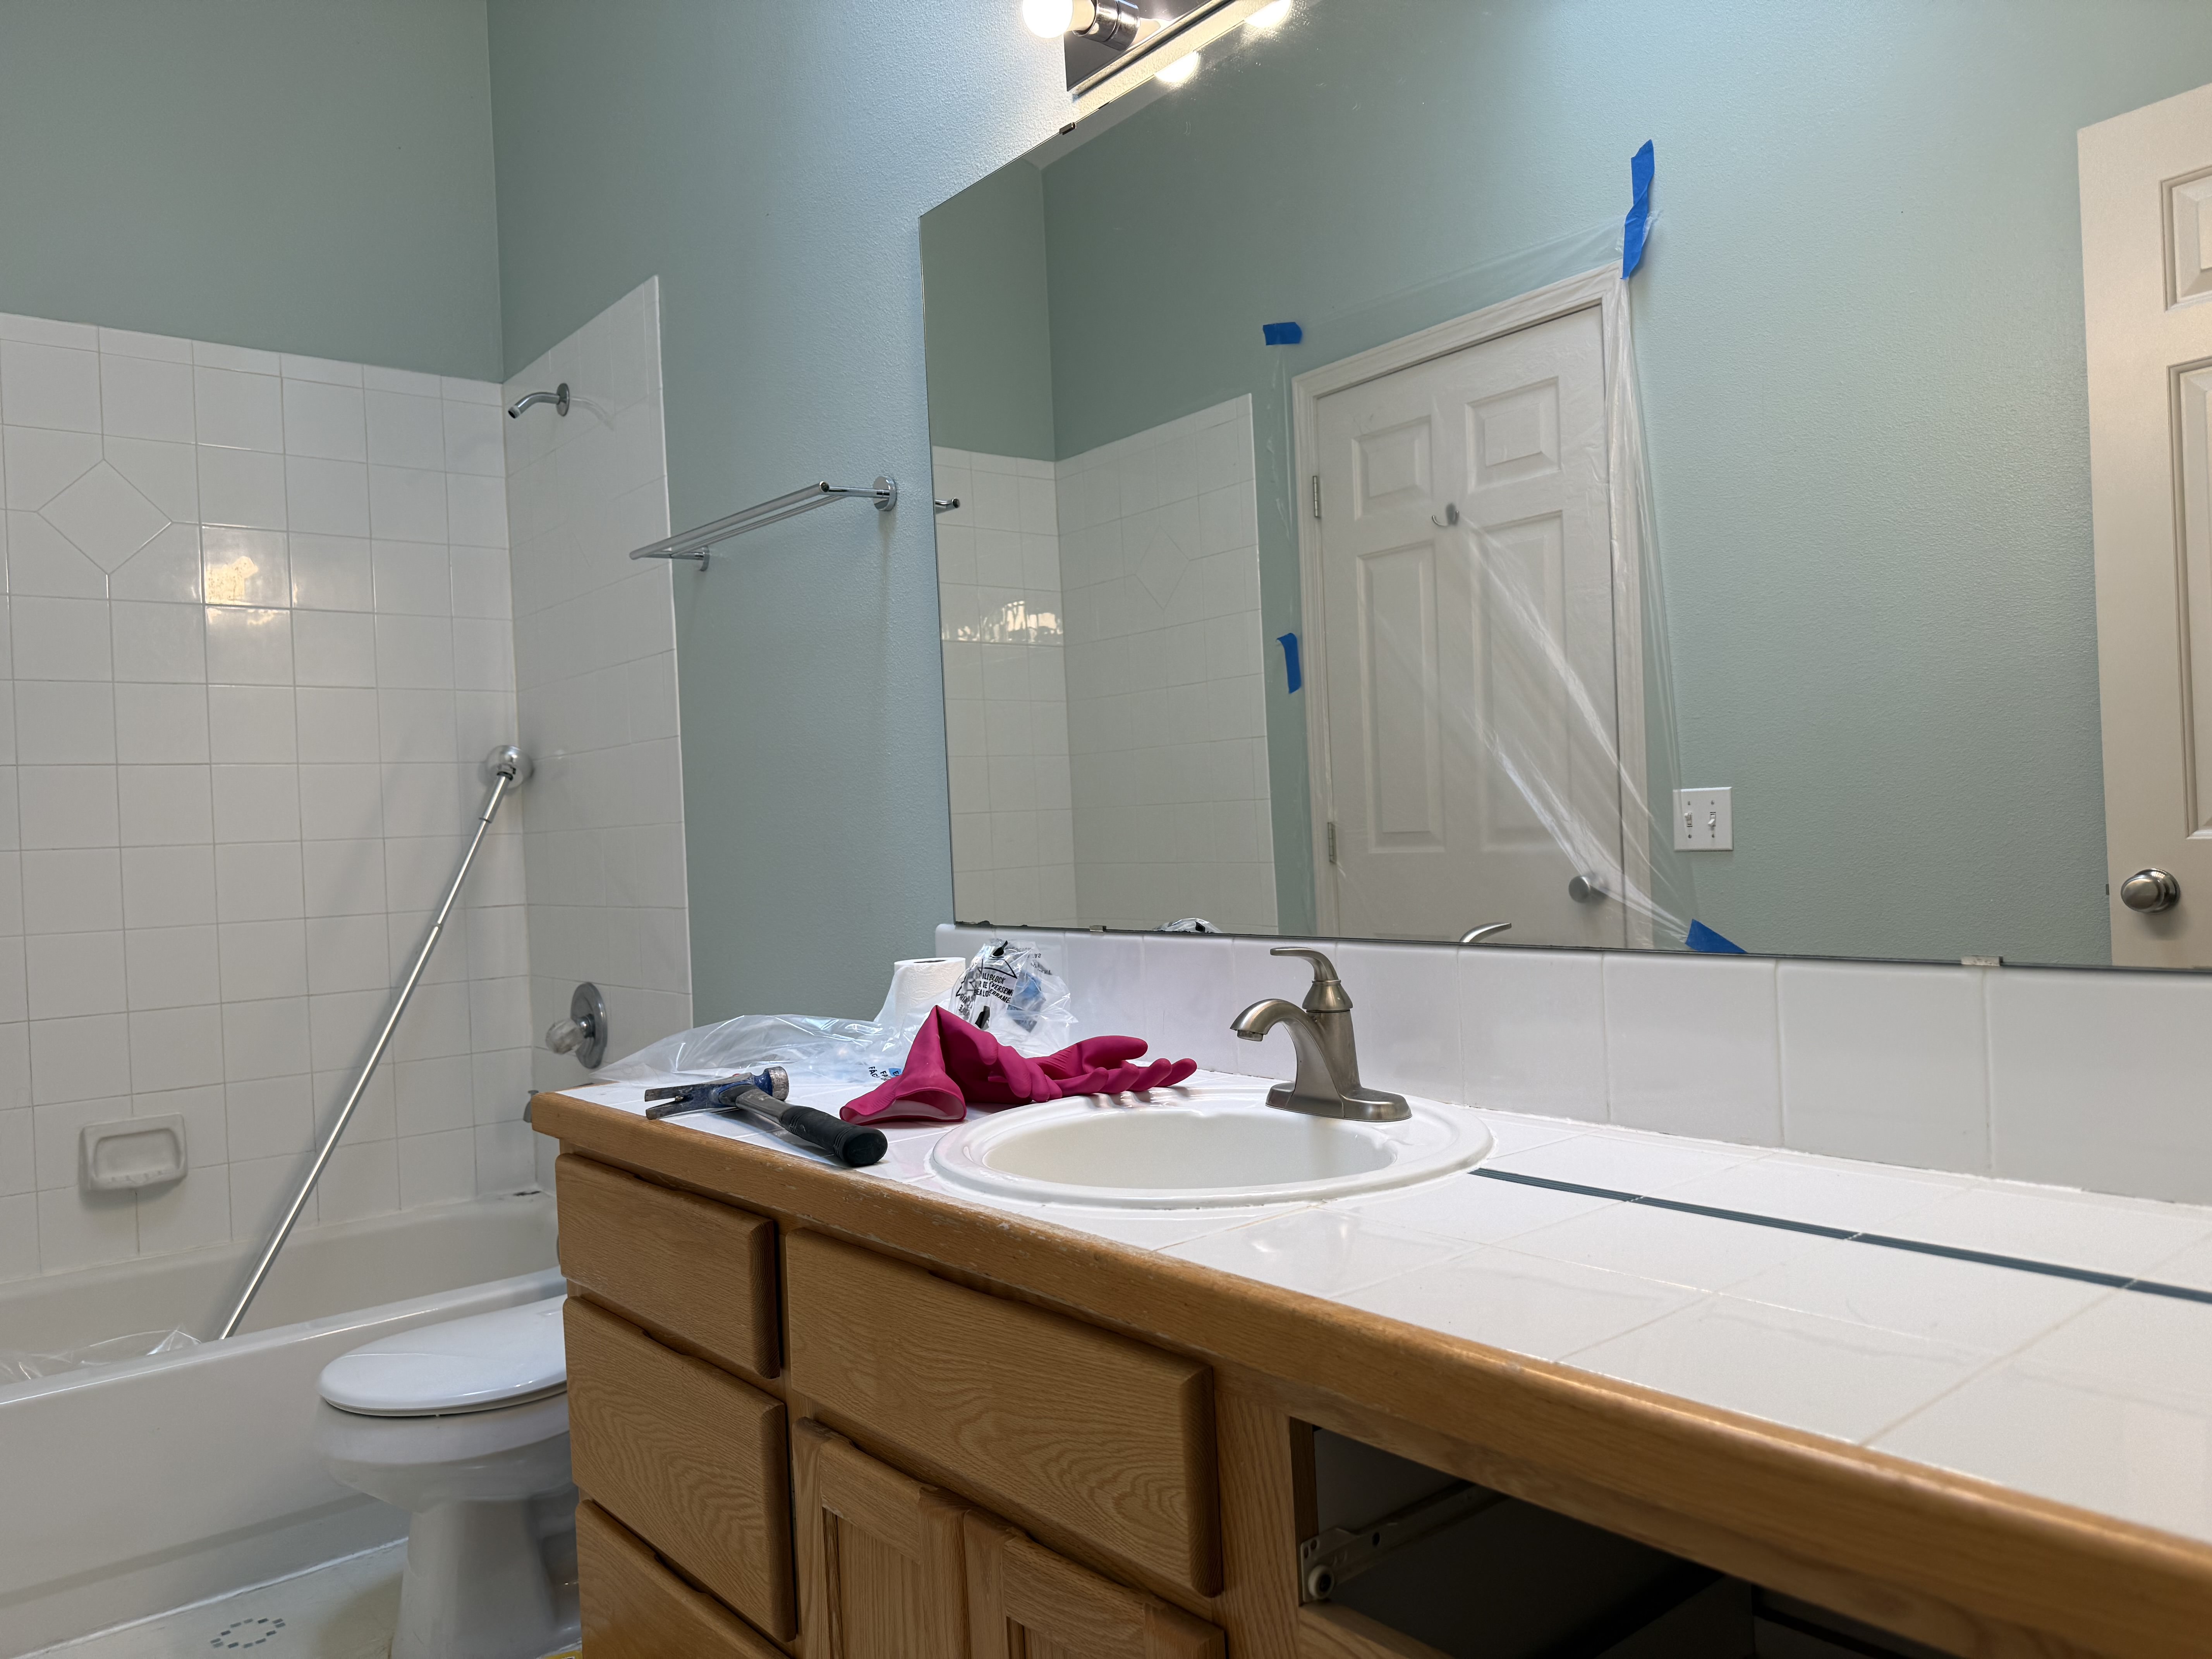
A very typical late-90s setup: 4×4 white tile around a tub/shower, a diamond accent set on point, tiled countertop with an oak edge, sea-foam walls, wall-to-wall mirror, and a Hollywood light bar. The room worked functionally but showed age and took too much time to keep clean.
During the walk-through, we protected the door and floors, noted the grab bar and the tub condition, and confirmed which items would be replaced versus kept.
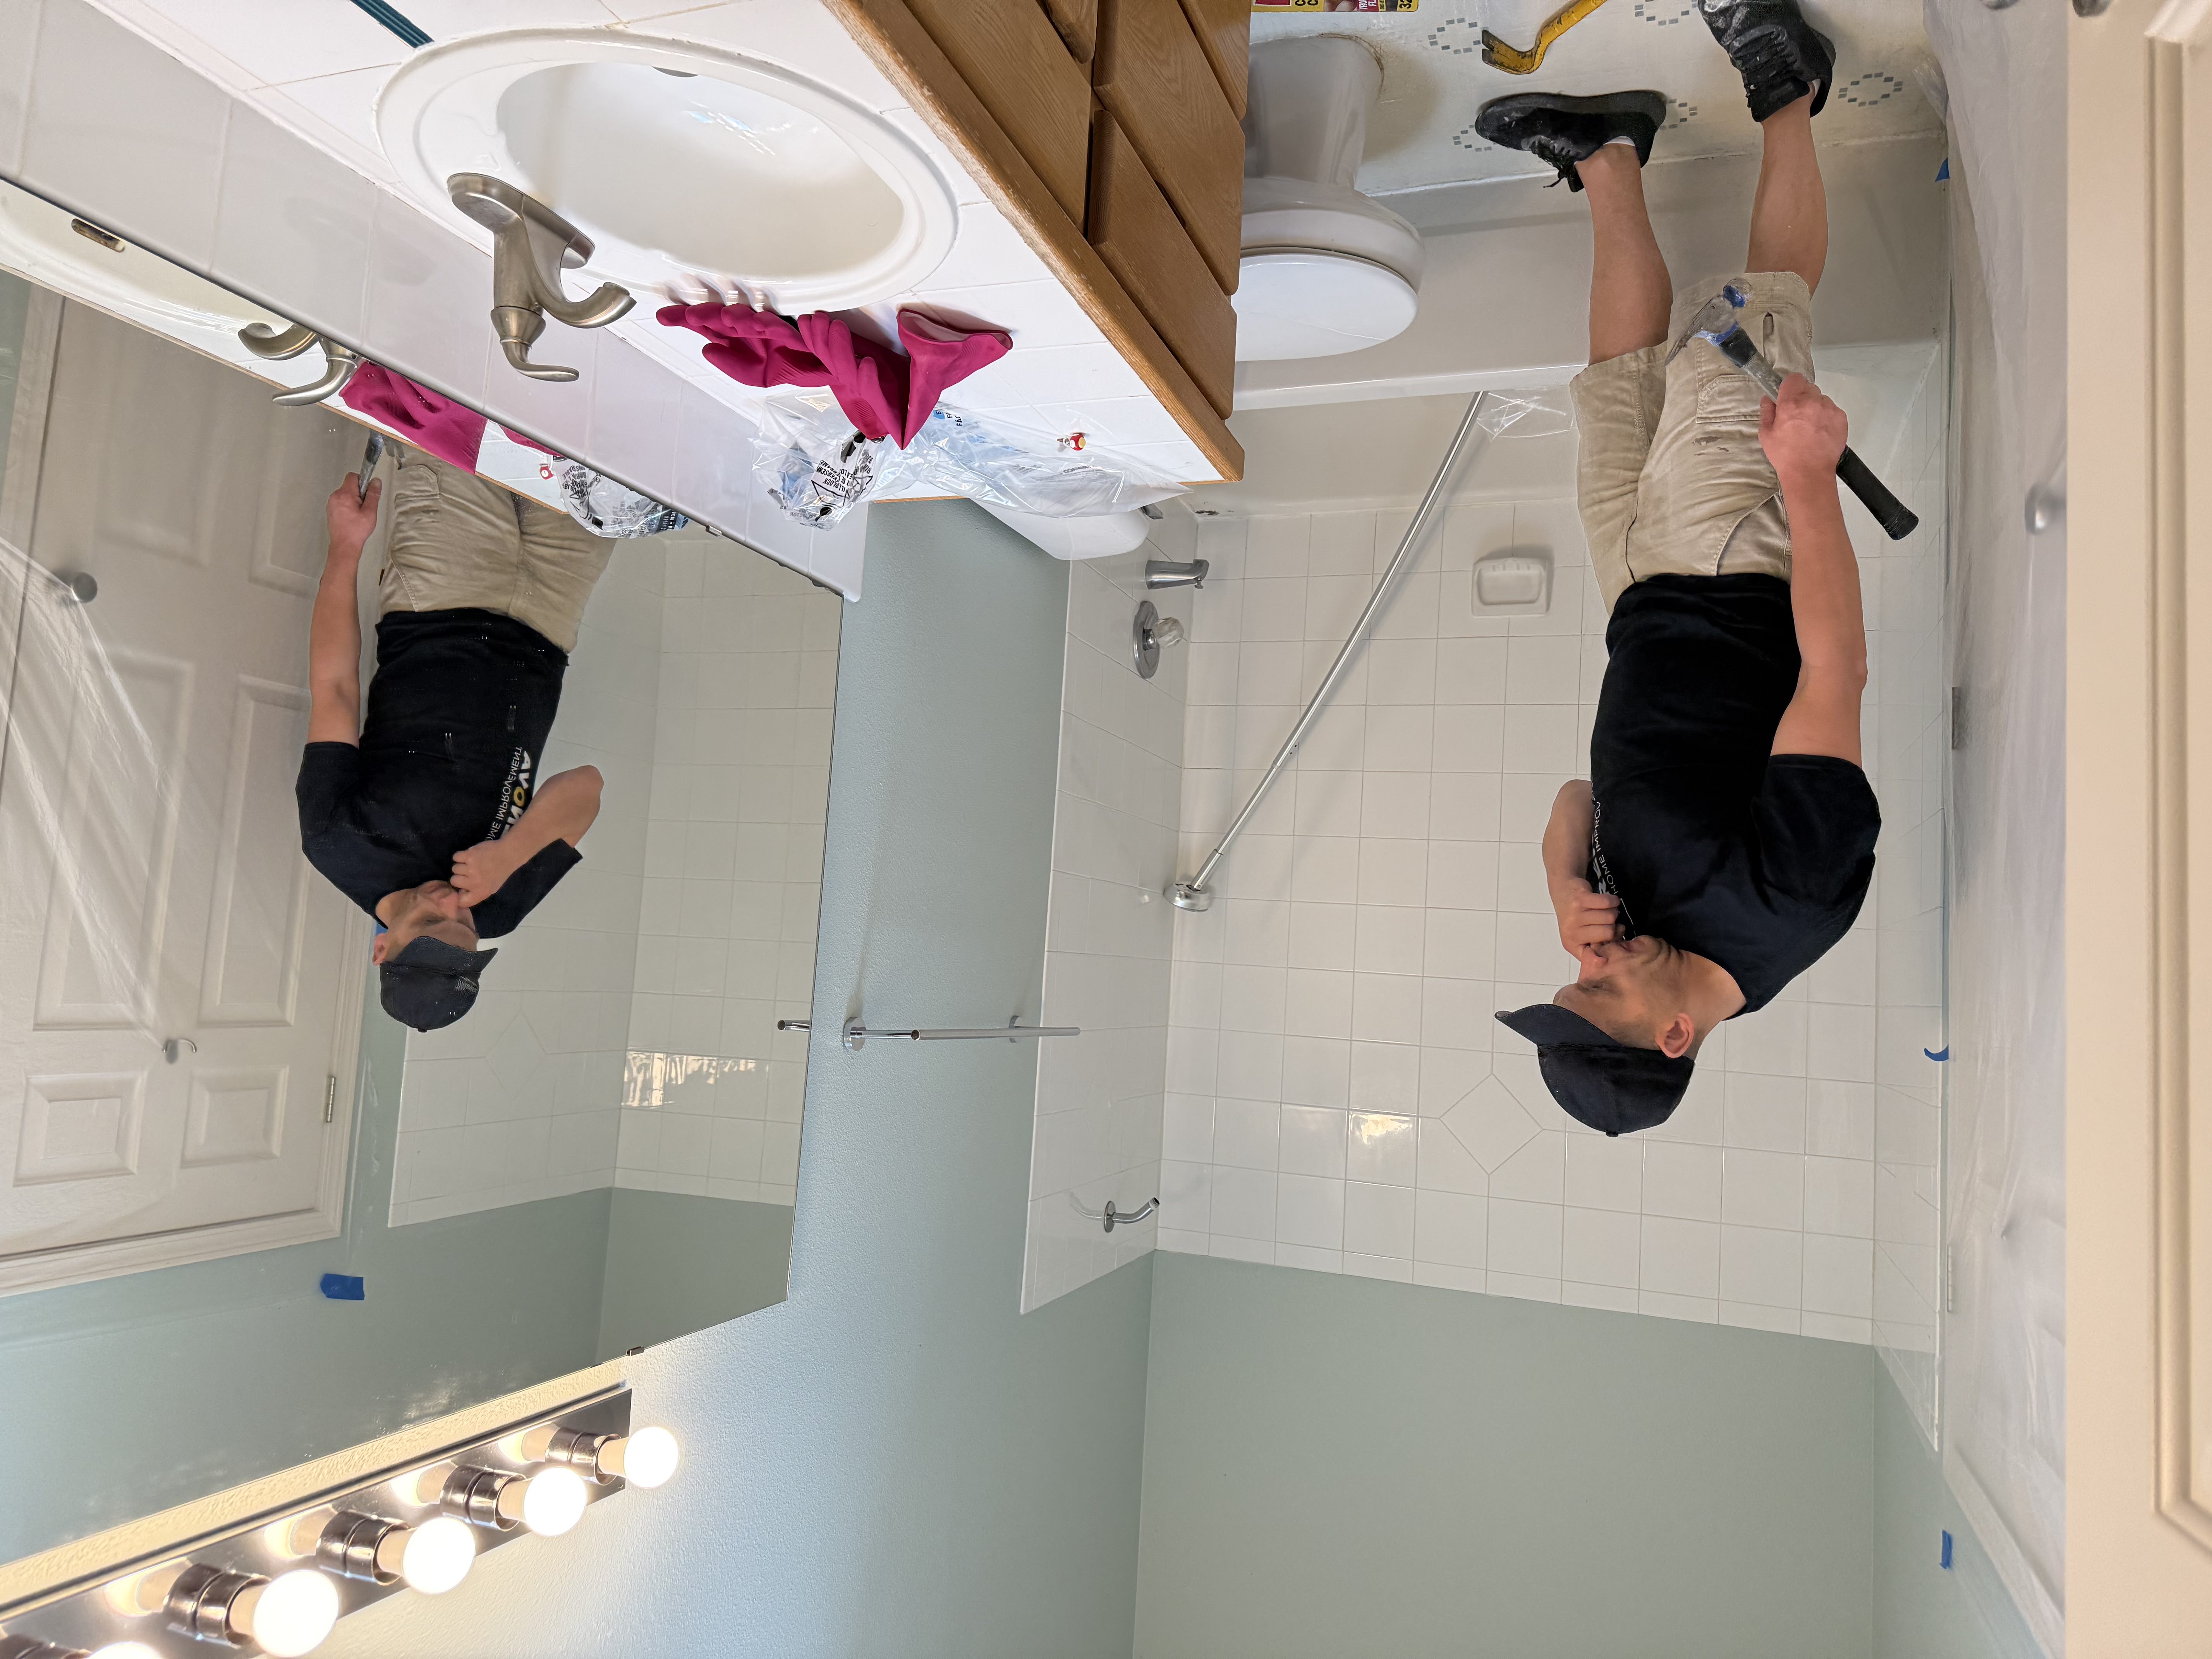
A quick counter detail shows the maintenance headache: tile and grout on a horizontal surface plus an old single-handle faucet.
Notes from inspection
- Tub was solid and worth keeping; flange was clean.
- No visible water damage, but wet walls would be opened to verify.
- Electrical would need GFCI and a tidier feed to the vanity lights.
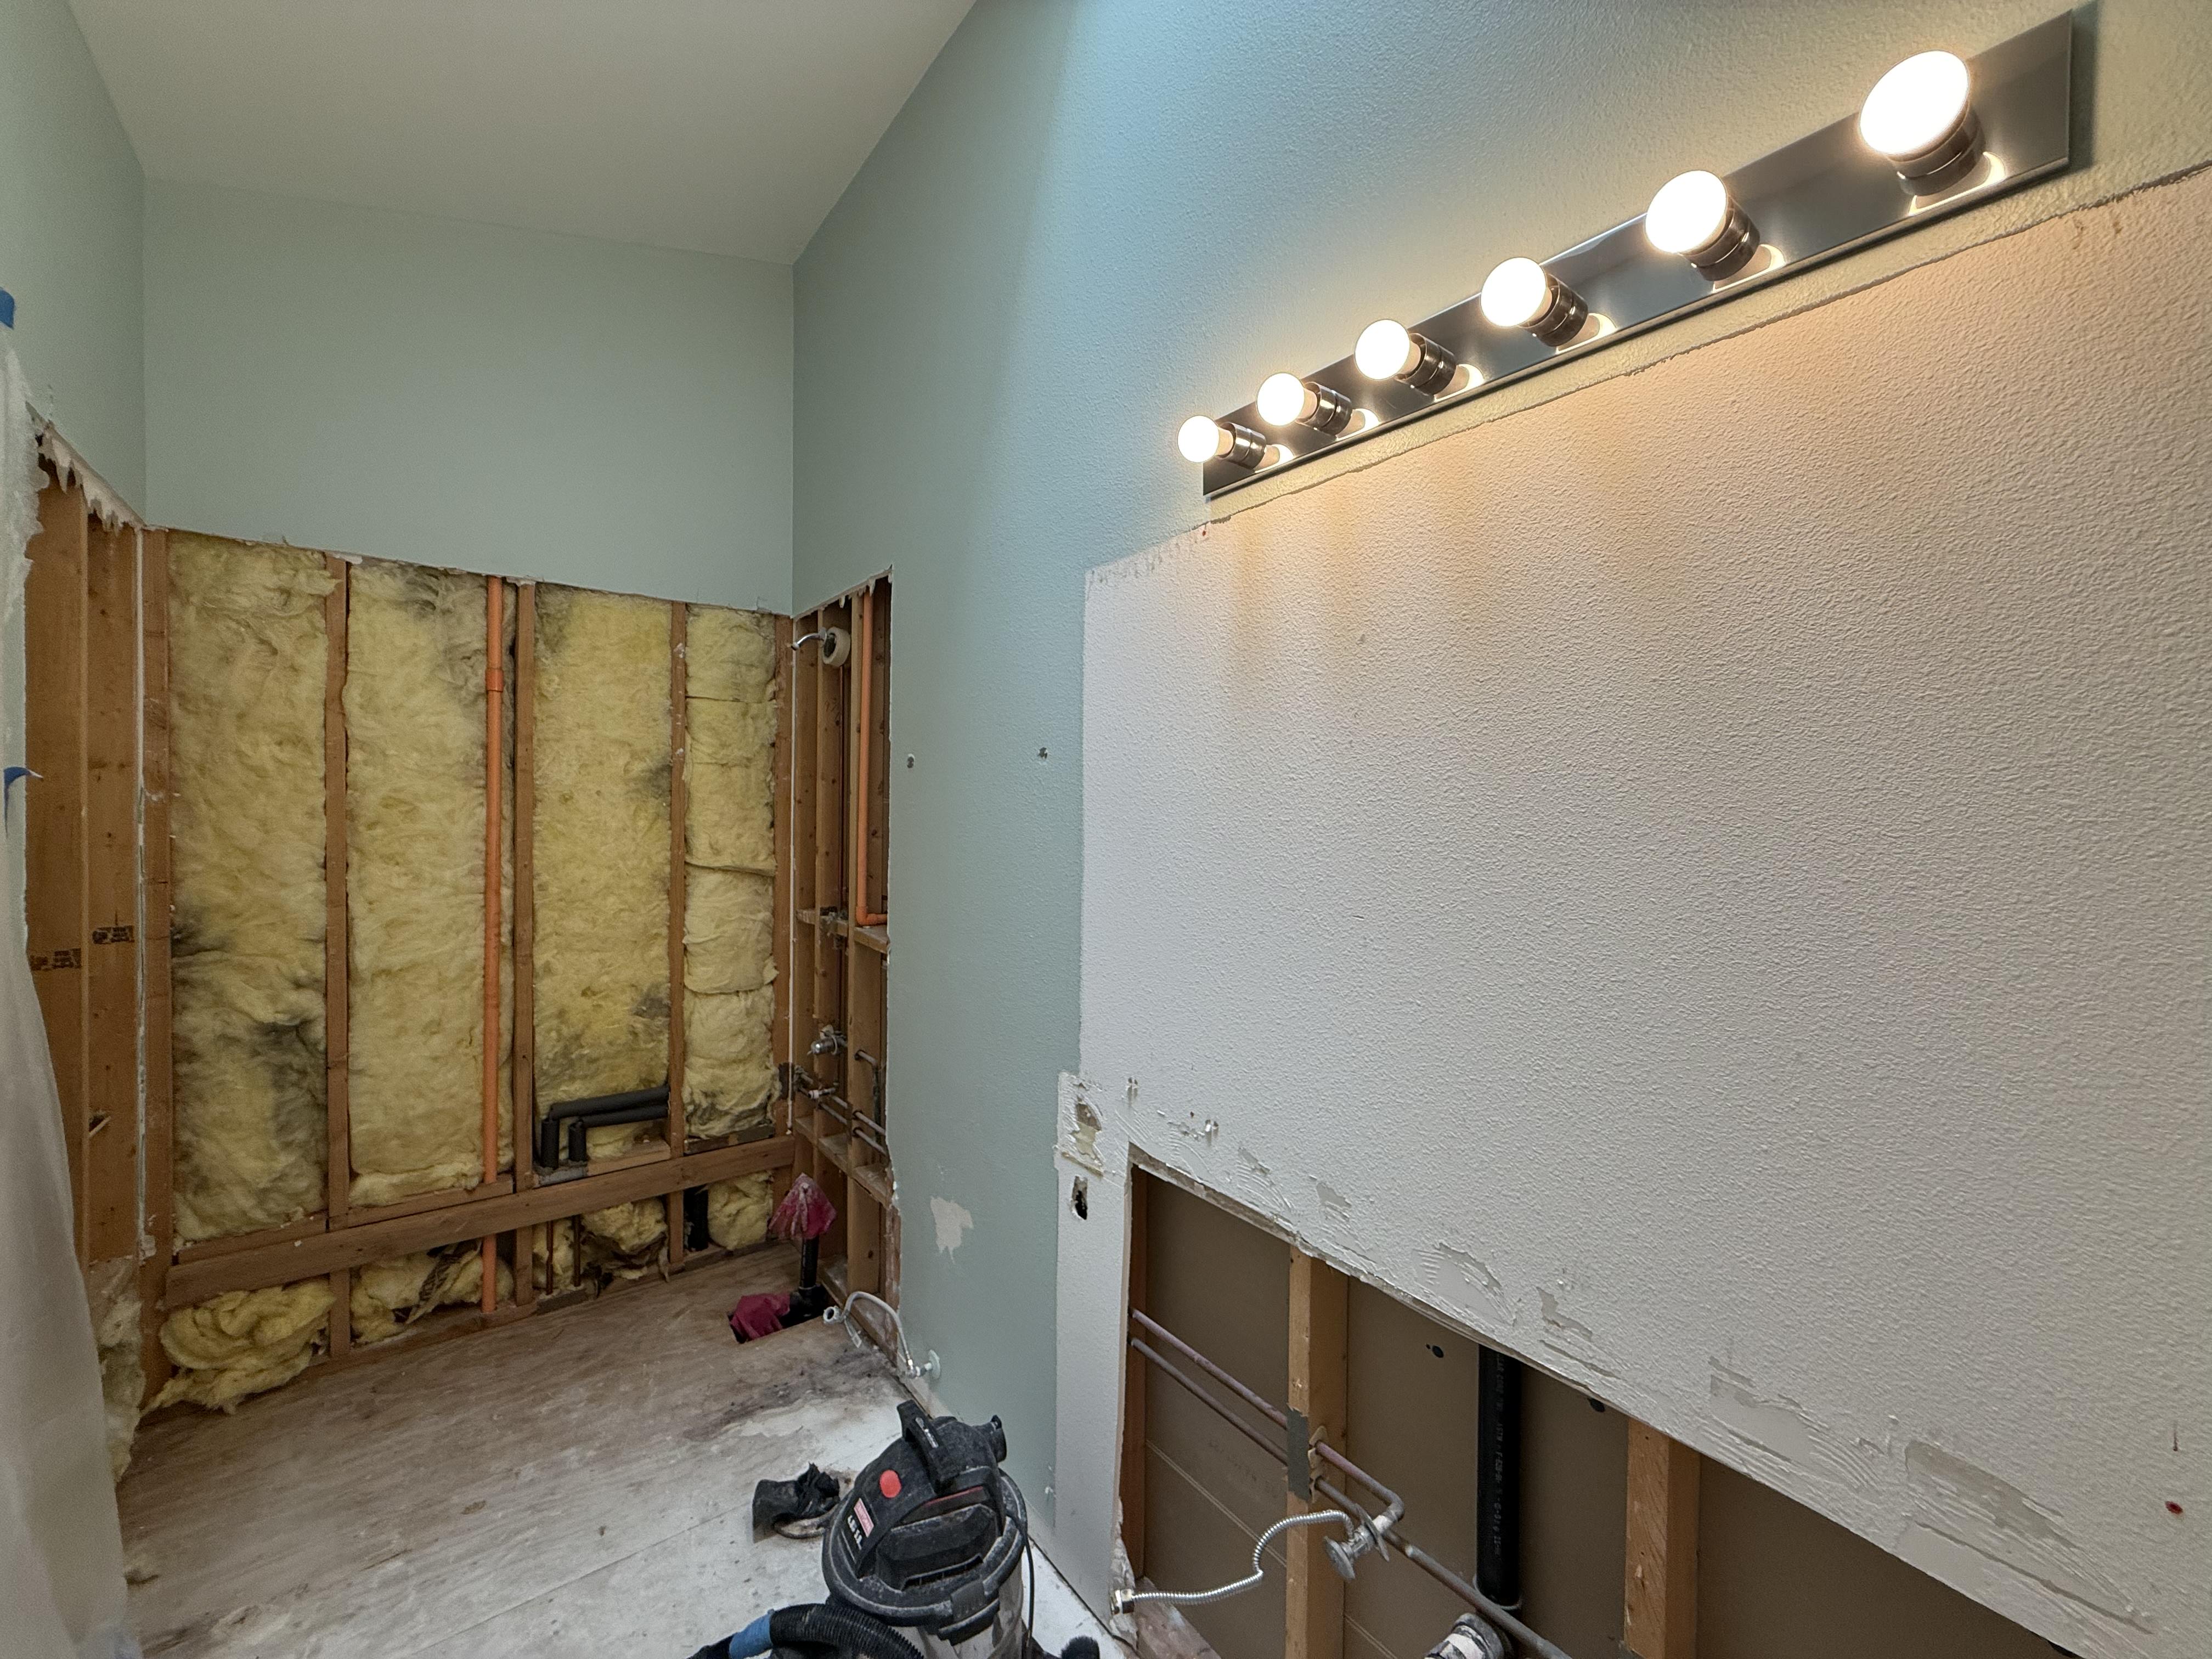
Demo and rough work
We ran standard protection, removed the surround and vanity, then opened the wet walls to the studs. That let us check for soft spots, fix old penetrations, and clean up the plumbing layout. Valves and stops were replaced; electrical was brought to current code.
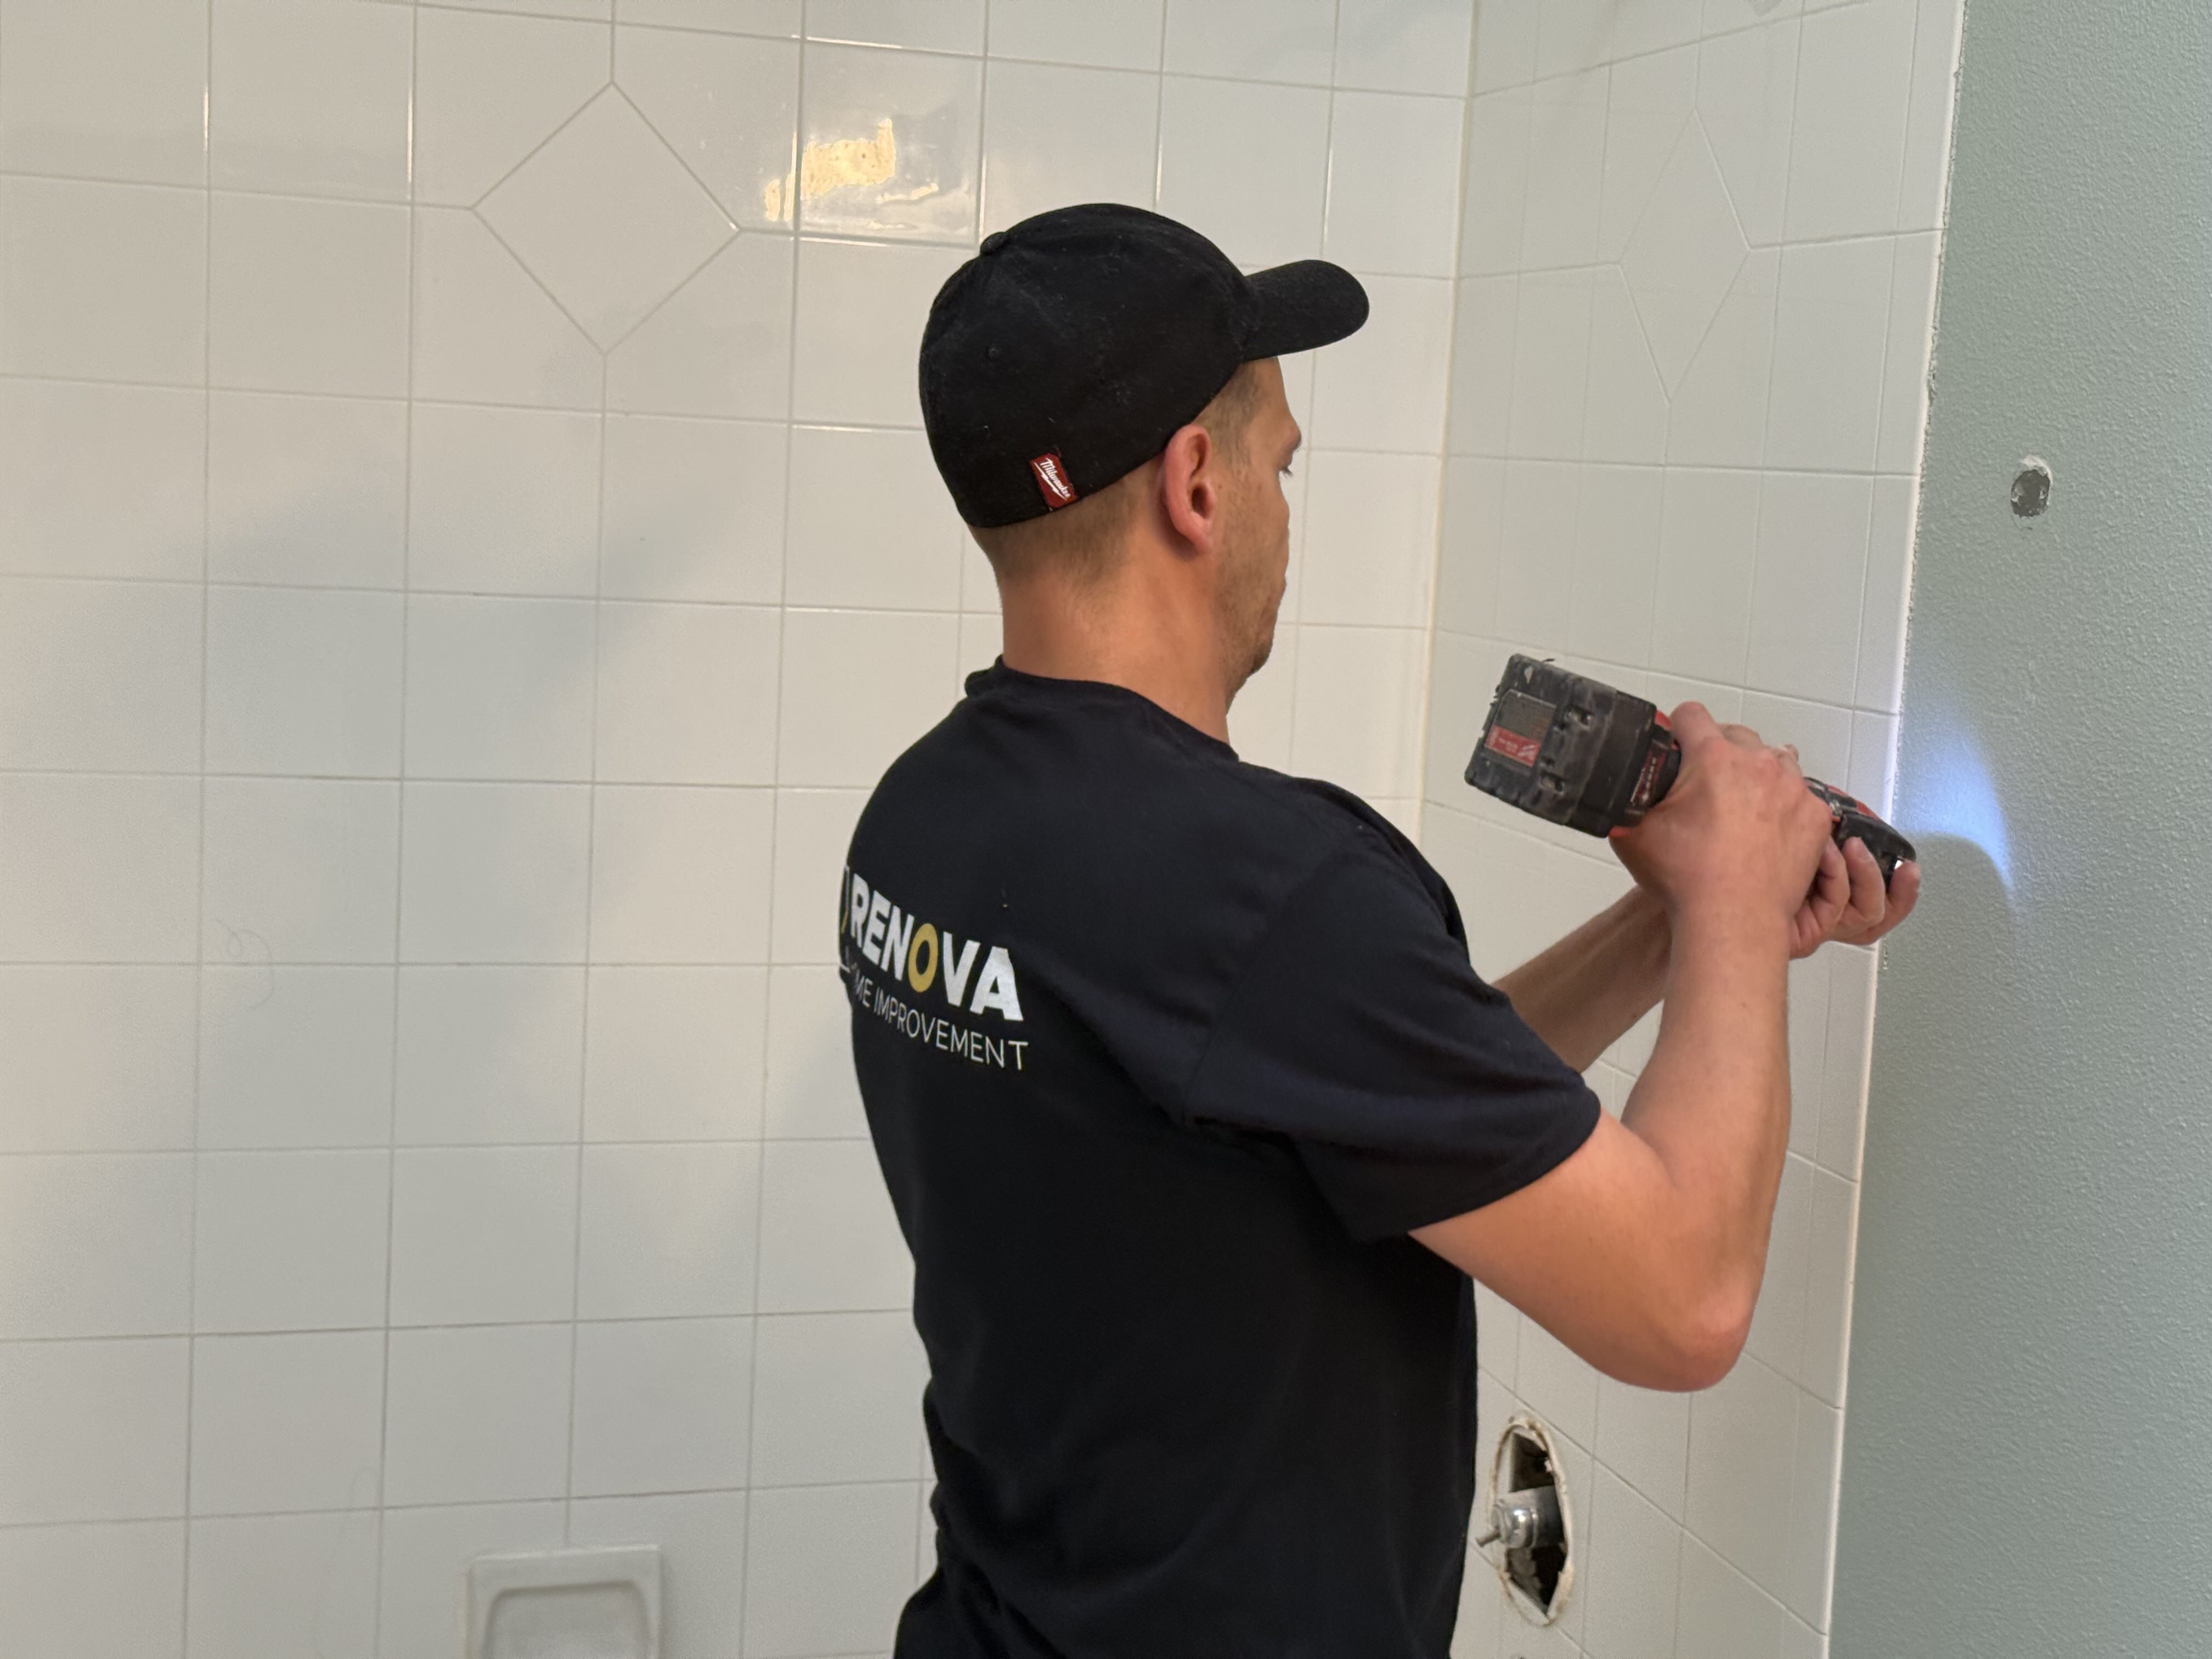
Once the surround and vanity were out, we insulated where needed, flattened studs, and installed proper backer and waterproofing in the wet zone. The goal is boring walls: straight, plumb, and dry.
Rough checklist
- Pressure test after valve replacement.
- Backer seams taped and waterproofed to spec.
- Movement joints planned at changes of plane and trim transitions.
- Electrical: GFCI device, quieted wiring to the vanity light, new fan switch verified.
Finishes we installed
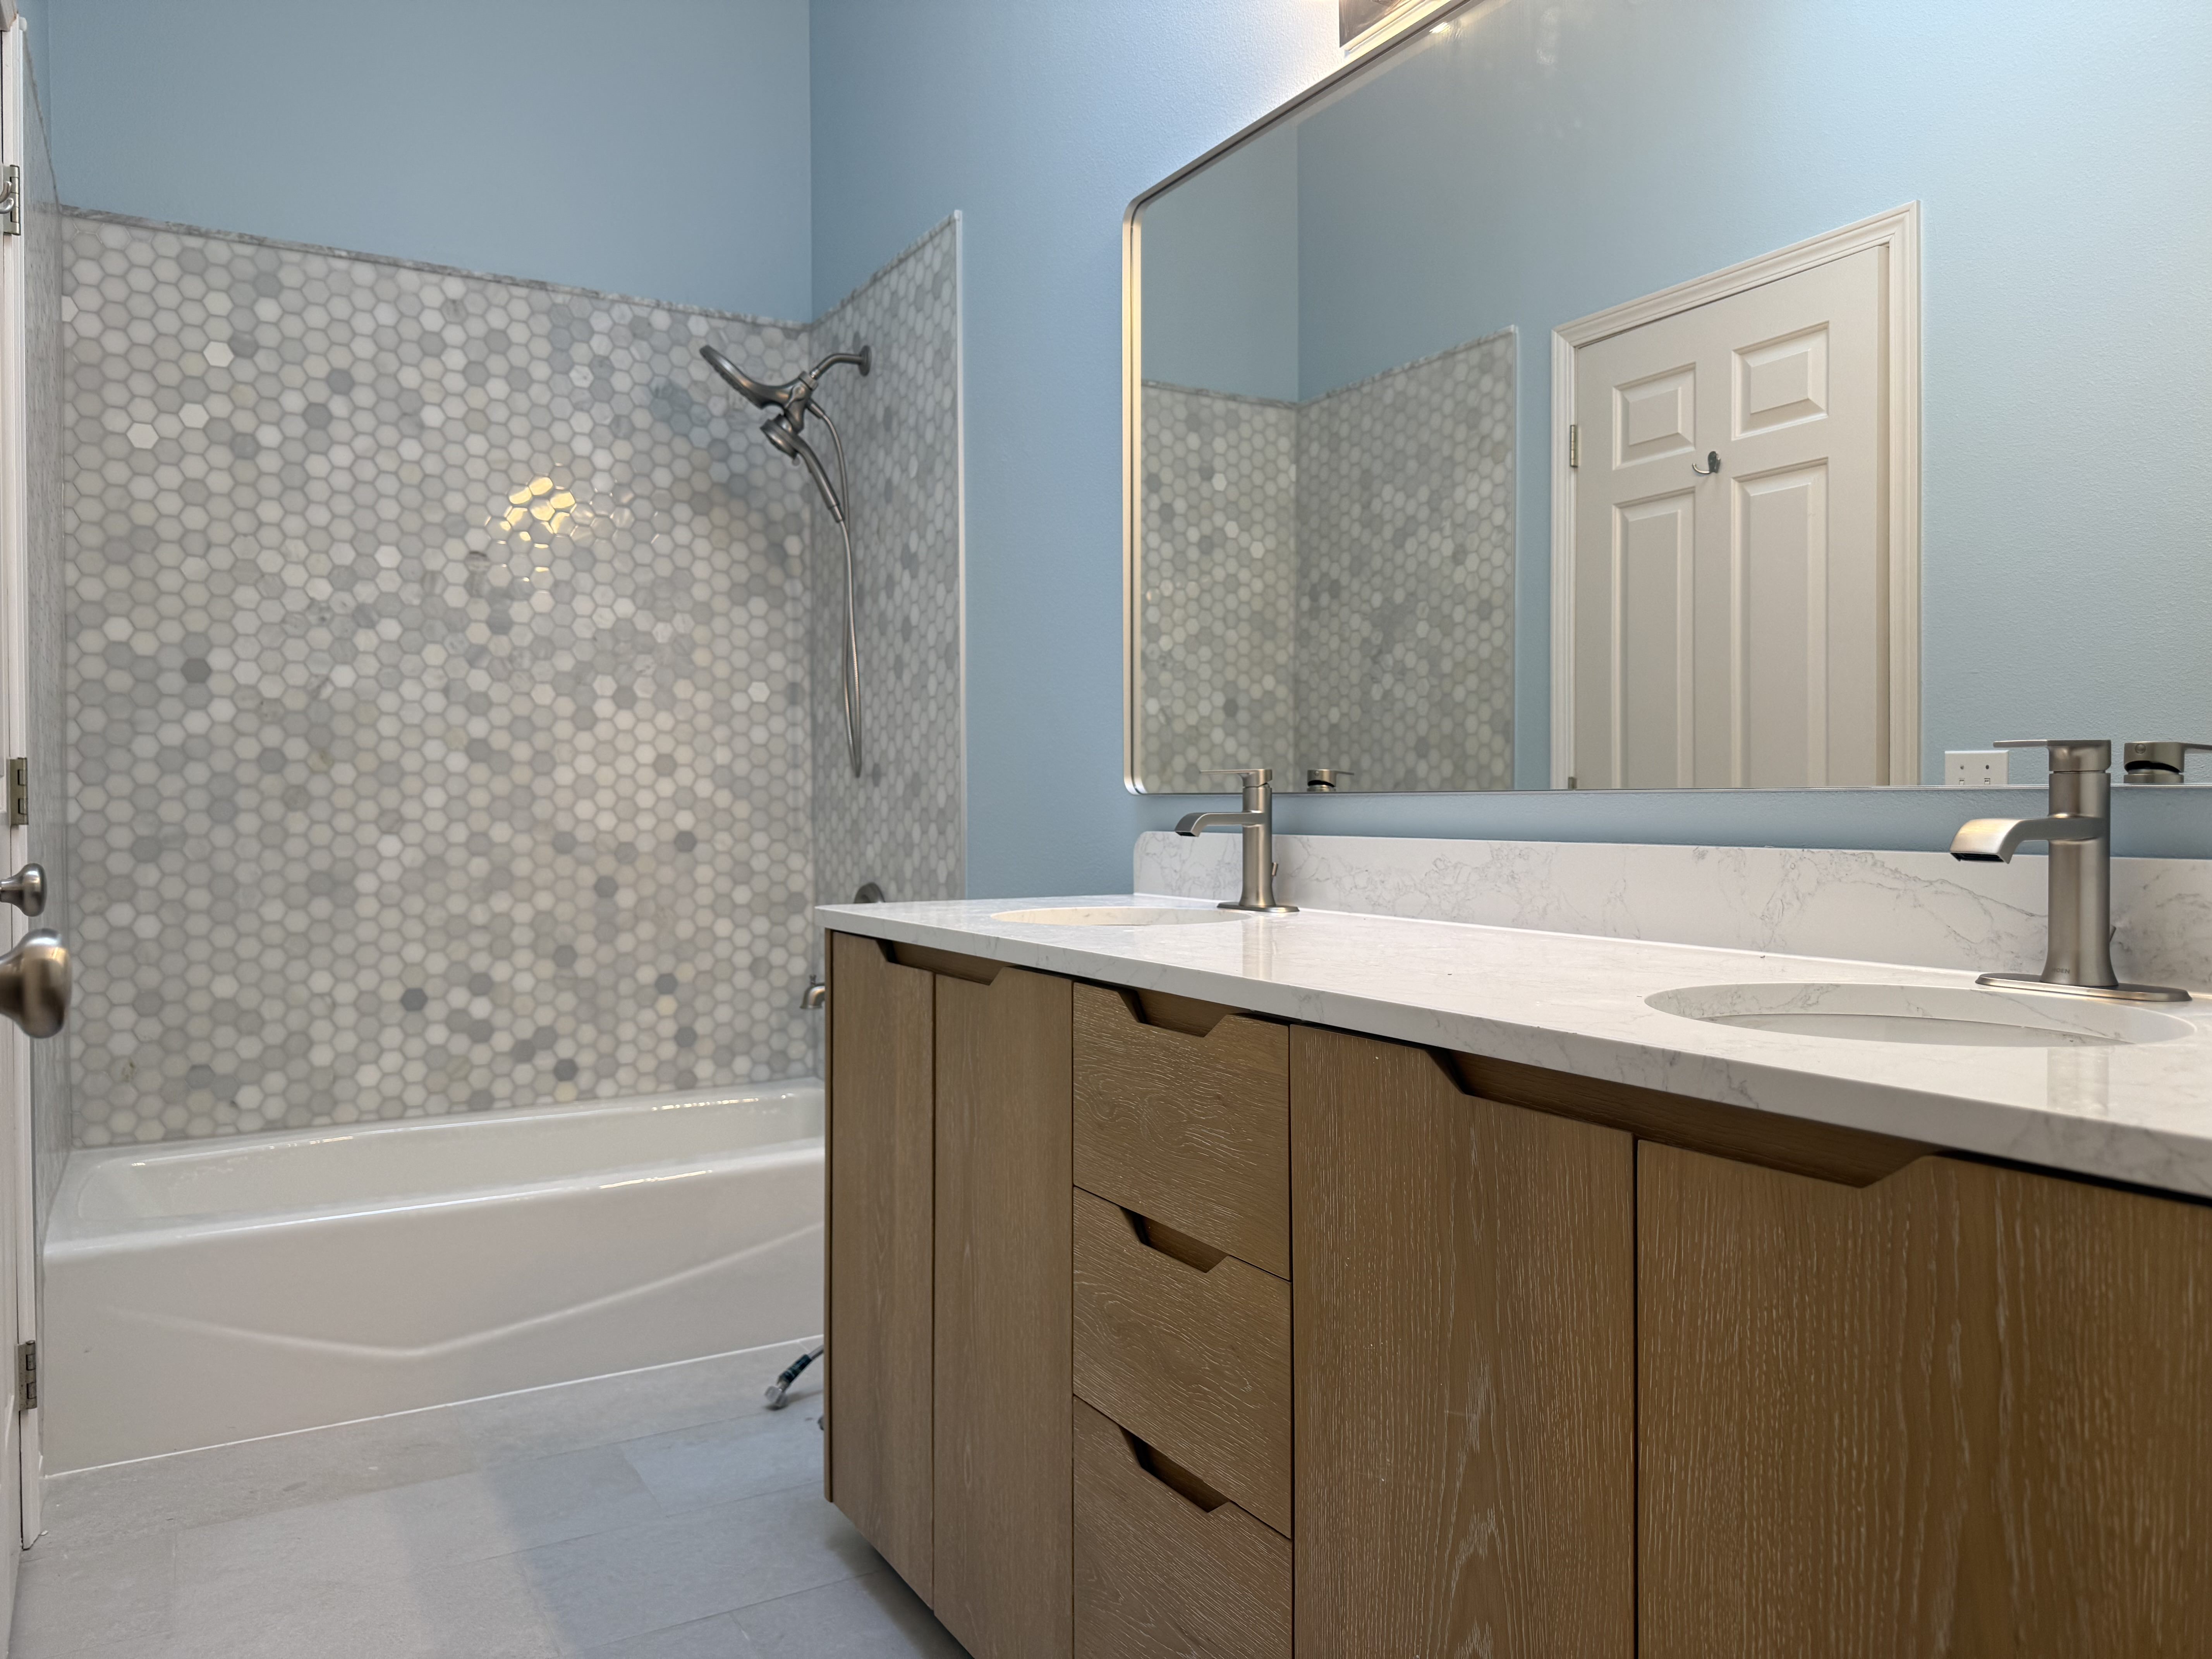
We kept the palette calm and durable. Nothing that needs babysitting.
- Tub surround: gray/white hex mosaic. Adds texture without shouting, works with the existing tub, and provides lots of tiny edges for grip when wet.
- Floor: large-format light-gray porcelain tile. Fewer grout joints, better traction, quick to mop.
- Vanity: warm oak slab-front cabinet with finger pulls (no protruding hardware). Big drawers instead of a dark under-sink cave.
- Countertop: white quartz with a short backsplash. No grout lines on the counter.
- Plumbing trim: brushed nickel — hides fingerprints and ties in with the shower hardware.
- Mirror & lighting: one large rounded-corner mirror and a refreshed linear light. Even spread, no harsh hotspots.
- Walls: the same calm blue, repainted with crisp edges and clean caulk lines.
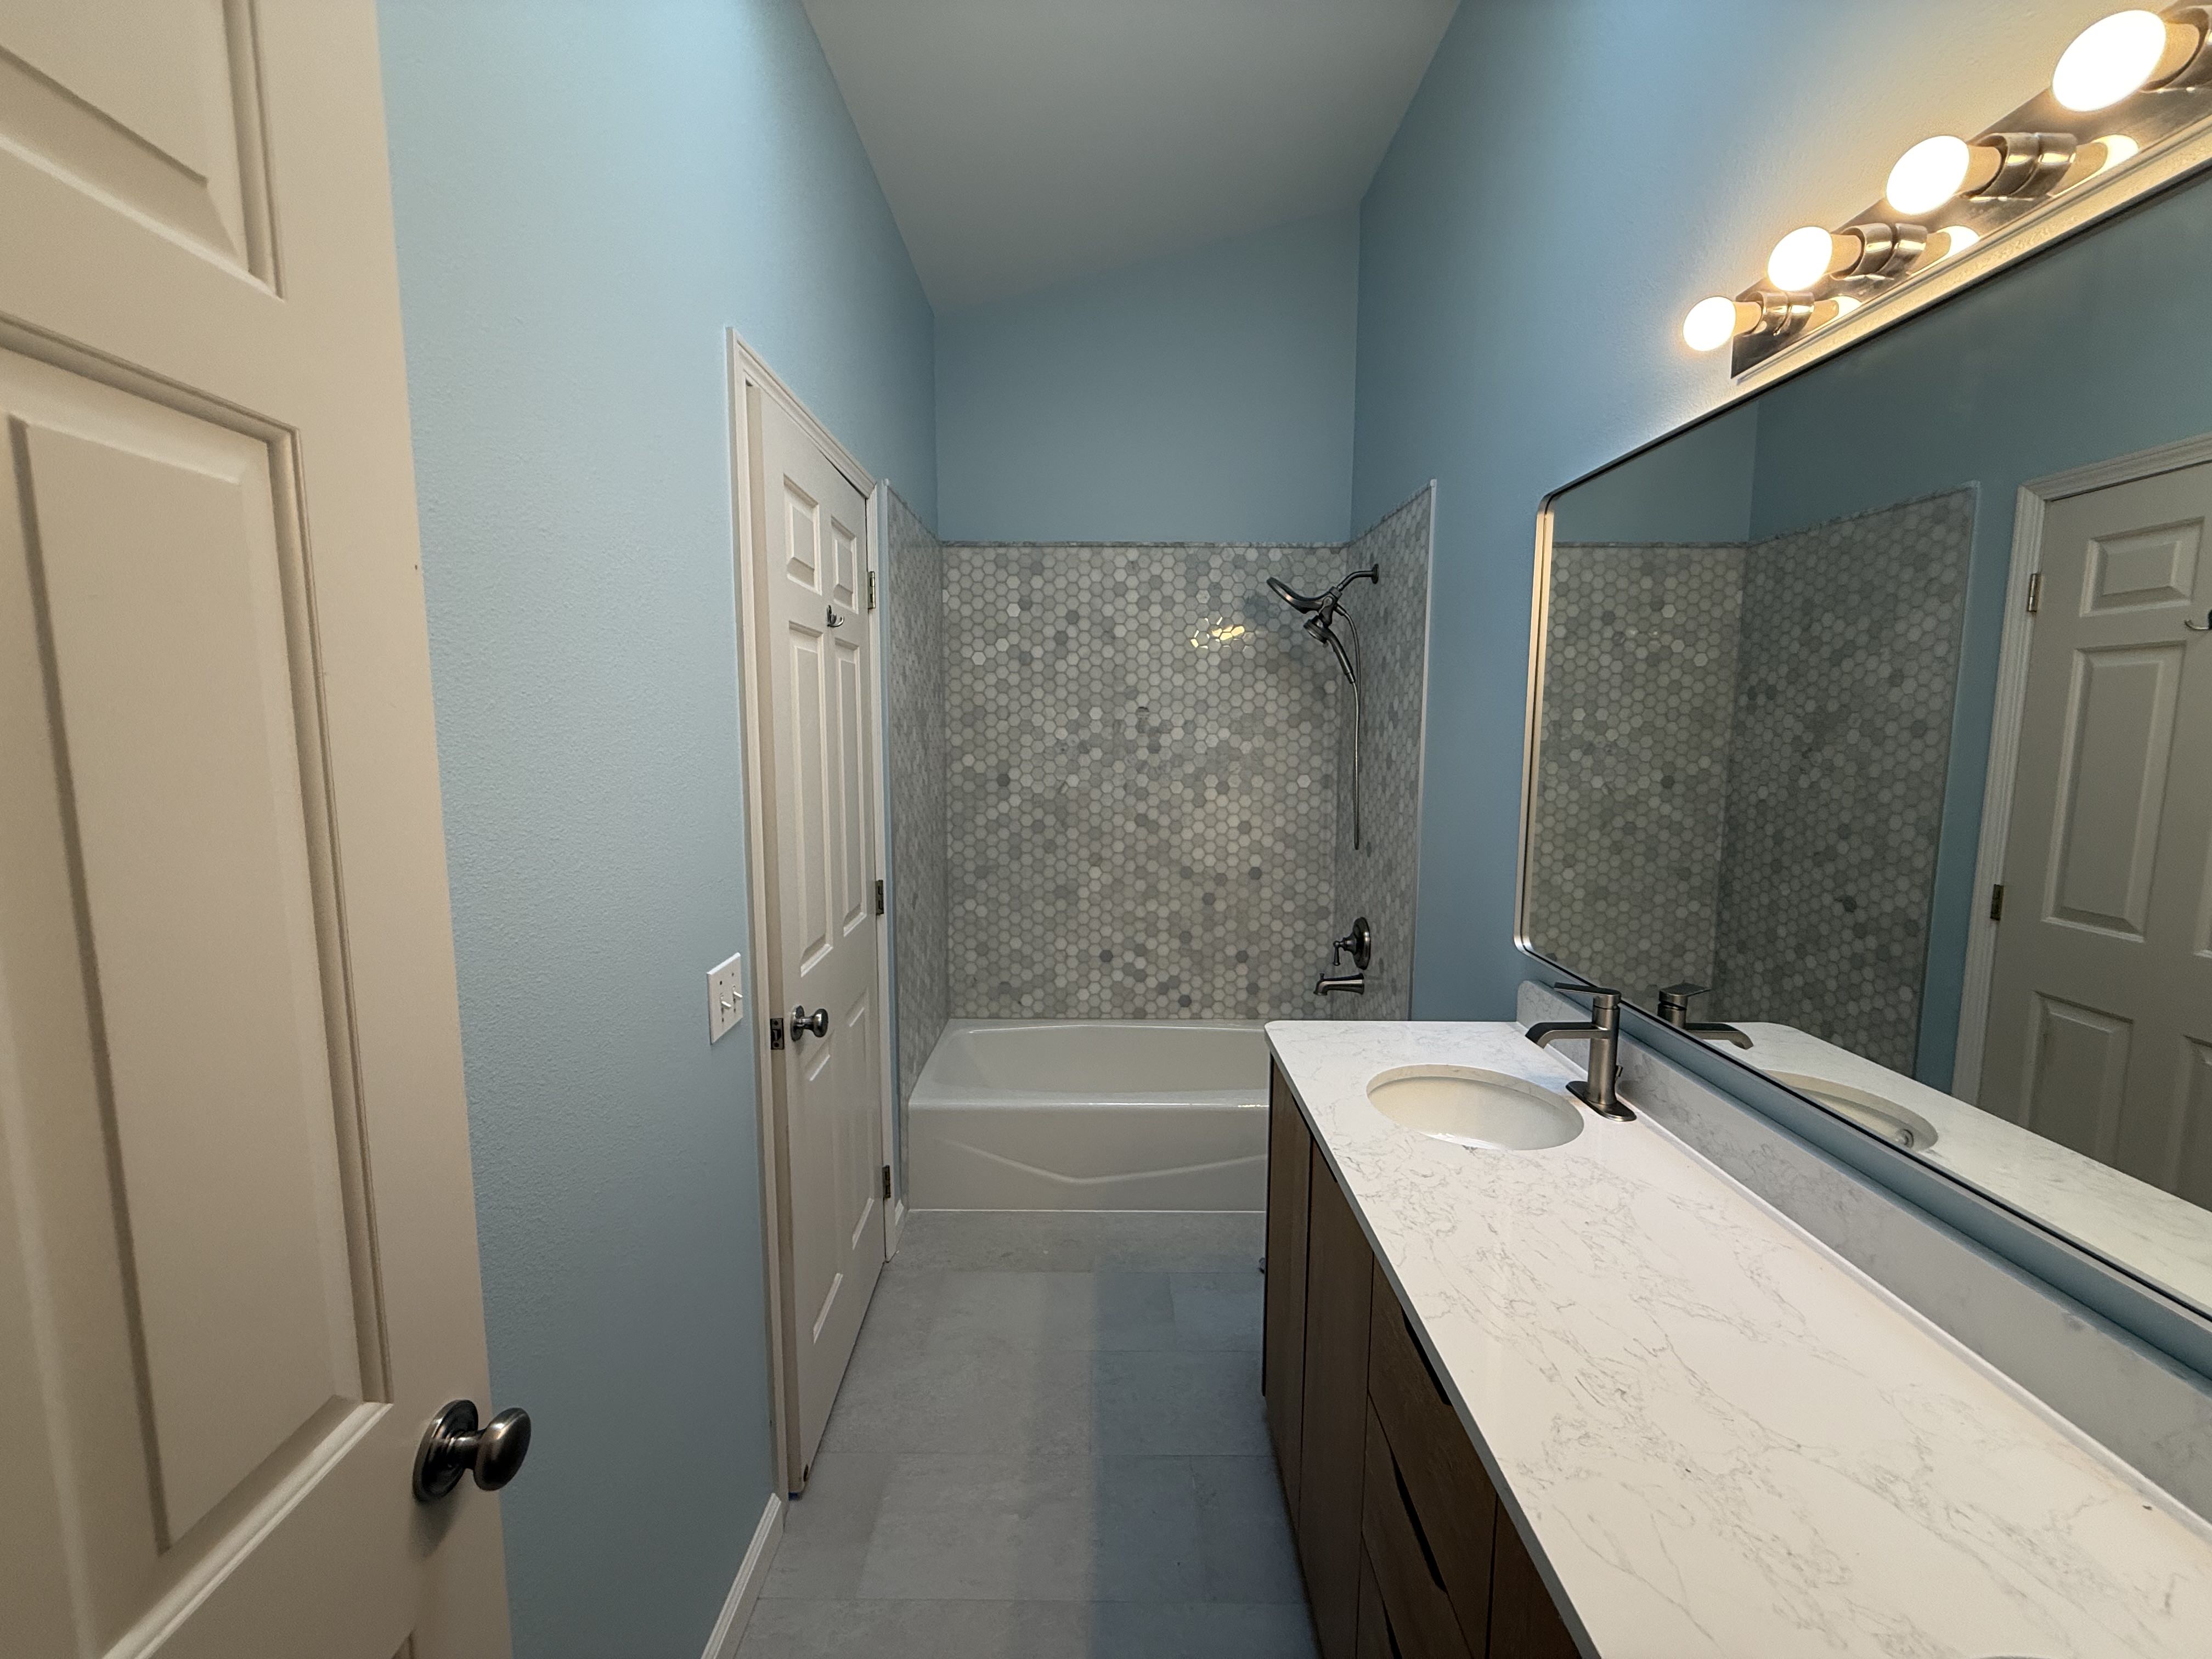
A long view from the entry shows how the pieces sit together: quiet floors, soft wall color, patterned surround doing the visual work, and the vanity staying warm without looking heavy.
Why the room feels better now
- Less grout to scrub. The old tiled countertop is gone; big floor tile means fewer joints.
- Storage that actually works. Deep drawers take hair dryers and cleaners upright; finger pulls don’t snag towels.
- Warm + cool balance. Oak vanity warms the space; gray floor and hex tile keep it calm and clean.
- Kept the tub, spent on the touch points. Holding the tub protected budget and time; money went into valves, tile setting, quartz, and fixtures you use daily.
- Waterproofing done right. Flat, plumb backer and continuous membrane. Caulk where there should be caulk; grout where there should be grout.
Scope in plain terms
- Protection and selective demo; haul-out.
- Rough plumbing (new stops/valves, cleaned diverter location) and GFCI/electrical tidy-up.
- Backer and waterproofing in the wet zone; straightening framing for a true tile plane.
- Tile: hex mosaic surround; large-format porcelain floor; movement joints at all transitions.
- Casework and tops: oak slab-front vanity; white quartz with short backsplash; under-mount bowls.
- Fixtures and trim: brushed-nickel widespread faucets; handheld shower; new stops and supplies.
- Mirror, lighting, paint, silicone, punch, full clean.
Timeline and disruption
With decisions made and materials on site, this kind of keep-the-layout bath typically runs about four weeks end to end in Seattle: protection & demo → roughs → waterproofing & tile → casework & tops → trim-out/paint → punch. We sealed the space during messy phases and kept daily cleanup tight so the rest of the house stayed livable.
Extra photo angles (alt text for accessibility)
The same set shown above, listed with descriptive alt lines:
Need more space?
Need more storage, a real office, a media room, or a bedroom that meets egress? Even a rentable ADU? We lay it out to match how you live and what you want to spend. We work in Ballard, Queen Anne, Fremont, Magnolia, Green Lake, and West Seattle, and we hand you a dry, quiet space that passes inspection and is ready to use.
Closing note
Same footprint, better bones, and finishes that don’t fight you. That’s it. If you’re in Ballard or nearby and want a bathroom that holds up and stays easy to clean, the photos here show the level of work. For scheduling or a clear estimate, see the Seattle bathroom remodel page and we’ll walk you through next steps.
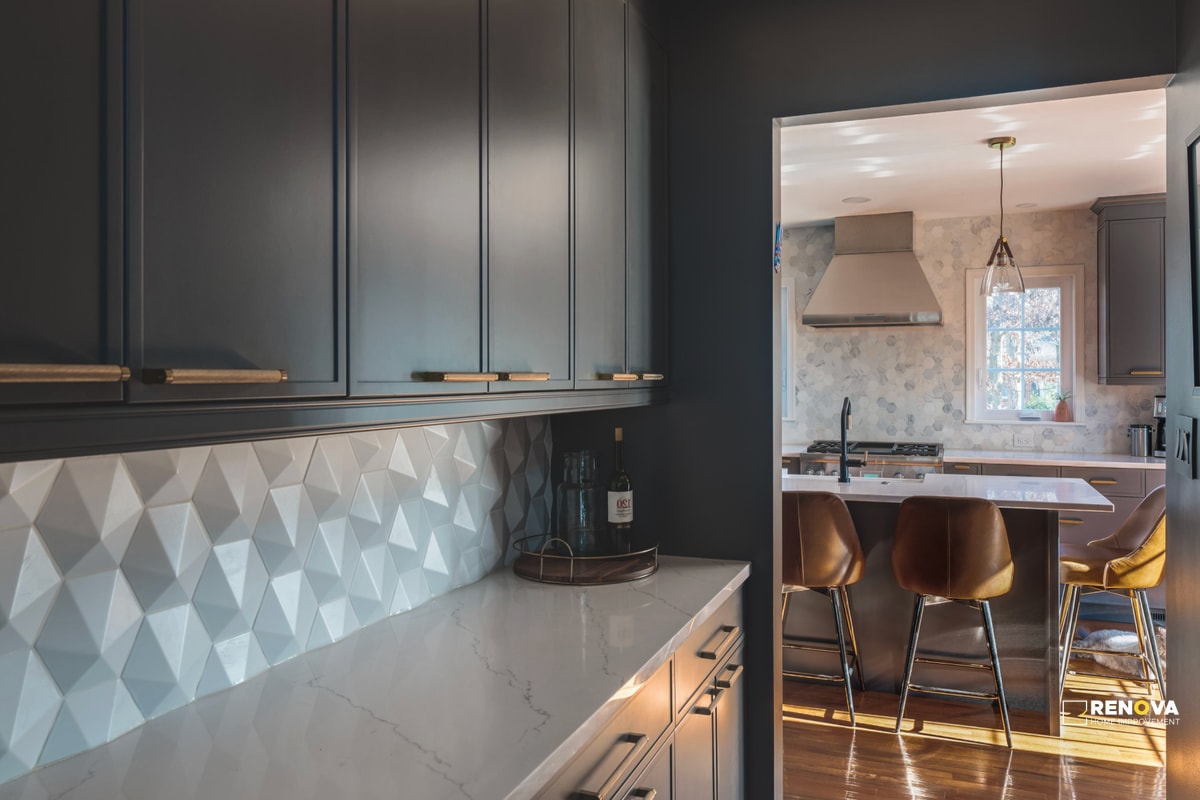
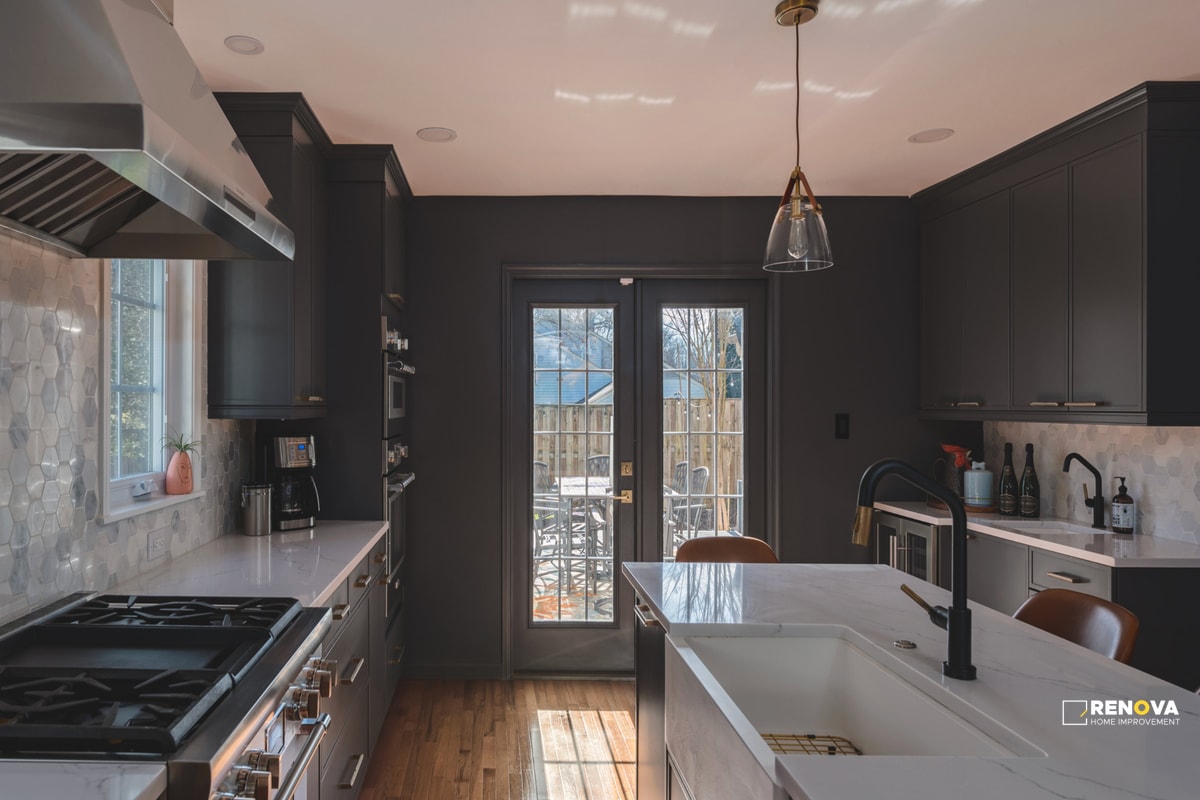
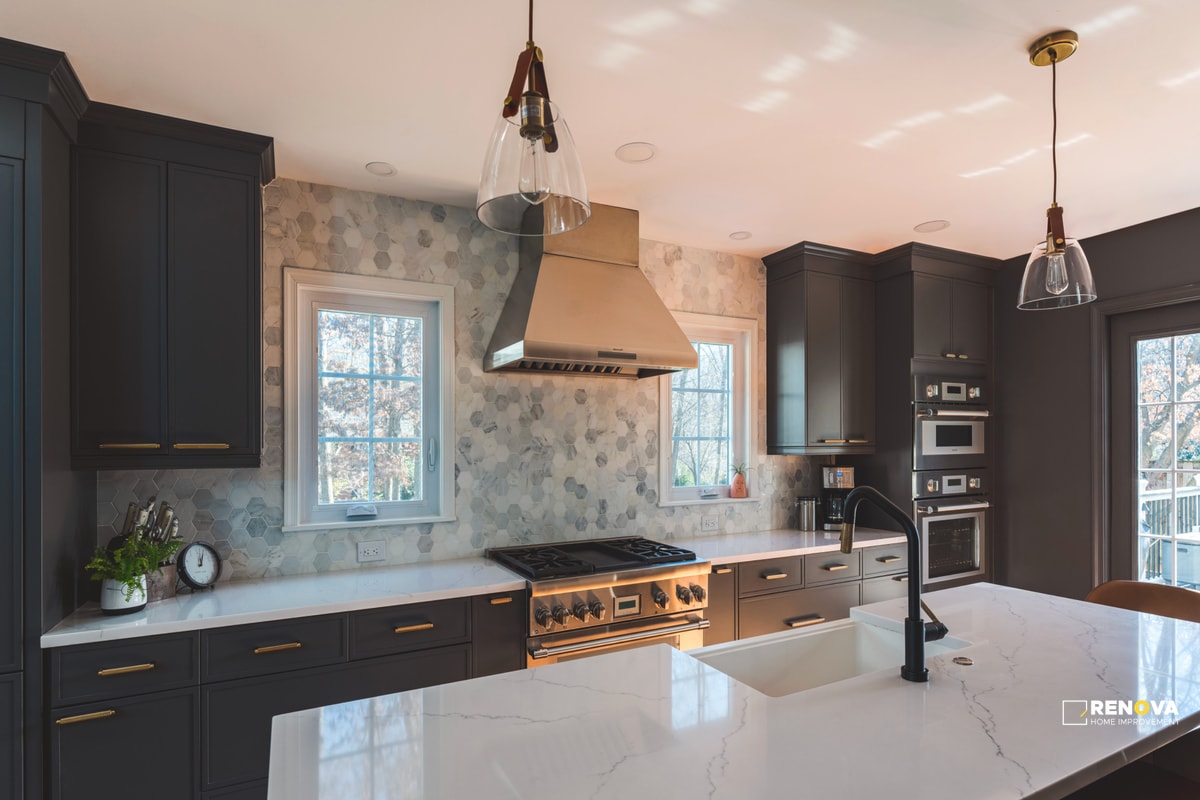
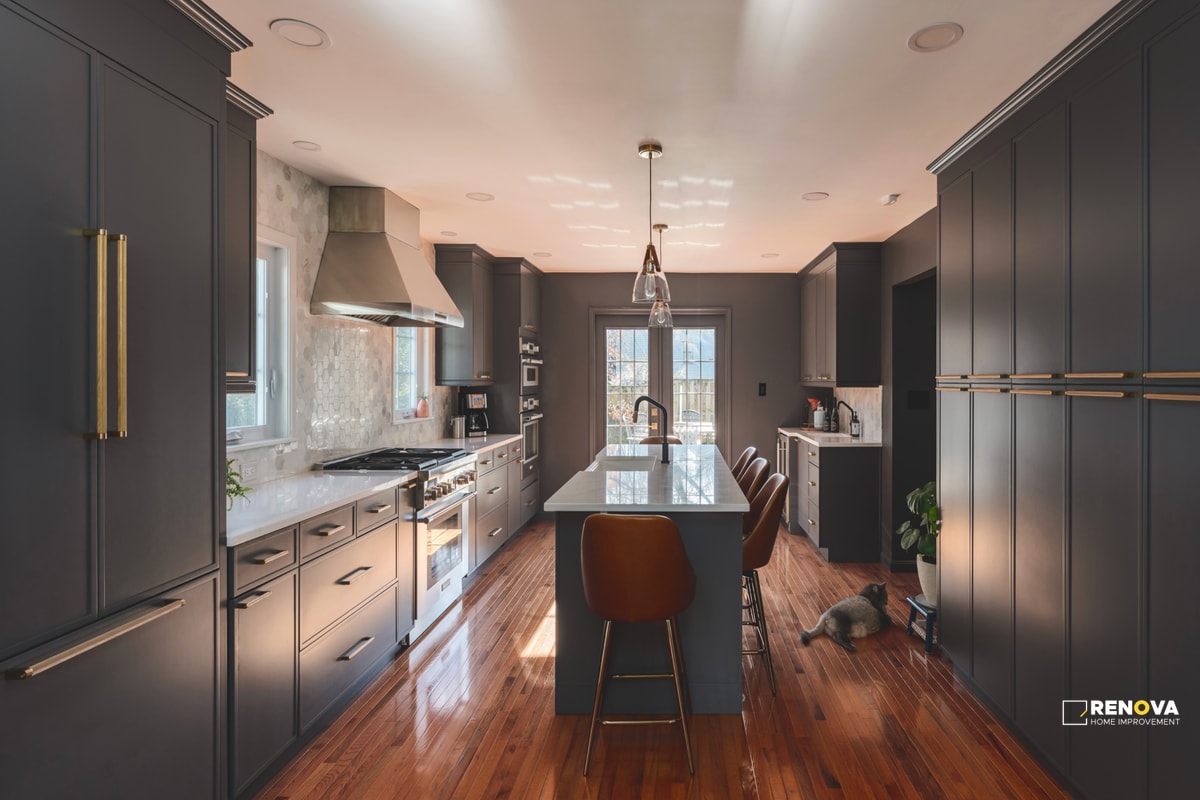
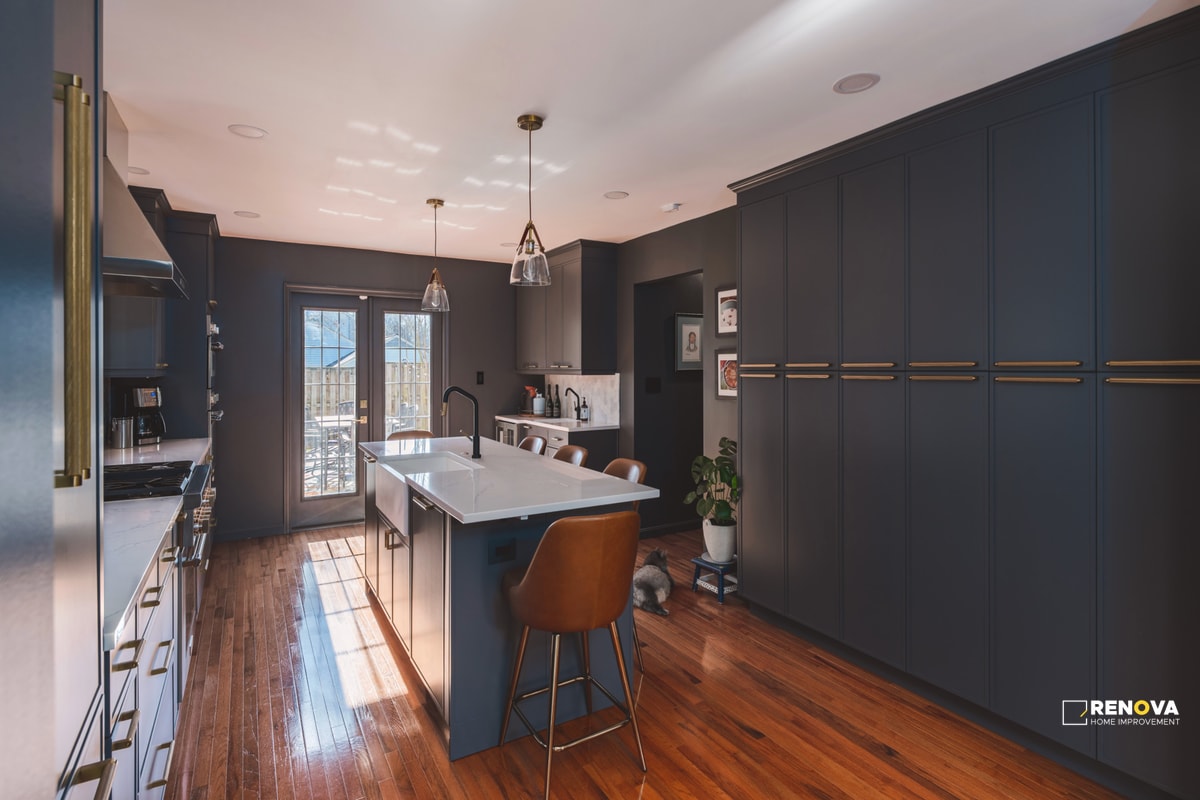
Transitional high-end kitchen remodel 2025
Bellevue kitchen, start to finish. We demoed to studs, corrected framing as needed, rewired to current code with GFCI where required, and replumbed for sink and dishwasher. The new layout keeps the work triangle tight and opens sightlines to the living area. Cabinets are frameless and dark, built with plywood boxes and soft-close hardware. White quartz counters and a full-height geometric tile splash add contrast and easy cleanup. A 36 inch range with a custom hood anchors the cooking wall. Stainless refrigerator and dishwasher balance the palette. The center island brings a prep sink and seating. We refinished the wood floors, verified appliance clearances, templated and set tops, installed and leveled the cabinets, set appliances, and closed the punch. This one is built for daily cooking and fast wipe-downs.
Book a kitchen walkthrough →


Project snapshot
- Location – Bellevue single-family home
- Timeline – 11 weeks, start to finish
- Scope – demolition to studs, electrical to code, plumbing updates, cabinet replacement, new countertops, full splash, flooring refinish, appliance set, final punch
- Goal – a durable, modern kitchen that cooks well and cleans fast
What changed and why it matters
- Function first – work paths are shorter, prep space is bigger, and the island carries the load for seating and storage.
- Light and contrast – dark cabinetry grounds the room while white surfaces reflect light. The space reads clean without feeling cold.
- Daily durability – plywood boxes, quality hardware, quartz counters, and a tile splash that handles steam and oil.
- Service access – shutoffs, outlets, and appliance clearances are reachable. Future swaps stay simple.
Cabinetry and storage
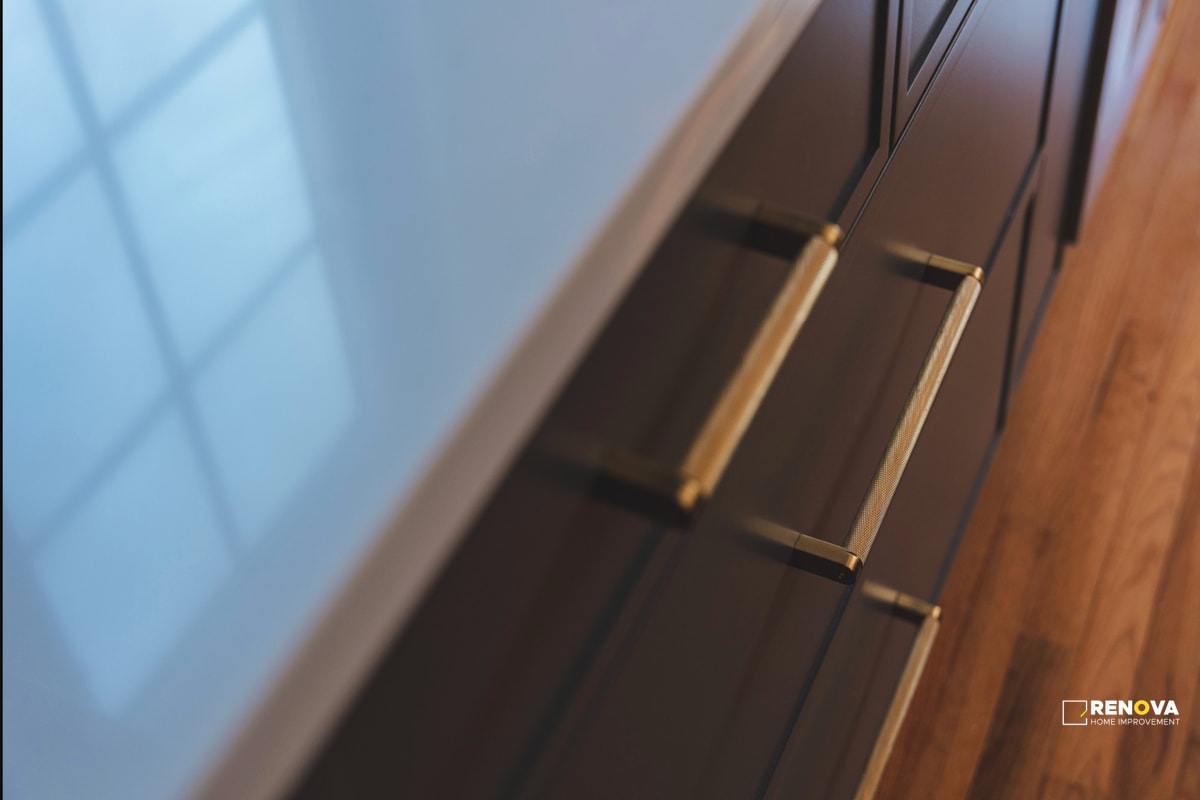
- Frameless dark cabinets – plywood boxes for rigidity, edge-banded doors and drawer fronts for a tight look.
- Soft-close throughout – slides and hinges tuned so drawers close straight and doors keep even reveals.
- Smart interiors – tray dividers near the range, trash and recycle pull-outs by the sink, deep drawers for pots under the cooktop zone.
- Tall storage – pantry organization with full-extension pull-outs keeps staples visible and easy to reach.
- Finish details – fillers and scribes resolve out-of-square walls, crown and light rail finish the lines, and end panels tie into the island seating.
Countertops and splash
- White quartz – consistent color, low maintenance, and the right mix of sheen and scratch resistance for a family kitchen.
- Full-height tile splash – geometric tile adds pattern without visual noise. The grout is sealed and easy to refresh.
- Seam planning – seams kept out of the eyeline and pulled tight. No seams through sink or cooktop cutouts.
- Edges – eased for comfort and chip resistance. Corners are slightly radiused to protect pockets and hips.
Appliances and ventilation
- 36 inch range – enough output for weeknight sears and weekend batches. Controls are clear and reachable.
- Custom hood – proper capture zone and ducting sized for the appliance. Make-up air considered so the door doesn’t slam when the fan runs.
- Stainless fridge and dishwasher – efficient, quiet, and easy to wipe. Panels around the fridge are scribed tight so crumbs don’t collect.
Electrical, lighting, and code work
- Rewire to current code – GFCI where required and correct circuits for range, dishwasher, microwave, and fridge.
- Layered lighting – cans for general light, pendants for the island, under-cabinet task lighting for prep. Warm color temp keeps the room comfortable at night.
- Switching and dimming – zones make sense. You can dim task lights without losing overall visibility.
Plumbing and fixtures
- New supplies and drains at the sink – clean runs, proper slope, and access that doesn’t steal storage.
- Prep sink at the island – speeds cooking and keeps traffic out of the main sink when more than one person is working.
- Quiet disposal and air gap – installed to spec, tested under load, and mounted to minimize vibration.
Flooring and transitions
- Wood floors refinished – color chosen to bridge the dark cabinetry and light counters. Finish system selected for abrasion resistance and spot repair.
- Clean thresholds – transitions to adjacent rooms are flush and tight so chairs don’t catch and vacuuming stays easy.
How we installed it
- Measure and layout – walls mapped, floors checked for flat, studs located. Shop drawings issued and approved before ordering.
- Materials ready – we scheduled demo only after cabinets, panels, fillers, and hardware were on site or confirmed at the yard.
- Site protection – floors covered, paths padded, dust contained. Pets considered and doors closed behind us.
- Set lines and hang uppers – level reference snapped, uppers hung first, bases set plumb and square, tall units anchored.
- Scribe and tune – fillers and panels are scribed to walls and floors. Doors and drawers adjusted until reveals run even.
- Template and tops – laser templating captured walls and corners within millimeters. Counters were cut on CNC, dry-fit, then set and sealed.
- Appliance set and test – clearances verified, connections made cleanly, and every function checked before the final wipe-down.
Day-to-day gains the owners feel
- More usable prep space – the island handles chopping, baking, and serving without blocking traffic.
- Faster cleanup – slab splash and quartz counters wipe down in minutes. Drawer organization cuts the hunt time for tools.
- Better cooking rhythm – the range, fridge, and sinks sit in a simple triangle. You can work solo or with a helper without bumping elbows.
- Quieter room – soft-close hardware and refined ventilation lower the noise floor.
Budget and choices that moved the needle
- Spend on structure – plywood cabinetry and quality hardware are worth it. They hold alignment and take daily use.
- Save with smart finishes – quartz brought durability and look without fragile maintenance demands.
- Pick lights once – a consistent color temperature ties the room together and saves on change-outs later.
- Design before demo – drawings, appliance specs, and fixture counts were locked before we opened walls. Fewer surprises, faster install.
What we’d repeat every time
- Plan seams before cutting – keep them out of sightlines and match pattern flow. The result looks custom because it is.
- Leave service access – shutoffs, outlets, and filters should not require gymnastics.
- Template after cabinets are tuned – tiny adjustments at install produce perfect countertops and a clean caulk line.
- Close with a punch – walk the space, list small fixes, complete them, and hand over care notes and a written labor warranty.
Thinking about your own kitchen
- Start with how you cook and clean. The materials follow the habits.
- Confirm appliance sizes and vent requirements early. Clearances drive the cabinet plan.
- Choose a cabinet line that can scribe tight and hold level in your house. Old floors and walls need real tuning.
- Put dollars into the parts you touch daily – hardware, drawers, lighting, counters.
Ready to plan your remodel in Bellevue or nearby cities? We’ll measure, draw, give you options, and schedule work when materials are truly ready. Simple, clean, built to last.
See kitchen remodel services
RENOVA Contractors LLC – About the Flooding in Seattle and the Green River Levee Breach
This is not a normal blog post for us.
This is more of a “hey, this is messed up and we see you” kind of post.
If you’re in Seattle, Kent, Renton, Auburn, Tukwila, or anywhere close to the Green River, you already know what the last few days have been like. Rain that wouldn’t stop. Alerts going off on phones. Streets you’ve driven a hundred times suddenly underwater. Basements filling. Crawl spaces turning into swamps.
At RENOVA Contractors LLC, we just want to say it plainly – we’re really sorry this is happening. Not in a polished PR way. Just honestly. Flooding isn’t “inconvenient.” It’s disruptive, stressful, and for some people right now, genuinely scary.
What Actually Happened – Straight Timeline
After several days of heavy rain across Western Washington, rivers were already high and the ground was completely saturated. Storm drains were overwhelmed. Sump pumps were running nonstop. Everything was on edge.
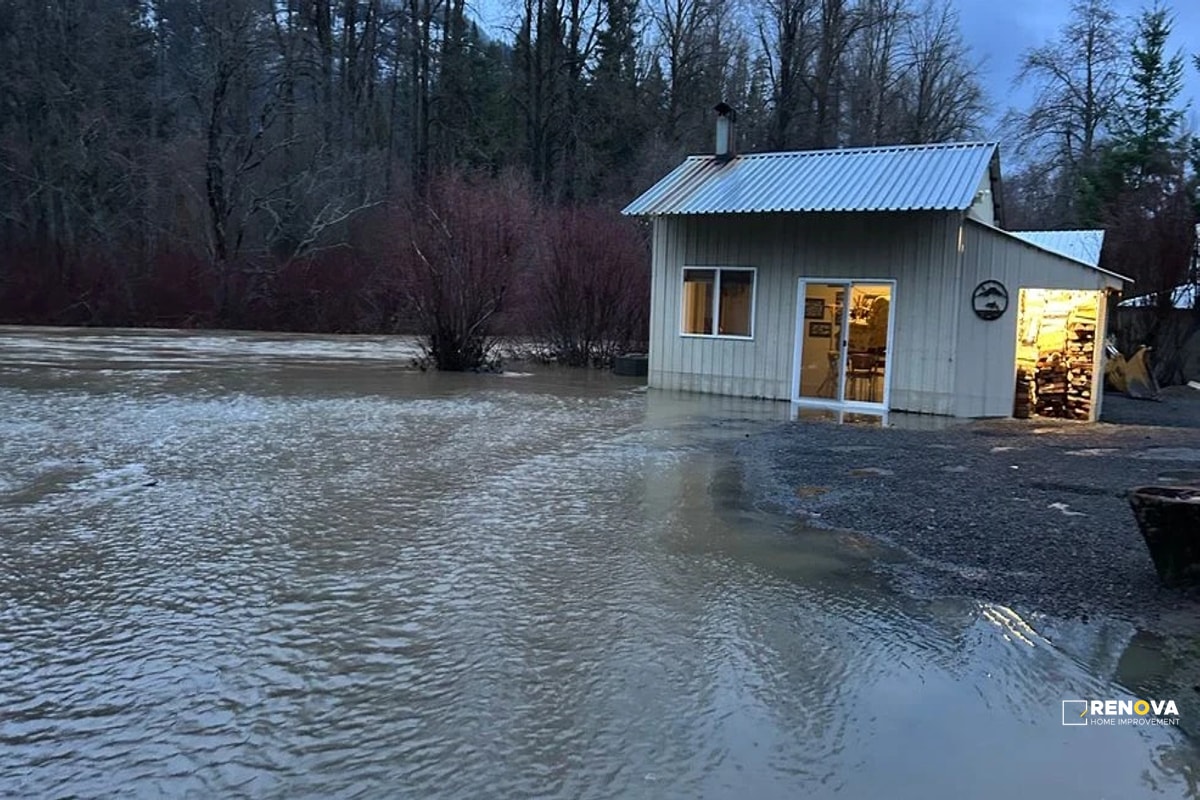
Then early Monday morning, December 16, Seattle time, the Green River levee near Tukwila breached.
Not a warning-level issue. Not a slow overflow. A real breach.
Water pushed through the levee and spread into surrounding low-lying areas along the Green River floodplain. That’s when evacuation notices went out fast. That’s when parts of Tukwila, Kent, Renton, and nearby areas were told to get out. Roads closed. Businesses shut their doors. People scrambled to move cars, equipment, whatever they could.
That breach changed everything for South King County.
What It Looks Like Right Now
As of now, some water levels have started to drop, but the situation is still unstable. The soil is fully saturated, which means even more rain can cause problems again quickly. Flooding isn’t always dramatic river water either. A lot of damage we’re seeing comes from groundwater pressure and drainage systems that just couldn’t keep up.

Especially in:
- South Seattle
- Kent valley areas
- Older parts of Renton
- Auburn flood-adjacent neighborhoods
- Industrial and warehouse zones near Tukwila
Basements that never flooded before suddenly did. Crawl spaces filled slowly and quietly. Floor drains backed up. Water came in through foundation walls. The kind of damage that sneaks up on you.
If You’re Dealing With This Right Now
If you’re tired, overwhelmed, or just pissed off, that’s normal.
Flood damage messes with your head. You’re trying to make decisions while stressed, wet, cold, and worried about money. Insurance calls feel endless. Everyone has an opinion. And somehow, people still expect you to function like normal.
A few things that matter right now:
- Follow evacuation orders if you’re in one. No job or house is worth your safety.
- Document damage when it’s safe. Photos, videos, water lines, soaked materials.
- Be cautious of contractors who show up uninvited and push hard.
- Don’t rush permanent repairs before things are fully dried and assessed.
We’re contractors saying that. Rushing is how problems get buried, not solved.
About the Green River Levee Breach – Why It’s a Big Deal
Levee breaches don’t behave like normal flooding. When water breaks through, it spreads out and settles into places it’s not supposed to be. Even after visible water recedes, moisture stays behind in soil, crawl spaces, wall cavities, insulation, and subfloors.
That’s why flood damage often shows up later.
We’ve seen plenty of cases where someone thought they were “mostly okay” and then weeks later dealt with mold smells, soft flooring, warped framing, or insulation that never dried properly.
This is especially true for older homes across Kent, Renton, and South Seattle, where crawl spaces and foundations were never designed for this kind of water pressure.
What RENOVA Contractors LLC Can Actually Help With
We’re not here to scare anyone. We’re here to help where it makes sense.
Once it’s safe to start recovery work, we can help with:
- Flood damage restoration for homes and small businesses
- Basement water cleanup
- Crawl space drying, cleanup, and sanitation
- Removal of damaged drywall, insulation, flooring, and trim
- Structural repairs where water compromised framing or subfloors
- Mold prevention and remediation planning
- Clear, usable repair estimates for insurance
And just as important – we’ll tell you when something does not need to be replaced. Not everything soaked automatically becomes trash. Anyone who says that without checking is guessing or upselling.
Pricing – No Disaster Profiteering
This matters enough to be very clear.
We do not raise prices because of floods. We do not add emergency markups because people are stressed. We do not believe in profiting off someone else’s disaster.
Our pricing is based on:
- Real labor
- Real materials
- Real scope of damage
We explain numbers. We break things down. If something feels expensive, we tell you why. If there’s a cheaper option that still makes sense, we’ll say that too.
If you want to get multiple quotes, do it. You should.
We’re Local – This Is Our Community Too
We’re not a storm-chasing company from out of state. We work here. We live here. We drive the same flooded roads. Our crews and suppliers are dealing with this too.
Seeing evacuations in Tukwila, businesses underwater in Kent, and homes dealing with groundwater in Renton hits close to home. This isn’t abstract for us.
If You Need Help – Reach Out When You’re Ready
If you’re still evacuating or waiting for water to fully drop, focus on that first.
When you’re ready for:
- An honest inspection
- A realistic repair estimate
- Or just someone to explain what actually needs to be done
You can reach out to RENOVA Contractors LLC. No pressure. No obligation. Even if all you need right now is advice.
Floods leave more than damage behind. They leave people exhausted and overwhelmed.
We get that.
Stay safe. Take care of yourself and your people.
And when the water finally backs off, RENOVA Contractors LLC is here.